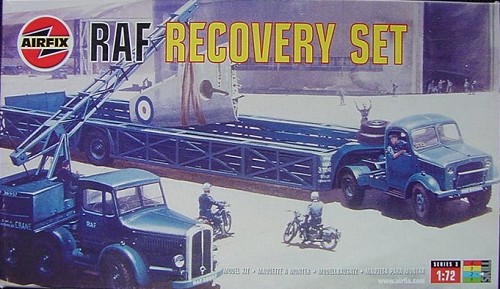
Airfix 1/72 RAF Recovery Set
| KIT #: | 03305 |
| PRICE: | $9.98 MSRP |
| DECALS: | one option |
| REVIEWER: | Greg Ewald |
| NOTES: | beware of fit problems, use slow set glue! |
| HISTORY |
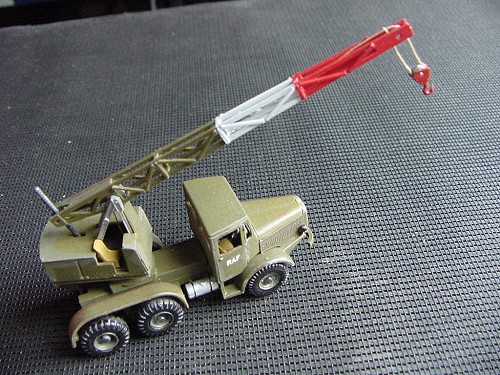 The pair of
vehicles in this kit are well known, the Thorneycroft Amazon and the
Bedford tractor. On top of the flatbed of the Amazon is the Coles crane,
and the Bedford pulls a 40 foot trailer capable of holding three tons of
material. The pair made a good team, being able to assemble and
disassemble fighter components in quick order, and transport anything that
needed to be moved quickly. Units such as this were used by the Allies
during and after World War Two to access unknown German technology,
stripping the aircraft down for shipment on aircraft carriers, or making
them serviceable for a fast flight back to Britain.
The pair of
vehicles in this kit are well known, the Thorneycroft Amazon and the
Bedford tractor. On top of the flatbed of the Amazon is the Coles crane,
and the Bedford pulls a 40 foot trailer capable of holding three tons of
material. The pair made a good team, being able to assemble and
disassemble fighter components in quick order, and transport anything that
needed to be moved quickly. Units such as this were used by the Allies
during and after World War Two to access unknown German technology,
stripping the aircraft down for shipment on aircraft carriers, or making
them serviceable for a fast flight back to Britain.
One of the best known groups of engineers and flight profilers were “Watson’s Whizzers” (or wizards, depending on your source)…a conglomeration of scientists, pilots, and designers whose task it was to figure out the strange planes brought into reality by the Luftwaffe, and make the tech advances available to the British and American air forces. In an operation called “Lusty”, hundreds of these men scoured the airbases and countryside of occupied Europe searching for bits and pieces of the German war machine that could be rendered usable by the Allies.
| THE KIT |
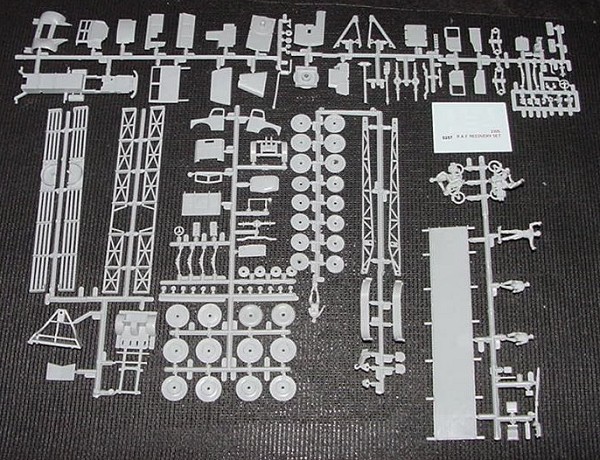
 This kit is a
typical Airfix offering, molded in a light grey styrene, and composed of
146 pieces, including drivers and three mp’s (two on motorcycles), the
sprues are very clean of flash, and only a few sink holes mar the
moldings. For some odd reason, the wheels are made in two halves, which
in 1/72 scale translates to quite a lot of work to put them all together,
and keep them arranged (they are all different). Considering the level of
detail here, it seems like “make work”.
This kit is a
typical Airfix offering, molded in a light grey styrene, and composed of
146 pieces, including drivers and three mp’s (two on motorcycles), the
sprues are very clean of flash, and only a few sink holes mar the
moldings. For some odd reason, the wheels are made in two halves, which
in 1/72 scale translates to quite a lot of work to put them all together,
and keep them arranged (they are all different). Considering the level of
detail here, it seems like “make work”.
There are a few small pieces, but nothing out of the ordinary, and the decals are well printed on a very small sheet, as there aren’t many!
| CONSTRUCTION |
The
instructions are of the “exploded” type, per segment…be sure to test fit
everything prior to gluing up the bits. One problem I ran into was trying
to keep everything level and straight while the glue dried, there are very
few locator areas and pins, and the individual pieces must all fit together
at the end… I think it might be a good idea to “spot” glue pieces into
place
 until they are fitting well, and then use a microapplicator to weld
them in using c/a. Some of the cab components can be frustrating…and do
not to glue on the roof permanently if you want to put in the driver
figures!
until they are fitting well, and then use a microapplicator to weld
them in using c/a. Some of the cab components can be frustrating…and do
not to glue on the roof permanently if you want to put in the driver
figures!
 Be sure to
assemble the Bedford first, because it is going to prepare you for the
Thorneycroft/Crane kit…this one needs patience! I found that prepainting
was mandatory here, and a steady hand is a must…I set out the starboard
side of the crane, with the pulleys in place, then laid in the cord (I used
carpet thread, none is supplied with the kit) over the fittings as
recommended… Do not glue the wrap of the thread to the forward pulley
(#127) until you have determined the angle at which your crane is to be
displayed…this assembly takes a bit of trying, but wait, there’s more!
Be sure to
assemble the Bedford first, because it is going to prepare you for the
Thorneycroft/Crane kit…this one needs patience! I found that prepainting
was mandatory here, and a steady hand is a must…I set out the starboard
side of the crane, with the pulleys in place, then laid in the cord (I used
carpet thread, none is supplied with the kit) over the fittings as
recommended… Do not glue the wrap of the thread to the forward pulley
(#127) until you have determined the angle at which your crane is to be
displayed…this assembly takes a bit of trying, but wait, there’s more!
Steps 10-12 are somewhat complex, in step10,you assemble the boom…steps 11 and 12 need to be done almost simultaneously. Carefully fit the rear boom slave (134) through the deck plate, then cement to the floor (141) and let dry. (see pic) Then you can add on the sides, front, and rear of the crane.
The crane then sits on top of the bed, and viola! you have a RAF set of vehicles!
| COLORS & MARKINGS |
 While the
instructions call for standard Blue Grey overall, I chose Olive Drab
instead…I was lucky enough to talk to some of the old salts (one of them
being my father) who served in World War Two, and was told that literally
everything that could be painted O.D., was painted O.D. ! Since this kit
was for use in a diorama that was supposed to be taking place in Europe,
not Britain, I opted for the Testor’s Model Master O.D as an base colour
scheme. Weathering was done using dry brush with light gull gray and some
washes of black.
While the
instructions call for standard Blue Grey overall, I chose Olive Drab
instead…I was lucky enough to talk to some of the old salts (one of them
being my father) who served in World War Two, and was told that literally
everything that could be painted O.D., was painted O.D. ! Since this kit
was for use in a diorama that was supposed to be taking place in Europe,
not Britain, I opted for the Testor’s Model Master O.D as an base colour
scheme. Weathering was done using dry brush with light gull gray and some
washes of black.
The bed of the trailer was wood, and the kit even has graining detailed into the planks. Using the same method perfected after reading Len Roberto’s review of the Constitution, I weathered the decking to resemble worn wood that had been stained olive drab. Be sure to paint and weather this kit as you go, there are many multi-layered assemblies, and if you wait until the end, you will miss a lot of spots!
The decals are well printed, what there are of them…a few ID markers in white, and one license plate. They all went on easily without having to use any setting agents. The kits were then oversprayed with a clear satin/flat mix, and buffed using a “extra fine” 3M pad to scuff up the finish a bit. (these pads are available in the sanding paper aisle of any hardware store)
| CONCLUSIONS |
 If you are looking
for a way to spice up a small diorama, as I was, this kit certainly fits
the bill, though you are going to want to add on separate figures to make
it believable, as the chances of three people standing around in exactly
the same pose is somewhat unlikely! Airfix has a whole family of these
support vehicles in the 1/72 scale region, and they add on a new dimension
to the basic “plane on stand” look.
If you are looking
for a way to spice up a small diorama, as I was, this kit certainly fits
the bill, though you are going to want to add on separate figures to make
it believable, as the chances of three people standing around in exactly
the same pose is somewhat unlikely! Airfix has a whole family of these
support vehicles in the 1/72 scale region, and they add on a new dimension
to the basic “plane on stand” look.
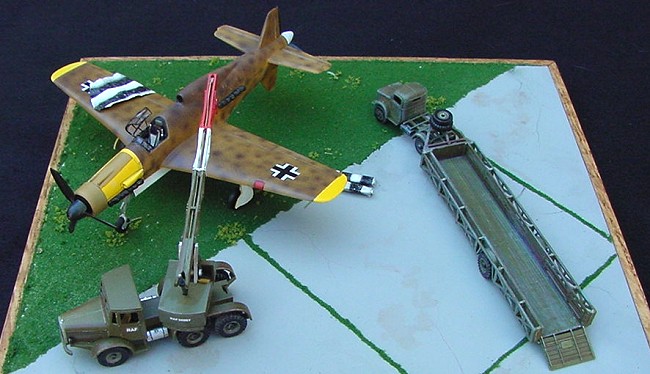
The Diorama: Buying kits over the net can be dangerous…the “deal” is usually priced that way for a reason, in my case, the 1/72nd Dornier Arrow that was missing parts…since the kit is out of production, I was faced with relegating it to the spare parts box or trying to make something out of it…
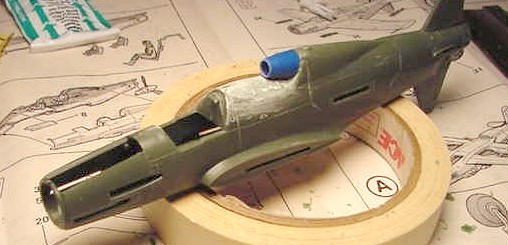 Using the end
of a ball point pen cap, I fashioned a new intake for the dorsus, and
removed the ventral air scoop…making this a “tropical” version of the 335.
(yes, fictional, but it makes sense…this version would have been able to
carry a drop tank and avoid ground/sand clutter)
Using the end
of a ball point pen cap, I fashioned a new intake for the dorsus, and
removed the ventral air scoop…making this a “tropical” version of the 335.
(yes, fictional, but it makes sense…this version would have been able to
carry a drop tank and avoid ground/sand clutter)
Quite a lot of filler and sanding later…I have a mottled production model of the D-335G, being investigated by a group of Operation Lusty scientists…the tarpaulins with the invasion stripes is also invented, but may have been used in order to keep trigger happy Tempest pilots from blowing up potential finds…!
Scratch building the cockpit was fun, actually, and I was able to make a rather convincing 1/72nd scale ejection seat out of sheet styrene…the 335 was one of the first planes to have such a feature!
I know, on a realism scale, this rates a neg-1, but it is interesting to look at , and I certainly learned a lot about the technology of the Luftwaffe while doing the research for the project, give some of these sites a whirl:
| REFERENCES |
http://www.wpafb.af.mil/museum/history/wwii/lusty.htm
http://www.skylighters.org/dornier/
http://www.airforcehistory.hq.af.mil/PopTopics/airtechintel.htm
http://homepages.win.co.nz/bphprint/frames12.html
January 2005
If you would like your product reviewed fairly and fairly quickly, please contact the editor or see other details in the Note to Contributors.