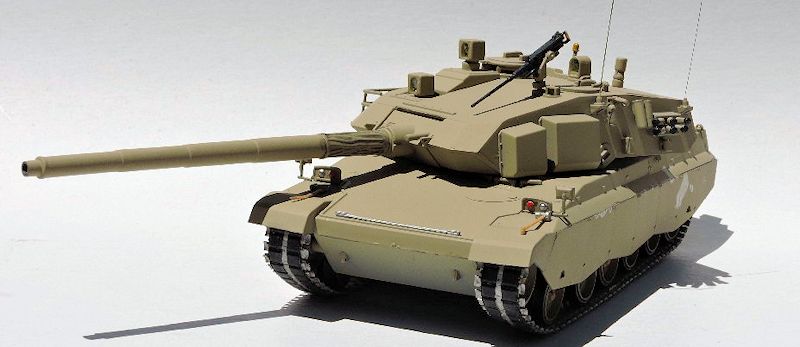
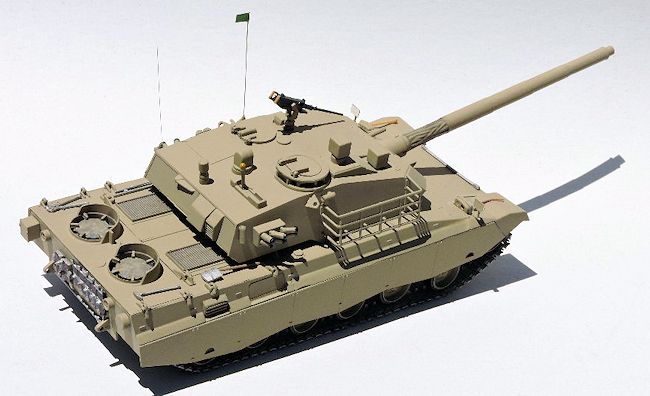
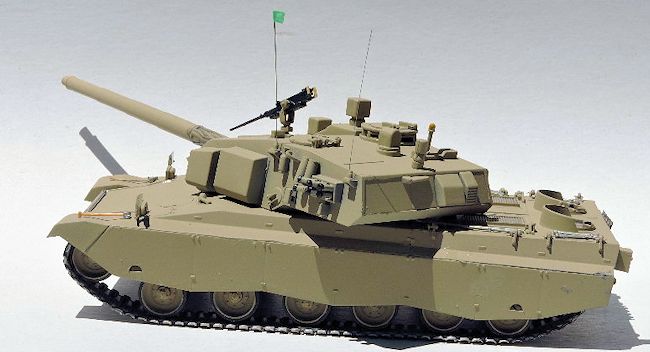
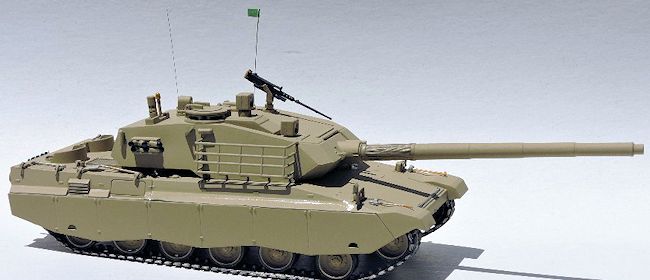
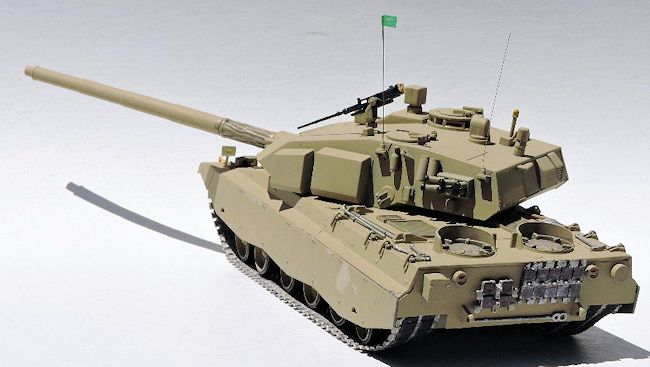
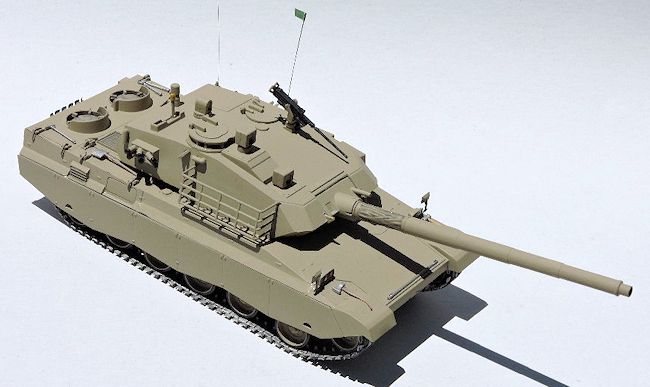
Trumpeter 1/35 EE-T2 Osório
| KIT #: | 00333 |
| PRICE: | $22.50 |
| DECALS: | Yes |
| REVIEWER: | Robert Myers |
| NOTES: | Bought on the 'used kit' market |
| HISTORY |
 The
Engesa EE-T1/T2s were Brazilian main battle tank prototypes started in 1982.
They were developed as a privately funded venture by Engesa, with little
government support; intended to be sold first to Arab and other Third World
countries, jump-starting production; thus enabling the Brazilian Army to
later place its own orders without having to fund development costs.
However, the Osório tank was never put into production.
The
Engesa EE-T1/T2s were Brazilian main battle tank prototypes started in 1982.
They were developed as a privately funded venture by Engesa, with little
government support; intended to be sold first to Arab and other Third World
countries, jump-starting production; thus enabling the Brazilian Army to
later place its own orders without having to fund development costs.
However, the Osório tank was never put into production.
The EE-T1 was considered for service with the Saudi Arabian Army. It was evaluated against the French AMX 40, the American M1 Abrams, and the British Challenger 1 and emerged as the winner, but Saudi Arabia opted for the M1 Abrams instead. The two unique prototypes were given to the Brazilian Army as a result of Engesa going bankrupt.
| THE KIT |
 This kit
is similar to in quality and molding to early Tamiya kits.
The parts are large and easy to handle. The sprues are molded in a
light tan with average size attachment points to the parts. They are easy to
clip and remove from the sprue.
This kit
is similar to in quality and molding to early Tamiya kits.
The parts are large and easy to handle. The sprues are molded in a
light tan with average size attachment points to the parts. They are easy to
clip and remove from the sprue.
A nice set of pioneer tools, clear covers for the vision blocks and good external machine gun are included. The tracks are the rubber band type and look accurate for the prototype shown to Saudi Arabia for trials. Decals consist of a set of white numbers.
| CONSTRUCTION |
This
model was built to represent the EE-T1 prototype used for evaluation by
Saudi Arabia. As usual, I started with the suspension. I inserted the
suspension arm assemblies onto the hull using Tamiya super thin cement just
touched to the join. I did one side at a time, aligned the arms and let the
glue dry before moving on to the other side. While the suspension glue dried
I assembled the road wheels and drive
 sprockets per the instructions and set
them aside for painting. The side shirts were clipped from the sprue and set
aside with the wheels.
sprockets per the instructions and set
them aside for painting. The side shirts were clipped from the sprue and set
aside with the wheels.
I was
curious about the track rubber. I wasn't sure the paint would stick to it;
just to be safe I gave both tracks a coat of Krylon flat black primer and
let it dry overnight. The steel parts of the track were brush painted Model
Master (MM) steel and they are finished. Priming them seemed to work fine;
there has been no paint flaking.
Back to
the hull. With the suspension dry I glued the upper and loser hulls
together. They mate up fine with a seam at the front. I looks like there is
supposed to be a seam there on the real tank, so I just used a little extra
MM liquid glue and let it ooze out to tone down the seam effect. The
headlights just don't look right to me. I don't think the placement that the
instructions show is correct for all of the prototypes or changes made to
them over the course of testing. I found most pictures showing them on the
front of the hull just to the inside of each fender. I decided to follow the
instructions since this is a prototype and
 he head light position could
have been changed on the real one. The pioneer tools were separate, so I
just clipped them from the sprue and set them aside for painting later.
he head light position could
have been changed on the real one. The pioneer tools were separate, so I
just clipped them from the sprue and set them aside for painting later.
As
usual, the turret is my last major subassembly. It was pretty simple, even
compared to an early Tamiya kit. The lower/upper turret join is under the
edge of the upper turret. It does leave a slightly visible gap at the front.
The gun tube (barrel) was glued together with a small seam showing. Just a
light sanding of the seam made it disappear. At the same time I gave the
front of the hull a light sanding across the glue that had oozed out of the
join, to reduce, but not eliminate the seam line. All of the rest of the
turret parts were glued on with
the hatches glued shut.
| COLORS & MARKINGS |
 At this
point everything (except tracks and machine gun) including all of the parts
left on the sprue was sprayed with MM 2910 sand beige. It looks close to
what I think the prototype being demonstrated to Saudi Arabia may have
looked like. The kit paint color call out is for Mr color Gunze sandy brown.
No decals were used.
At this
point everything (except tracks and machine gun) including all of the parts
left on the sprue was sprayed with MM 2910 sand beige. It looks close to
what I think the prototype being demonstrated to Saudi Arabia may have
looked like. The kit paint color call out is for Mr color Gunze sandy brown.
No decals were used.
While
the spray paint dried, I brush painted the machine gun MM Gunmetal with MM
Wood Handles and a flat black tip on the barrel. I also stretched some sprue
for the radio antenna. A quick search on the web brought up a good image of
the Saudi flag. I printed it and glued it to the tip of the antenna. The
road wheels were brush painted flat black to simulate the rubber parts and
the pioneer tools were brush painted MM steel and wood as appropriate.
| FINAL BITS |
Final
assembly was a breeze. I glued the track ends together with super glue gel
and clamped them for about 10 minutes. After I removed the clamps I stapled
the joins together just for insurance. The track and road wheels were set
into place and glued with super glue. The fit was pretty tight, so it took a
bit of fitting and aligning to get everything together. After a break and
can of Dew, I glued the side skirts and pioneer tools on. The pioneer tools
are nicely molded, but don't have much detail to show how they are held to
the hull. For the review I left them this way to show you. Before it goes
back on the shelf, I am going to paint some Bare M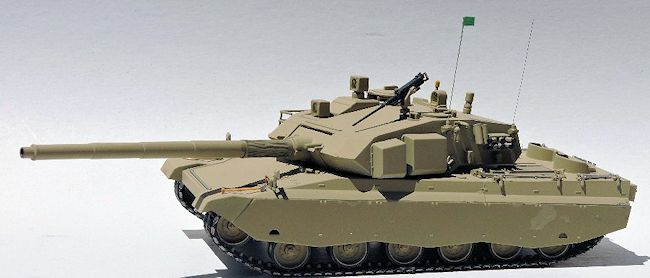 etal Foil with the sand
beige and use thin strips for hold down straps.
I painted the spare track steel with flat black pads and glued it to
the rear of the tank. The machine gun and antenna were glued to the turret.
etal Foil with the sand
beige and use thin strips for hold down straps.
I painted the spare track steel with flat black pads and glued it to
the rear of the tank. The machine gun and antenna were glued to the turret.
For the last
details, I gave the barrel sleeve, engine cover grates and fan grates a wash of
flat black. The tail lights were painted with MM stop light red metallic. Back
to the headlights: I don't like them, but they were painted silver and red, per
a close-up image I found on line. As I said earlier, I didn't use the clear
acetate for the vision blocks. I filled them with a couple of layers of Testors
Clear Cement; each added after the first or second layer had dried. I like the
effect much better. Each rear view mirror got some Bare Metal Foil for the
reflective surface.
| CONCLUSIONS |
This Osório
was an easy build, reminiscent of an early Tamiya kit. It just needed a bit of
sanding to build a nice replica of an obscure tank. If you have to have one for
your collection; go for it. A young builder could do just fine with it. As a
general note in machine gun placement for tanks. Be sure you place the machine
guns so that the hatch under them can be opened. I had never really paid
attention, until a friend mentioned it.
Robert Myers
July 2015
If you would like your product reviewed fairly and fairly quickly, please contact the editor or see other details in the Note to Contributors.