Roden 1/72 SdKfz 231 (8-rad)
|
KIT # |
702 |
|
PRICE: |
$8.98 ($7.96 at Squadron) |
|
DECALS: |
three vehicles |
|
REVIEWER: |
|
|
NOTES: |
Neat 'small' subject. Well detailed for scale. |
|
BACKGROUND |
For a brief overview of the history of this vehicle and a look in the box, click here.
|
CONSTRUCTION |
Construction was straightforward in accordance with
the instructions. I started on the complex and highly detailed chassis
assemblies. The black plastic these parts are molded in is quite soft,
with almost a latex quality to it. While complex, the chassis assemblies
presented no real problems in assembly other than the parts are quite
small, so beware of 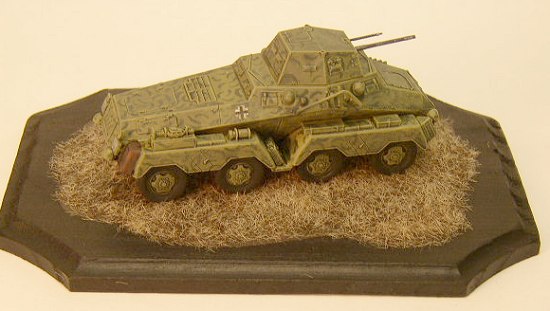 the carpet monster! I chose to leave off the mounting
brackets (i.e. where the leaf springs attach) on both the body of the kit
and the chassis running gear to ease painting and alignment of the wheels.
Assembling this way allows you to get all eight wheels to touch the surface
more easily.
the carpet monster! I chose to leave off the mounting
brackets (i.e. where the leaf springs attach) on both the body of the kit
and the chassis running gear to ease painting and alignment of the wheels.
Assembling this way allows you to get all eight wheels to touch the surface
more easily.
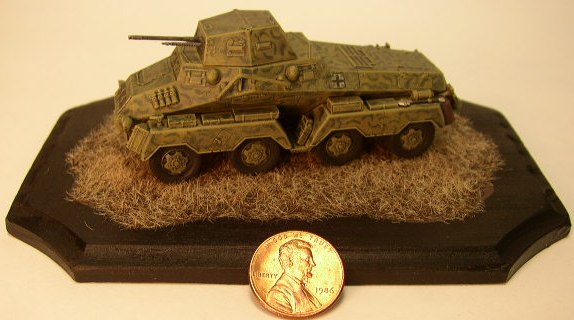
Next was the main body. The body halves matched up nicely with only a little sanding at the joints. I then glued the fenders to the body. Be careful here! It is easy to confuse which fenders go on which side, and in my haste, I accidentally glued them on backwards! I really did not feel like tearing them off, so I lived with it. The only indicator is that the small 45-degree angled hatches should slant forwards, not back. I heeded Scott’s previous advice to not glue on all the toolboxes, etc. to the fenders until after they had been attached to the body. I attached all of the small parts even though I knew this would make it difficult to access some areas during painting. I had a small bit of trouble with the turret. The underside part did not fit perfectly, which resulted in a small gap between the bottom of the turret and the body. I sanded this down as much as I could, but the result is OK.
|
CAMOUFLAGE & MARKINGS |
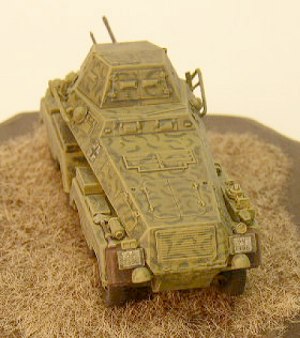 All paints were Model Master Acrylics. Don’t ask me
why, but I decided to completely hand-paint this kit. I used Panzer
Dunklegelb for the base color (2 coats) and hand painted the crescents with
RLM 80 Olivegrun. I had no documentation that this pattern was ever used
on an 8-rad, but since it was used on a well-documented Marder III, I felt
it certainly could have been used on a recon armoured car.
All paints were Model Master Acrylics. Don’t ask me
why, but I decided to completely hand-paint this kit. I used Panzer
Dunklegelb for the base color (2 coats) and hand painted the crescents with
RLM 80 Olivegrun. I had no documentation that this pattern was ever used
on an 8-rad, but since it was used on a well-documented Marder III, I felt
it certainly could have been used on a recon armoured car.
After the base colors were dry, I applied the two national insignias over a brush-applied dab of glosscoat. The set down with no problem, but this was a very flat surface, so I cannot comment how they would do over raised surface detail. After the decals were dry, I liberally applied Black Magic Detailing Liquid (black wash) over the sub-assemblies. This added depth to recessed detail, and highlighted raised details. I dry brushed the entire model with more Dunklegelb to bring out highlights and raised detail. I then attached the chassis assemblies, sprayed dullcoat and the kit was complete!
|
DISPLAY BASE |
 Wood
base: $1.00 at craft
store.
Wood
base: $1.00 at craft
store.
Black (edges) and brown (under grass) paint: Free!
Verlinden Static Grass: Free!
Elmers Glue (thinned with water): Free!
A nice, easy display for a neat kit: Priceless!
|
CONCLUSIONS |
Highly recommended for those looking for a change of pace (I certainly needed it!). If you are not afraid of very small parts, go for it!
|
REFERENCES |
Encyclopedia Of German Tanks Of World War Two: The Complete Illustrated Dictionary of German Battle Tanks,Armoured Cars, Self-Propelled Guns and Semi-Track, by Peter Chamberlain and Hilary Doyle
June 2003
Copyright ModelingMadness.com If you would like your product reviewed fairly and fairly quickly, please contact the editor or see other details in the Note to
Contributors.