| KIT: | Coney Collect lighter - Zero version |
| KIT #: | 0 |
| PRICE: | $ |
| DECALS: | Spares box |
| REVIEWER: | Frank Spahr |
| NOTES: | Hot stuff |
| HISTORY |
A fiery experience – having fun with Coney Collect´s airplane lighter
Historical background
 One of the oftentimes
overlooked chapters of the pacific campaign is Japan´s attempt at
intercepting U.S. bombers with near-suicidal incendiary planes. Inspired by
the german „Schraege Musik“ oblique upward-firing cannon, the japanese
experimented with flamethrowers that should be deployed from immediately
underneath the bomber´s belly. A special attack squadron was formed on
Okinawa in 1944 and equipped with the Sukiyaki 1A4 „Tokai“, a design
assembled from otherwise unneeded aircraft components. The unique look and
bizarre tactics were soon observed by american aircrews and the new threat
aptly nicknamed the „Flying Zippos“. Needless to say that no american
bomber was shot down; those Tokais that made it into close range were lost
to a man when firing their primary weapon - which was inexplicably mounted
in front of the canopy - by self-incineration. The resulting fireballs were
spectacular, not least because all guns had been removed to find room for
more tanks for the incendiary fluid. A little known fact is that instead of
the wing guns, blue formation lights were mounted to improve attack
coordination.
One of the oftentimes
overlooked chapters of the pacific campaign is Japan´s attempt at
intercepting U.S. bombers with near-suicidal incendiary planes. Inspired by
the german „Schraege Musik“ oblique upward-firing cannon, the japanese
experimented with flamethrowers that should be deployed from immediately
underneath the bomber´s belly. A special attack squadron was formed on
Okinawa in 1944 and equipped with the Sukiyaki 1A4 „Tokai“, a design
assembled from otherwise unneeded aircraft components. The unique look and
bizarre tactics were soon observed by american aircrews and the new threat
aptly nicknamed the „Flying Zippos“. Needless to say that no american
bomber was shot down; those Tokais that made it into close range were lost
to a man when firing their primary weapon - which was inexplicably mounted
in front of the canopy - by self-incineration. The resulting fireballs were
spectacular, not least because all guns had been removed to find room for
more tanks for the incendiary fluid. A little known fact is that instead of
the wing guns, blue formation lights were mounted to improve attack
coordination.
As an aside: Although the Luftwaffe had the He 177 which was dubbed the „Luftwaffenfeuerzeug“ (airforce lighter) by its unnerved crews on account of its frequent engine fires, they used no similar service unit as mentioned above, relying on more conventional aircraft as the Ba 349.
| THE KIT |
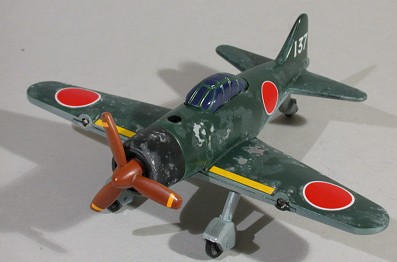
 Coney Collect´s
multimedia kit of styrene, cast metal, poly parts and working flame
thrower / formation lights comes in a sturdy display box, is pre-assembled
and pre-painted. The unique lines of this less than graceful aircraft are
captured well, even though very little photographic evidence remains to
compare to. Most american shots are over-exposed due to the glare of the
flame-thrower, and the entire japanese technical documentation was burned
in a taxiing accident.
Coney Collect´s
multimedia kit of styrene, cast metal, poly parts and working flame
thrower / formation lights comes in a sturdy display box, is pre-assembled
and pre-painted. The unique lines of this less than graceful aircraft are
captured well, even though very little photographic evidence remains to
compare to. Most american shots are over-exposed due to the glare of the
flame-thrower, and the entire japanese technical documentation was burned
in a taxiing accident.
A nice touch is the sturdy landing gear which is actually fastened with screws, this will make handling much easier. What panel lines there are are deeply recessed but surprisingly technically accurate and necessary ;-)
| CONSTRUCTION |
No real contruction took place in this case, except a partial dis- and reassembly. Some gaping seams on the stabilizers were glued with CA to improve the looks a bit. Apart from that, nothing was changed in the configuration. I could very speedily proceed to the paintshop as intended from the outset.
| COLORS & MARKINGS |
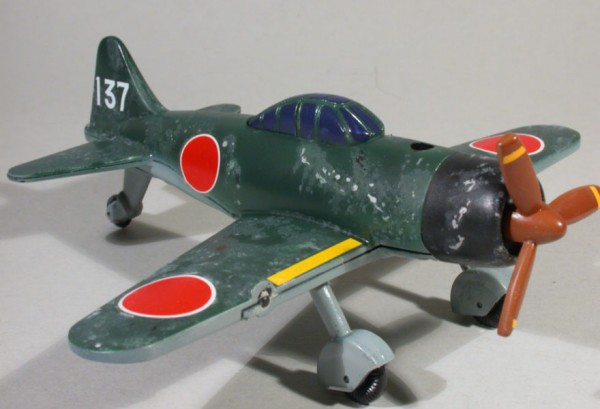
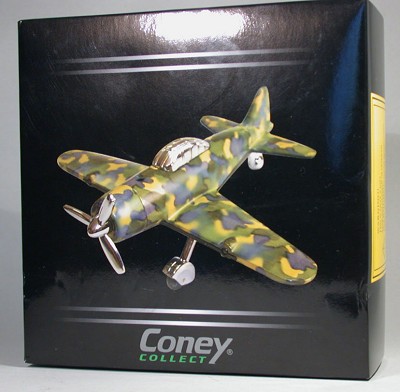 The scheme supplied
with the kit was a low-contrast mottling which is not correct for a service
airframe, but only for the preliminary static testbeds (which worked
reasonably well, BTW). I coated the model with Model Master aluminum
metalizer and used Model master IJN green and grey over it. The extreme
weathering and partial scorching from test runs of the weapon was achieved
with salt slush, my first attempt at this technique. I´ll probably work
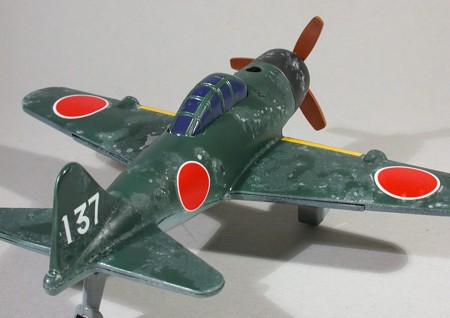
with a drier slush next time. The prop was painted Model master Siena. The
canopy was painted deep blue where the panes would be. I pieced the marking
together from my spares box, using the personal mount of Lt. Ken Seoinage
(#137). Before and after decalling, Future was used liberally. A final flat
coat completed the kit. No fiddly bits whatsoever were used or harmed in
making this model.
The scheme supplied
with the kit was a low-contrast mottling which is not correct for a service
airframe, but only for the preliminary static testbeds (which worked
reasonably well, BTW). I coated the model with Model Master aluminum
metalizer and used Model master IJN green and grey over it. The extreme
weathering and partial scorching from test runs of the weapon was achieved
with salt slush, my first attempt at this technique. I´ll probably work
with a drier slush next time. The prop was painted Model master Siena. The
canopy was painted deep blue where the panes would be. I pieced the marking
together from my spares box, using the personal mount of Lt. Ken Seoinage
(#137). Before and after decalling, Future was used liberally. A final flat
coat completed the kit. No fiddly bits whatsoever were used or harmed in
making this model.
| CONCLUSIONS |
A friend of mine gave me (a near non-smoker) this lighter in the shape of a single radial engine prop for my birthday with the appropriate big grin. Never shunning an excuse to drop out of „serious“ modeling, I repainted it and had fun – hope you too!
November 2004
If you would like your product reviewed fairly and quickly by a site that has over 250,000 visitors a month, please contact me or see other details in the Note to Contributors.