Trumpeter 1/700 USS Ticonderoga
CV-14
| KIT #: | 05736 |
| PRICE: | $29.99 MSRP |
| DECALS: | Deck lines, numbers and insignia for air wing. |
| REVIEWER: | Dale Rannals |
| NOTES: | Comes with a nice vac sea surface for waterline display option. |
| HISTORY & THE KIT |
I can do no better than to refer you to Scott’s fantastic preview of this kit.
| CONSTRUCTION |
If you ask me, 523 pieces for $30 is a
pretty good deal. Upon
opening the box and seeing all those 500+ pieces my first thought was,
“whoa…those are some tiny bits.”
This was going to be interesting.
See, I build mostly 1/48 aircraft…..kits with parts you can
actually see. So all those
individual cannon/machine gun mounts was somewhat intimidating.
I have built 1/700 ships when I was a young…errr, younger lad,
but, as that has been more t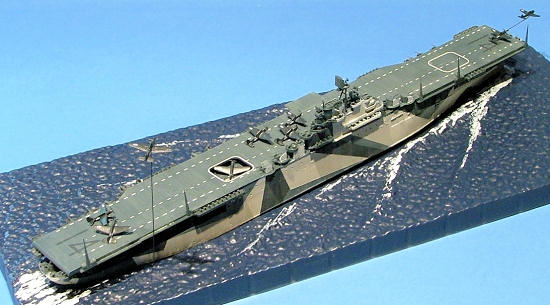 han
a few months back this was pretty new to me.
han
a few months back this was pretty new to me.
Right out I wasn’t sure how I was going
to handle the camo scheme.
I figure I could paint while assembling, but matching up the camo lines
might prove daunting. I
could build it up then try airbrushing, but masking would be nigh
impossible, let alone doing it without breaking all sorts of things off.
So I opted to concentrate on building first, then trying out my
brush painting skills later.
At least that was plan “A”.
Assembly begins at the very last step
of the instructions. Odd,
aye? See, Trumpeter would
have you build the entire model, and then at the last step attach the
hull bottom or waterline plate, depending on which option you’re going
with. I can’t imagine doing
things this way……puttying and sanding a hull joint last?
Right. I was going
with the waterline, so this plate was duly glued on the hull.
Back to the beginning of the
instructions, the hanger deck is built up.
The instructions are a little vague on the placement of some of
the bulkheads, but I managed not to screw up much.
I left about half of the hanger doors open, but since I wasn’t
going to detail inside, I painted the whole hanger deck a very dark
gray.
 A
few of the weapon tubs and sponsons where added next.
At this point I decided to start crossing off things in the
instructions that I had completed.
Some of the steps contain many subassemblies so for me this saved
some confusion. And pay
attention to the part numbers you need.
The sprues are for all the
A
few of the weapon tubs and sponsons where added next.
At this point I decided to start crossing off things in the
instructions that I had completed.
Some of the steps contain many subassemblies so for me this saved
some confusion. And pay
attention to the part numbers you need.
The sprues are for all the
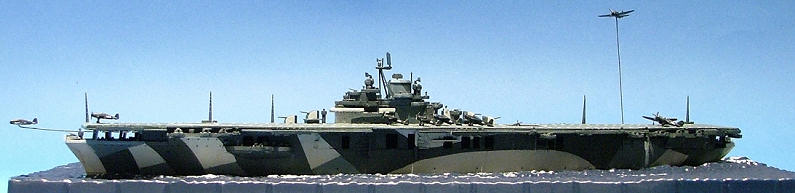
The next stage has you assembling many of the 20mm gun mounts, and there are a lot of them. These very tiny parts gave me fits at first, but soon I was “in the zone” with them and things went smoother. Still didn’t enjoy it much, but I took my time and only worked on one or two tubs (of six or seven cannons) at a time while working on the superstructure area. Quite surprisingly, very few of these small bits went flying out of my tweezers, and I recovered most of these. With the cannons and superstructure attached it was a complete quite dignified looking ship, but now I had to figure out that camo.
| COLORS & MARKINGS |
Trumpeter includes a nice color profile sheet in the kits, with
color callouts in Gunze Sangyo paints.
Since I don’t use these, I had to find some cross references.
The colors I came up with where Light Gray 36495, Intermediate
Blue 35164, and for both the deck and hull blues,
 The first part was easy.
I sprayed the entire ship with
The first part was easy.
I sprayed the entire ship with
Plan “B” went back to the airbrush.
Luckily, as this is a carrier, I had mostly the hull to worry
about, as there just isn’t that much superstructure.
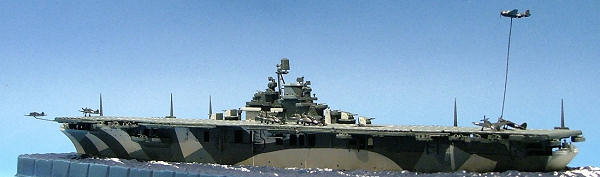
I carefully masked the areas to be painted, first Intermediate
Blue and the light gray.
Amazingly I only broke off two 40mm gun barrels with all the handling
and taping. That and the
top of the mast.
But it turned out okay.
The superstructure I brush painted…..I don’t want to talk about
it.
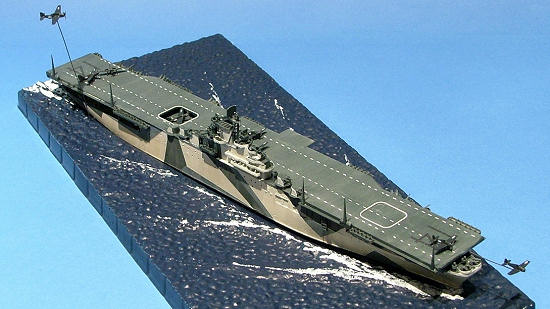
The deck number and line decals where then applied and these went on very well. There are a bunch of the deck line decals, each an inch to two inches long. Getting these to form a straight line along a flight deck about 15 inches long is a challenge in itself. After these dried a light yellow oil wash was splotched on the deck, in sections. I then took a wide flat brush damp in turpenoid and drew across the flight deck to give it a more “beat up” look and to lighten it from the hull color. I dotted the hull with tiny spots of oil paints, ranging in colors from grays to reds. Again, with a brush just damp in turpenoid, I brushed down along the hull, giving it a slight streaky look and to vary the hue of the paint.
| FINAL CONSTRUCTION |
Final construction consisted of the air wing.
And boo on Trumpeter for doing the aircraft in clear plastic.
I see no benefit in this, as canopies are just as realistic
painted black in this scale.
But here you get to work with the very little bits of brittle
clear plastic. Little tiny
landing gear were attached, then the planes where painted 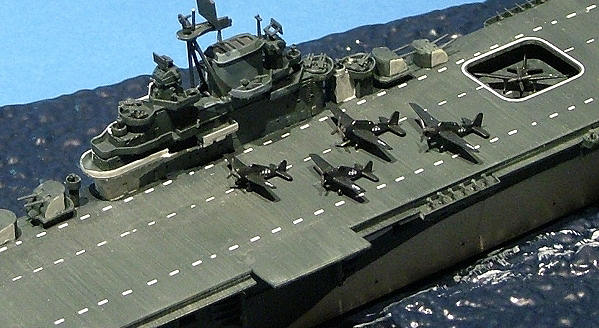 ng
and fuselage decals were applied.
While working on these planes, my son suggested I should have
some taking off or flying overhead.
I thought this was a very cool idea.
I found the finest wire I had around and attached to two of the
planes and placed them in flight.
The wire still looks pretty thick at this scale, so I am
searching for something finer still, but this at least gets the idea
across.
ng
and fuselage decals were applied.
While working on these planes, my son suggested I should have
some taking off or flying overhead.
I thought this was a very cool idea.
I found the finest wire I had around and attached to two of the
planes and placed them in flight.
The wire still looks pretty thick at this scale, so I am
searching for something finer still, but this at least gets the idea
across.
The kit also comes with a blue tinted vac sea surface for the
waterline display option. I
painted this
| CONCLUSIONS |
Funny, the oldest kits I have still
around are four battleships I built in the “beforetime”.
The oldest, a Testors 1/720 HMS Hood, I built in 1982 and it has
survived numerous moves in the Navy (and since) with only a broken mast
to show. It is the oddball
in my displa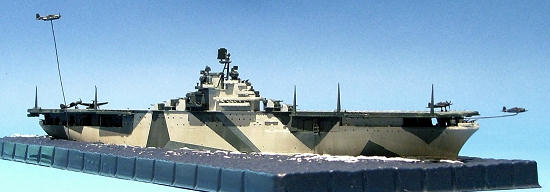 y
case full of aircraft, but still dignified and somehow elegant looking
after all these years. But
for some reason, other than a 1/72 U-boat a few years back, I have not
built a ship since. Since
working on this my interest has grown and I’ve acquired a few other kits
in this scale.
y
case full of aircraft, but still dignified and somehow elegant looking
after all these years. But
for some reason, other than a 1/72 U-boat a few years back, I have not
built a ship since. Since
working on this my interest has grown and I’ve acquired a few other kits
in this scale.
So this was quite different for me and
quite enjoyable, even with all those tiny cannon mounts.
The
Thanks for reading this far!
October 2010
Kit courtesy of Scott Van Aken and Modeling Madness.
If you would like your product reviewed fairly and quickly, please contact me or see other details in the Note to Contributors.