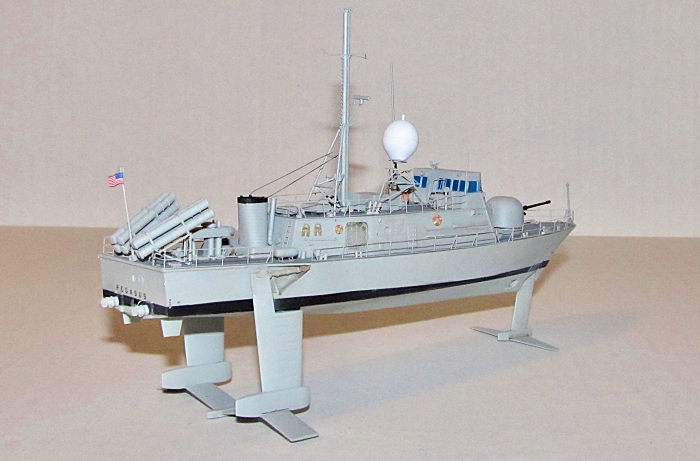
Hobby Boss 1/200 USS Pegasus PHM-1
| KIT #: | 2005 |
| PRICE: | @$60.00 |
| DECALS: | One option |
| REVIEWER: | Dan Lee |
| NOTES: | Includes PE fret |
| HISTORY |
The Pegasus hydrofoil program grew out of a NATO requirement for light attack craft to slow down/defeat USSR/Warsaw Pact forces in various bottleneck areas such as the Med, Baltic and North Atlantic. CNO Elmo Zumwalt felt that the Pegasus hydrofoil design would be part of his High/Low force mix which helped expand the Navy and supposed to enable destroyers and frigates to be pulled from low priority missions to high priority ones like convoy duty. Other NATO navies such as Germany, Italy and Canada were also joined in the program. Originally, the class was called the Delphinus Class but changed it when someone pointed out that the class would be potentially nicknamed Dull-Penis.
Pegasus class hydrofoils were
super fast with a max speed of 48 knots riding the foil. They also carried quite
a large punch for their size. Original armament was four Harpoon missiles in two
dual launchers and
 a 76mm gun. They were later upgraded to carry eight Harpoons
in two quad launchers.
a 76mm gun. They were later upgraded to carry eight Harpoons
in two quad launchers.
The hydrofoils weren't well received in the conventional navy and was soon pushed to the scrap heap once Elmo Zumwalt retired citing “high” development costs. Congress had other ideas and demanded that the program be completed up to the 6th unit which had already been funded. The Navy reluctantly did so while the other NATO countries dropped out of the program in large part because of the lack of funding and non existent US Navy enthusiasm.
The original plan was to base the six hydrofoils in Sicily, but the lack of a tender ship and being at the bottom of the Navy priority queue scrapped those plans so they were based out of Key West instead for their entire service. The hydrofoils spent most of their careers working on fast attack craft tactics in open water and littoral/coastal situations, simulating various WARSAW Pact combatants in exercises and helping the US Coast Guard chasing down drug smugglers as part of the 'War on Drugs.'
In 1993, the US Navy decided to scrap the entire force citing “high” cost of running six hydrofoils despite only being in service for a decade. Some folks assert that it was because the hydrofoil force didn't have a patron saint in the Navy bureaucracy willing to fight for it so they were among the first of many Post Cold War cuts. Five of the six boats were scrapped while the Aires PHM-5 still exists with the intent to turn it into a museum ship. Thus ended the hydrofoil service with the Navy.
| THE KIT |
Hobby Boss' kit comes with four separate parts for the main hull, main deck and upper works, six sprues of parts, one sheet of photo etch including the railings and one decal sheet with markings for the Pegasus only. The surface detail of the plastic parts are very well done and no flash minus mold markings. Some of the parts such as the gun barrel and chaff launchers are done with slide molds for the hollowed out effect.
The instructions are step by step assembly, but is only done for easy of assembly not ease of painting. The small decal sheet is within register and the colors seem correct.
| CONSTRUCTION |
I have built enough ships to know that it is better to ditch the build order of most instruction sheets and start painting first. The deck, main hull and upper works were painted their respective base colors. FYI painting details in the next section.
Various small parts representing
the deck fittings were cut from the sprues and assembled. There are a lot of
small parts to keep track in this kit. I almost wish they made this kit in 1/144
scale as some of the parts at 1/200 were almost too small to handle. I had a
number of tiny parts fly out of my tweezers and I spent a good deal of time on
my hands and knees franticly looking for them. I consider myself quite fortunate
that I  only lost two parts and replaced them with cruder replicas made from
plastic card/rod. I stuck these tiny sub assemblies on some tape and painted
them. I had to keep track of what part of the hull they belonged to.
only lost two parts and replaced them with cruder replicas made from
plastic card/rod. I stuck these tiny sub assemblies on some tape and painted
them. I had to keep track of what part of the hull they belonged to.
The bridge/command deck required a lot of work as it included tiny photo etched shutters and windshield wipers. I didn't think that portion of the model would be that hard, but it was. I first painted it in the base color and then masked off the windows. I sprayed the windows with the window color then added the photo etch. It took a couple of hours to do all seven of them (SEVEN!) as I nearly lost several PE parts when they flew out of my tweezers.
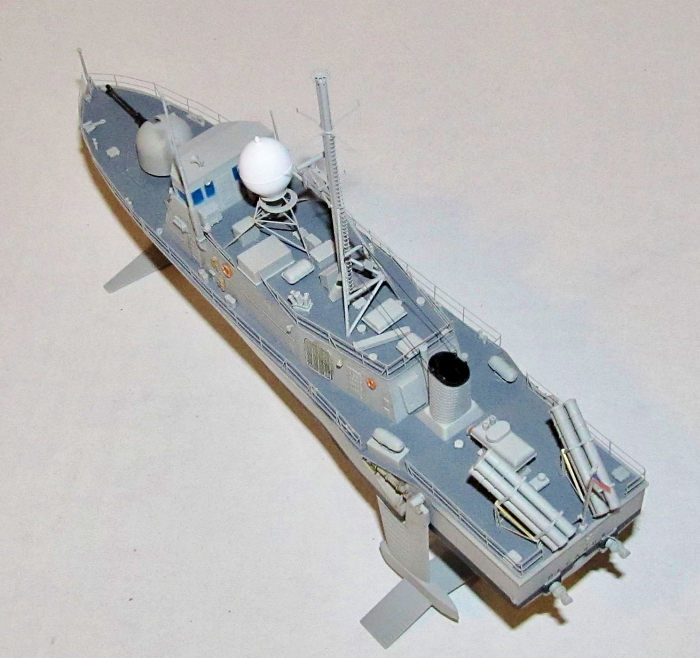
The bridge and deck fittings were nowhere as much of a headache as mounting the radar dome onto its PE frame (used a few drops of CA glue to secure the frame together.) The radar dome ended up not as straight as I wanted it to be and has a noticeable list to one side. I did a much better job with the Quad Harpoon Launchers and 76mm gun. Lastly, the various hull parts were painted and glued together.
| COLORS & MARKINGS |
The Pegasus was painted US Navy Haze Grey. My decade old bottles of Testors Acrylic Maritime Colors dried out and it turned out that Tamiya XF-80 Royal Grey is close enough to represent Haze grey. I sprayed it on the hull and deck fittings. The main deck was a dark grey and I used Tamiya Neutral Grey for the main deck and top deck with the Haze grey sides of the top deck masked off.
I had to paint the prominent flat
black strip on the hull. I masked off the sections using the old fashioned Mark
1 eyeball and I had some old fashioned screw-up's when I misaligned the bow
portside stripe and the starboard stripe. It turned out that I had screwed both
sides up and had to literally meet them in the
 middle. I had an easier time with
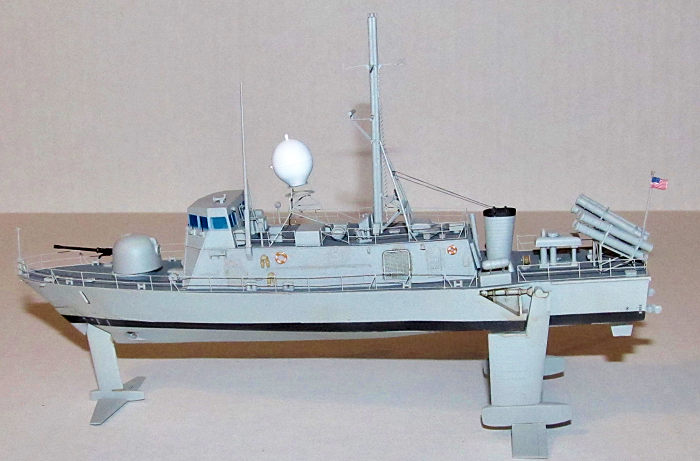
the funnel which had a black stripe around the mouth. Shockingly, I didn't screw
that up.
middle. I had an easier time with
the funnel which had a black stripe around the mouth. Shockingly, I didn't screw
that up.
The various life preservers were hand painted international orange with a flat brush while fine white stripes were painted with a fine tipped 00 brush. Meanwhile the windows were sprayed Vallejo Clear blue. I sprayed a lot of the Photo etched parts XF-80 before they were added to the ship.
I added the decals after the sub assemblies were glued together. I treated it like an armor kit and didn't use a gloss coat. I used a dab of Solvaset to get it to stick to the flat paint without bubbling. Once dry the decal solvent was wiped off with a damp paper towel.
I took a look at various photos of PHM-1 on the internet and noticed that the ship was kept in pretty good shape thus I didn't weather the ship or make it grungy. A couple of misted coats of Tamiya Flat clear were required.
| FINAL CONSTRUCTION |
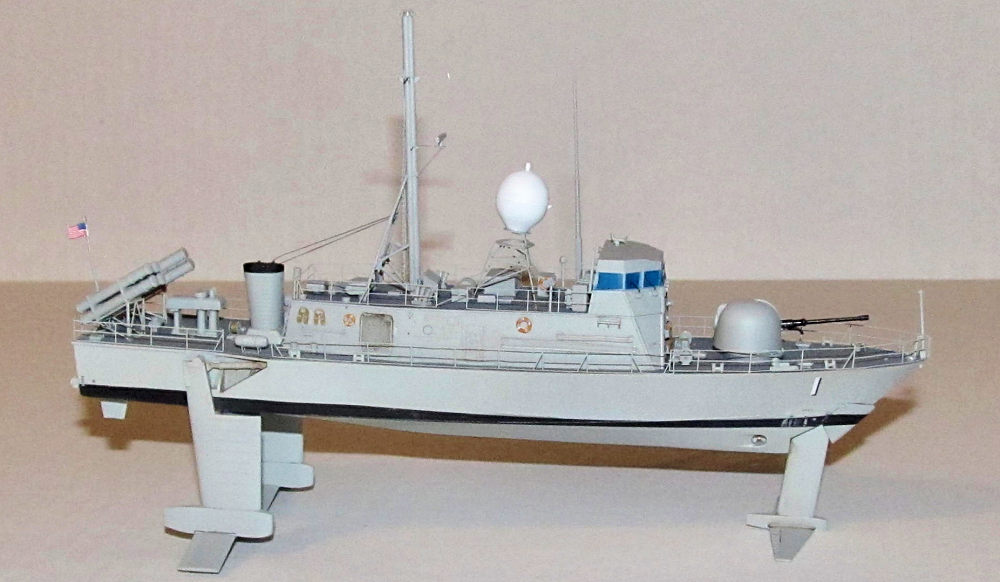
I wanted my hydrofoil in “flying” mode which meant foils down and locked into position. Hobby Boss gives you the option of foils up or down. Quite frankly, the Pegasus class looks quite silly with hydrofoils up so there was no way I was going to build the Pegasus with foils up.
 The various sub assemblies were
glued together. Main hull to main deck. Main deck fittings and railings were
added next. The bridge/control deck was added next. The various upper fittings,
antennas (watch out for the poorly located holes for the surface radar dome) and
the various PE railings for the upper deck were added. FYI, all the PE parts
were secured with CA glue.
The various sub assemblies were
glued together. Main hull to main deck. Main deck fittings and railings were
added next. The bridge/control deck was added next. The various upper fittings,
antennas (watch out for the poorly located holes for the surface radar dome) and
the various PE railings for the upper deck were added. FYI, all the PE parts
were secured with CA glue.
I cut some small stiff wire and glued them to sides of the funnel to act as a mount for the wire rigging. I used Ez Line for the first time and watched some Youtube tutorials in its use. A small drop of CA glue, held it tight for a couple of minutes then stretched it over the section of the mast I wanted to mount it to and I had perfectly done rigging (for once!)
| CONCLUSIONS |
I had always been interested in hydrofoils since I read about them as a kid despite the fact that they are viewed as a maritime technological dead end and threat to marine life (and slower boats) so I didn't hesitate to pick up this kit when it first came out.
At 1/200, the Hobby Boss kit is at a scale big enough to for decent detail but small enough to fit on any shelf. My personal preference would have been for 1/144 scale as it seems to be the “standard” size for naval Fast Attack Craft based on my experience of having almost too tiny parts flying out of my tweezers. 1/72 scale would be okay too, but it would probably have the same cost as a 1/350 battleship kit.
I won't recommend this for beginners, but someone who has more than a couple of ships under their belt and are comfortable with Photo Etch parts would find this a decent build.
4 September 2018
Copyright ModelingMadness.com
If you would like your product reviewed fairly and fairly quickly, please contact the editor or see other details in the Note to Contributors.
Back to the Main Page Back to the Review Index Page Back to the Previews Index Page