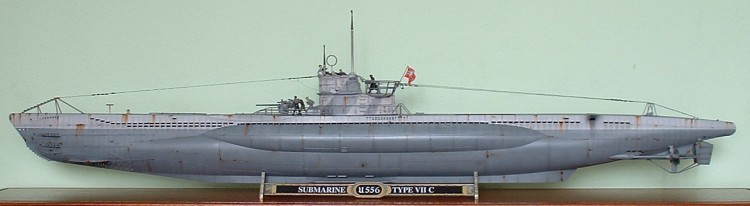
Revell AG 1/72 Type VIIc U-boat
| KIT #: | 5015 |
| PRICE: | $54.00 MSRP (now over $60) |
| DECALS: | Five options |
| REVIEWER: | Ramses Montes |
| NOTES: | Modelbrass, White Ensign PE Sets used. ULAD Decals “Type VIIC Part 3” Used, Andrea Miniatures figure kits used. |
| HISTORY |
Germany
had previous experience with U-Boats since WWI and based on this experience
decided to take full advantage of the U-Boat capabilities. After the end of
WWI Germany w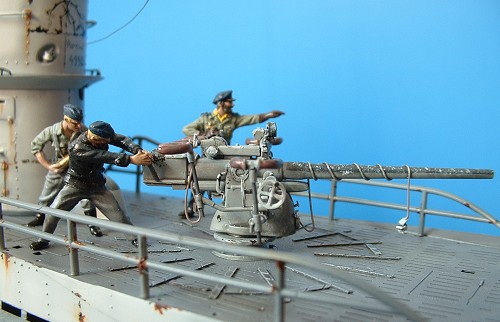 as
penalized and was forced to agree to a treaty that limited their armament
capability I several areas. Unfortunately for the rest of the world such
treaty was not as well drafted as they thought and limited Germany to the
manufacturing of certain vessels, among them U-Boats. However, the treaty
did not say that they could not manufacture parts for U-Boats abroad or
that they could not import such parts or build U-Boats for other nations.
So, they took this to their advantage and manufactured the parts abroad,
imported them to Germany, gathered valuable data from U-boats constructed
to other nations and in secret started building their U-Boat fleet.
as
penalized and was forced to agree to a treaty that limited their armament
capability I several areas. Unfortunately for the rest of the world such
treaty was not as well drafted as they thought and limited Germany to the
manufacturing of certain vessels, among them U-Boats. However, the treaty
did not say that they could not manufacture parts for U-Boats abroad or
that they could not import such parts or build U-Boats for other nations.
So, they took this to their advantage and manufactured the parts abroad,
imported them to Germany, gathered valuable data from U-boats constructed
to other nations and in secret started building their U-Boat fleet.
They also started a submarine school disguised as an Anti-submarine school. All this was done before the outbreak of WWII. After the war started they already had a great advantage over other nations that had neglected the importance of the submarine. They decided that the best strategy was to suffocate the British by destroying supply vessels before they could reach Great Britain. They succeeded to a certain point and then the Allies caught up to their tactics and soon enough the hunters became the hunted.
| THE KIT |
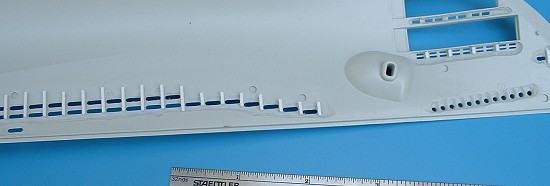
 The kit
is quite large; it measures close to 36 inches from bow to stern. It has
135 pieces. The overall detail is average: The hull is very nice detailed,
not too many sink marks on the model and flash is not too bad. My model’s
hull came warped at the bow and I could not fix the problem. For the size
of the model it lacks a great amount of detail in some areas, then again if
you consider what you paid for it then is not bad at all.
The kit
is quite large; it measures close to 36 inches from bow to stern. It has
135 pieces. The overall detail is average: The hull is very nice detailed,
not too many sink marks on the model and flash is not too bad. My model’s
hull came warped at the bow and I could not fix the problem. For the size
of the model it lacks a great amount of detail in some areas, then again if
you consider what you paid for it then is not bad at all.
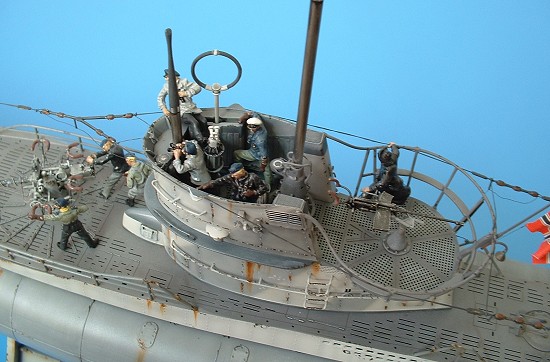
The 20mm and 88mm pieces and also on the inside of the conning tower (UZO and attack periscope base) provide a good starting platform in my opinion but are too plain for my taste. The decals provide you with several options and the kit allows for different variants of the Type VIIC. There are no resin or PE parts included in the kit.
| CONSTRUCTION |
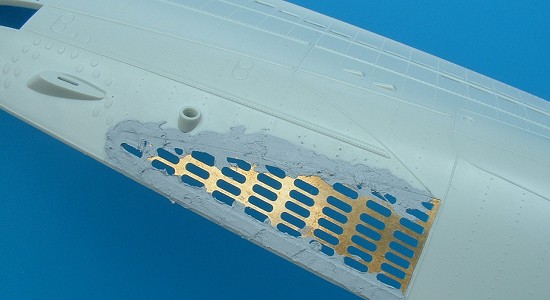
The kit is very simple to build but the instructions are to very clear, it can get confusing at some stages. The only problem areas I saw where the torpedo section in the bow, it seems that the piece that fits in there is too big for the model, so dry fit it several times until you get it to fit. And also the UZO and attack periscope base in the conning tower, the pieces are too small for the scale, they seem to be about 30% shorter than what they should be. I decided to detail the model as much as possible, extensive PE was used along with some scratch building. The PE parts I bought provide a new deck, along with saddle tank valves, fore and aft lower flood holes, armament detailing, side grilles and a lot of other neat stuff.
 I started
with the Hull,
all of the flood holes where drilled and the inside walls thinned,
structural ribs where installed on the inside of the model. I set that
aside (cause I was fed up o
I started
with the Hull,
all of the flood holes where drilled and the inside walls thinned,
structural ribs where installed on the inside of the model. I set that
aside (cause I was fed up o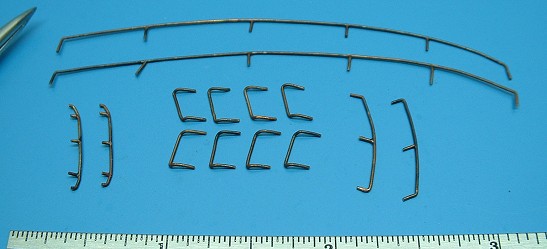 f drilling and filing and sanding etc.) and
started working on the conning tower. All access panels where drilled and
valves where installed on the inside. The hand rails and ladder steps where
made using
f drilling and filing and sanding etc.) and
started working on the conning tower. All access panels where drilled and
valves where installed on the inside. The hand rails and ladder steps where
made using
 copper wire and the diesel intakes and side grilles where opened
up. The Attack periscope base was enlarged and detailed and the UZO was
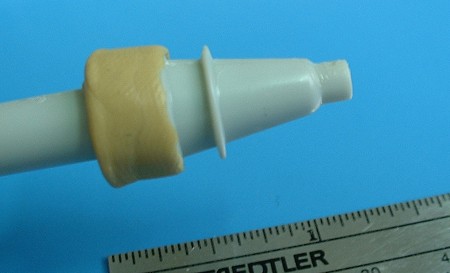
redone from scratch. The next step was the 88mm cannon. Its about 60%
scratch built, 30% original mode
copper wire and the diesel intakes and side grilles where opened
up. The Attack periscope base was enlarged and detailed and the UZO was
redone from scratch. The next step was the 88mm cannon. Its about 60%
scratch built, 30% original mode l and 10% PE. The chest rests where redone
entirely along with the sights using styrene and copper wire. Most of the
extra details where created using copper wire, brass and styrene left-overs.
PE was added to the 20mm.
l and 10% PE. The chest rests where redone
entirely along with the sights using styrene and copper wire. Most of the
extra details where created using copper wire, brass and styrene left-overs.
PE was added to the 20mm.
 Back to
the hull. After the flood holes where done and all ribs where installed,
the forward and aft bottom flood holes where installed using the PE
provided by Modelbrass. Next was the torpedo section and after all work was
completed the entire hull was painted bla
Back to
the hull. After the flood holes where done and all ribs where installed,
the forward and aft bottom flood holes where installed using the PE
provided by Modelbrass. Next was the torpedo section and after all work was
completed the entire hull was painted bla ck
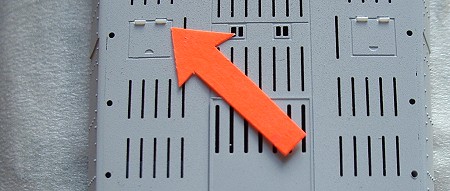
on the inside. The hull was glued and the PE deck was added. After that the
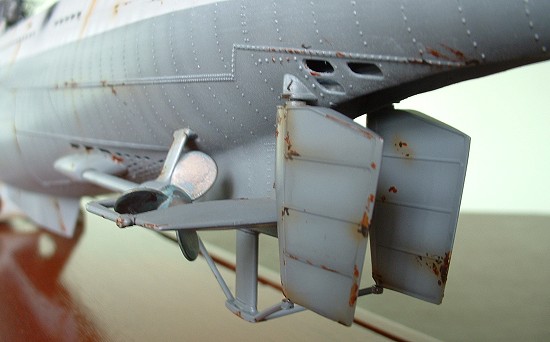
remaining parts (rudders, dive planes, propellers etc.) where attached.
Finally, all the remaining PE parts
ck
on the inside. The hull was glued and the PE deck was added. After that the
remaining parts (rudders, dive planes, propellers etc.) where attached.
Finally, all the remaining PE parts
 were
placed and also all the hinges (made using stretched sprue) on the access
panels of the deck were attached.
were
placed and also all the hinges (made using stretched sprue) on the access
panels of the deck were attached.
| COLORS & MARKINGS |
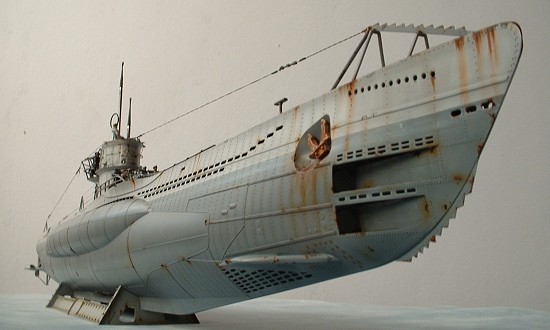
 I painted
my model using Model Master Enamels and Tamiya Acrylics. My subject was
U-556 and this particular boat was painted in the typical Light gray
overall color and the tower was camouflaged with gray stripes. The U-Boat
was painted using several different mixed shades of gray to my taste. It
was painted first Light gray (similar shade to the Canadian Voodoo Gray
from Model Master), then the camouflage on the tower was done and then the
hull was painted in the anti-fouling gray. The deck was painted in RLM 75
(I used that one just for the heck of it, you can use whatever gray you
want) After the beast was painted I proceeded to mottle the whole thing
with slightly lighter and darker shades of the colors used to simulate
discoloration and then I post-shaded where there are rivets and panel
lines.
I painted
my model using Model Master Enamels and Tamiya Acrylics. My subject was
U-556 and this particular boat was painted in the typical Light gray
overall color and the tower was camouflaged with gray stripes. The U-Boat
was painted using several different mixed shades of gray to my taste. It
was painted first Light gray (similar shade to the Canadian Voodoo Gray
from Model Master), then the camouflage on the tower was done and then the
hull was painted in the anti-fouling gray. The deck was painted in RLM 75
(I used that one just for the heck of it, you can use whatever gray you
want) After the beast was painted I proceeded to mottle the whole thing
with slightly lighter and darker shades of the colors used to simulate
discoloration and then I post-shaded where there are rivets and panel
lines.
The model was coated with Future and the only decal used was placed (the stick figure on U-556) after that, the model was weathered using oil paints.
| CONCLUSIONS |
 I really
liked the kit since I opened up the box. I recommend it to all skill level
builders. It has a lot to offer as far as upgrading and scratch-building
possibilities. There are a lot of aftermarket parts for this model and in
my opinion it is worth the investment. Given the size of the model and what
you can do with it if you invest a little extra time and cash on the kit,
it can become a real eye catcher even to people that do not know jack about
modeling. I feel very pleased with the outcome of this model. I would like
to point out that despite the simplicity if this model this Gray Wolf took
me almost 120 hours of work in order to bring up the level of detail to my
taste, but damn it’s worth every second of it! Would I do it again?
Definitely! For question or comments please write to av8r1977ahoo.com,
Enjoy.
I really
liked the kit since I opened up the box. I recommend it to all skill level
builders. It has a lot to offer as far as upgrading and scratch-building
possibilities. There are a lot of aftermarket parts for this model and in
my opinion it is worth the investment. Given the size of the model and what
you can do with it if you invest a little extra time and cash on the kit,
it can become a real eye catcher even to people that do not know jack about
modeling. I feel very pleased with the outcome of this model. I would like
to point out that despite the simplicity if this model this Gray Wolf took
me almost 120 hours of work in order to bring up the level of detail to my
taste, but damn it’s worth every second of it! Would I do it again?
Definitely! For question or comments please write to av8r1977ahoo.com,
Enjoy.
February 2005
| REFERENCES |
U-Boats in Action, Squadron Signal Publications.
U-Boat War, Squadron Signal Publications.
If you would like your product reviewed fairly and quickly, please contact me or see other details in the Note to Contributors.