| KIT #: | 70083 |
| PRICE: | @ 25 € |
| DECALS: | None |
| REVIEWER: | Frank Spahr |
| NOTES: | Resin kit. Addition bits are from WEM PE 730 Askold, 16 € / WEM PE 757 HMS Tiger, 16 € |
| HISTORY |
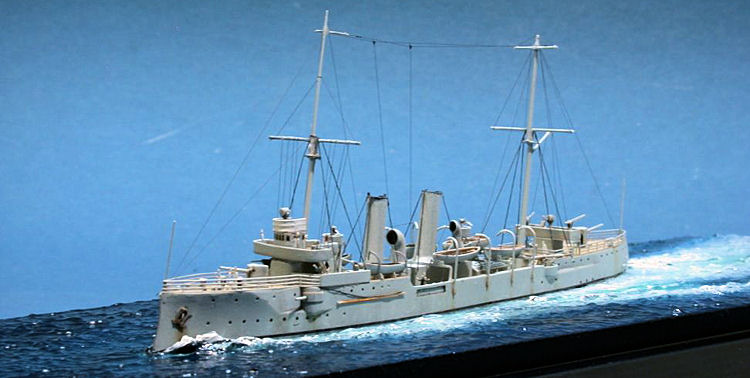
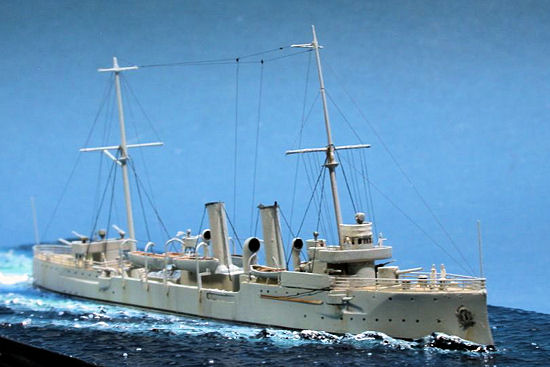
 Uruguay
was termed a cruiser, but basically this very small vessel rather was a mix of
torpedo boat and gun boat and couldn´t compare to contemporary proper cruisers.
To me she looks like a budget ship for a modest country with modest naval
interests. Her main armament were two 4.7 in Skoda guns; she had a number of
smaller guns and two deck-mounted torpedo tubes. Built in 1910 in Germany at the
Vulkan yard at Stettin (now the Polish city of Sczeczin), she served her country
well over several decades, mostly as a training ship. Her moment closest to
serious action was in 1939, when she was tasked to face the German raider Graf
Spee and the pursuing British task group, maintaining Uruguayan interests.
Luckily no fight ensued, and Uruguay soldiered on to be scrapped around 1950.
Uruguay
was termed a cruiser, but basically this very small vessel rather was a mix of
torpedo boat and gun boat and couldn´t compare to contemporary proper cruisers.
To me she looks like a budget ship for a modest country with modest naval
interests. Her main armament were two 4.7 in Skoda guns; she had a number of
smaller guns and two deck-mounted torpedo tubes. Built in 1910 in Germany at the
Vulkan yard at Stettin (now the Polish city of Sczeczin), she served her country
well over several decades, mostly as a training ship. Her moment closest to
serious action was in 1939, when she was tasked to face the German raider Graf
Spee and the pursuing British task group, maintaining Uruguayan interests.
Luckily no fight ensued, and Uruguay soldiered on to be scrapped around 1950.
There isn´t that much more info on this rather small and obscure vessel, which formed a lot of the kit´s appeal when I found it during a summer visit to NNT mail order. This would be pure and guilt-free happy modeling without nits to be picked or rivets to be counted. Ya-hey!
| THE KIT |
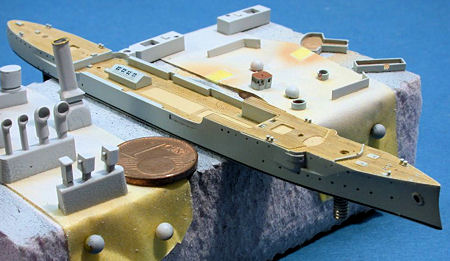
A typical Kombrig offering, the kit
comprises a limited number of parts which are crisply molded in resin. With the
original measuring a mere 85 metres, the model´s length equals the calibre of
her main guns, a bit under 5 inches. Luckily no parts had been damaged in the
flimsy Kombrig paper box. A small PE fret with specific parts for the ship was
most welcome, whereas more generic parts were easily obtained from WEM PE sets.
As usual, masts and yards are included in resin, but due to their softness they
are only fit to be used as templates for metal replacements. The splinter
shields of the main guns are cast solid, a PE replacement would have been nice.
The kit misses the original´s bow and stern crests; I tentatively thought of
replacing the bow crest with an Imperial Japanese chrysanthemum of appropriate
size, painted blue and white, but somehow never got around to commit this
sacrilege. All in all this is quite nice value for money and a good resin kit
for beginners in the pre-WW1 field.
| CONSTRUCTION |
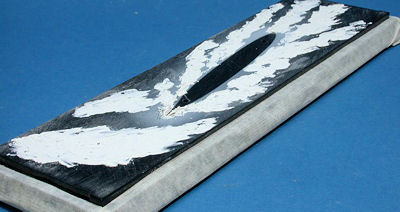
German hardware supermarkets sell a
putty that is virtually the same as Revell putty, but in larger tubes for less
money. This putty was used to sculpt the waves and wake of the ship. Tools used
were a spatula for artist´s oils,
and a wire brush to stipple the wake. After the putty had cured, corrections
were made using sandpaper and an X-ACTO knife.
Now white wall paint was applied in a
stippling motion using a normal painter´s brush. I aimed at a bit livelier sea
so used a bit more paint and stippled a bit harder. With a bit of practice, you
can replicate varying sea states with this method.
The white paint dried, I brought my
airbrush and sprayed first a green shade of acrylic (Revell 48, IIRC) and then
Vallejo ModelAir Insignia Blue on the base. Some corrections were made with
ModelAir White. This technique allows blending the various hues
 rather
easily. Already at this point, white artist´s oil paint was used to highlight
the foam caps and the wake.
rather
easily. Already at this point, white artist´s oil paint was used to highlight
the foam caps and the wake.
When the base was fully dried (I gave
it about a week), I generously applied solvent-based clear gloss from a big
rattle can from the hardware supermarket. Now I only needed a ship to mount on
the base.
In fact, I had a ship to mount on the
base at that point, as I had made progress as fast and smooth as ever. The kit
parts needed but little cleanup and were easily removed from the thin resin
wafers and mounted on kabuki tape. I use tape from the German manufacturer kip
(#308) which is available at some model shows (my main supplier being the Dutch
Airbrush Services Almere). It´s equal to Tamiya tape but WAY cheaper. I use pins
to fix pieces of tape to styrofoam blocks and mount my parts and subassemblies
to them for painting.
The superstructure parts were also sprayed pale
grey blue, with the platform decks receiving a brown shade for a linoleum
covering, and the wooden decks of the bridges a similar treatment as the main
decks, but a shade darker to add some variety. The canvas-covered railings on
the wheelhouse roof were simulated by applying
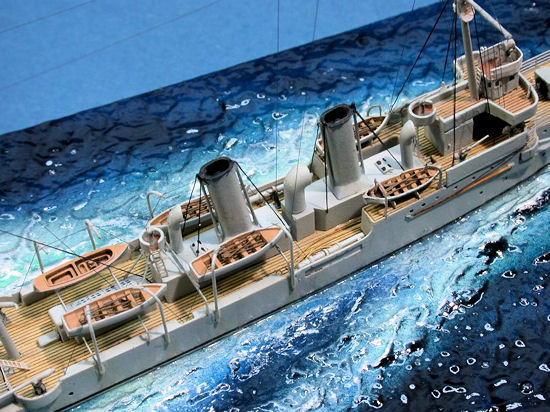
The boats were painted in hull colour
for the outsides, and a rich brown with a black wash for the insides. The mouths
of the vents were painted black. Care was used to apply dark blue paint to the
skylights and bridge windows, with some drybrushing with hull paint for the
frames.
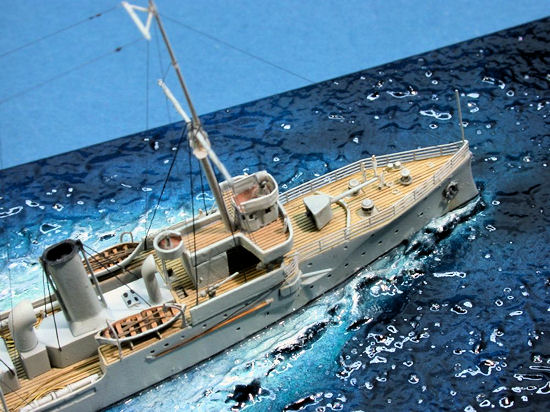
The masts were built from my
dwindling stock of BMK tapered brass, plus brass and steel wire, using the kit
parts as hints. They were glued with CA gel. 0.2 mm brass wire was also used for
the funnel steampipes. The larger gun barrels were replaced by Master Model´s
1:700 German 105 mm barrels, suitably shortened.
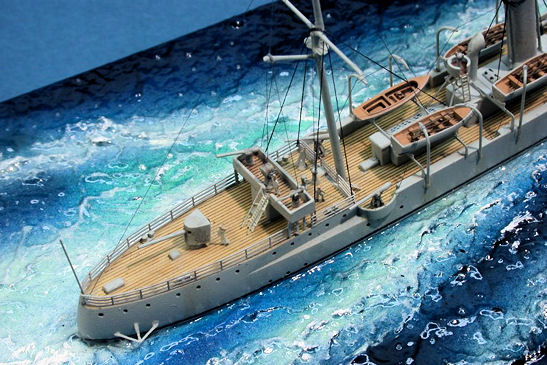
 The various
subassemblies prepared, I was able to start assembling the model. Working from
the center to the preriphery in order to minimize damage, the superstructure was
added, then the bridges, guns, masts, railings and davits. The davits were made
from 0.2 mm brass wire, bent to shape.
The various
subassemblies prepared, I was able to start assembling the model. Working from
the center to the preriphery in order to minimize damage, the superstructure was
added, then the bridges, guns, masts, railings and davits. The davits were made
from 0.2 mm brass wire, bent to shape.
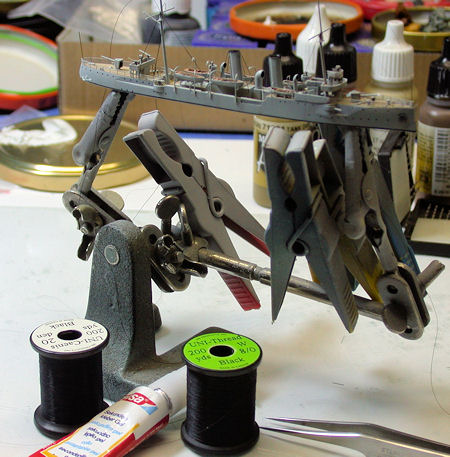
I use flyfishing thread almost
exclusively. The Canadian company
The brass masts and yardarms give
enough strength to work as I currently do: Any given line will be glued to its
start point using CA gel. That takes some time to set, but gives a strong bond
and works way better than thin CA for me. Then I lead the line to its end point;
in many cases you can lead the line around something and add a small weight to
it to make it taut. I use clothes pins. Then the end point is also glued, here
thin CA works fine. I leave it to set for a while and then carefully cut off the
excess using a scalpel that sees no other work. There will be some issues with
excess material, though, and hence the technique (and result) is inferior to
master rigger Jim Baumann´s approach, but mine works way better for me and my
sanity. I use an optivisor at 3.5 x magnification, and make sure I have a lot of
light at my workbench. The Lumie desk lamp Jim recommended to me last year was a
big step forward. Its bright light at 1,250 lux is originally aimed at
countering seasonal affective disorders, so I think my modeling sessions as
affective therapy ;-)
| FINAL CONSTRUCTION |
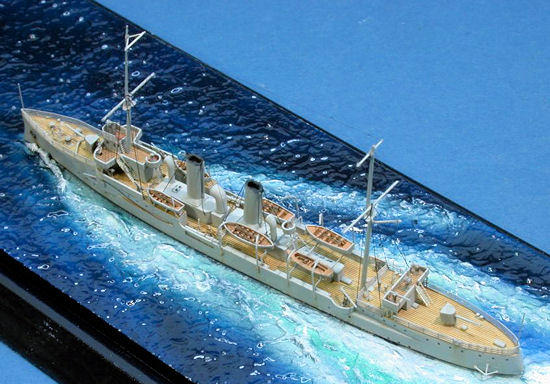
After the flat coat was cured, the
model was glued to its base using CA gel; the remaining gaps between the model
and the base were filled with gloss clear
heavy acrylic gel, applied from a salve syringe - not the one you stick
into people, but the larger diameter and blunt one to apply salves. Some more
structure was added to the waves with the gel, too.
That cured, the final work was highlighting the waves with white artist´s
oils. I haven´t found another paint yet that is as white and will remain like
that.
| CONCLUSIONS |
November 2012
If you would like your product reviewed fairly and fairly quickly, please contact the editor or see other details in the Note to Contributors.