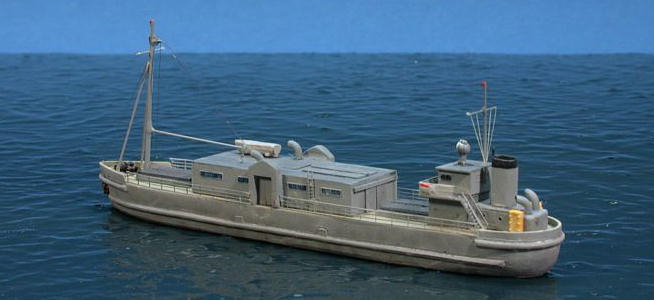
BFM 1/700 Kriegsmarine Supply/Repair Barge
| KIT #: | BFM 726 |
| PRICE: | $25.0016.98 |
| DECALS: | None |
| REVIEWER: | Frank Spahr |
| NOTES: | Resin, Photo Etch and Machined BrassNot exactly a brand new kit |

| HISTORY |
Even the greatest celebrity needs supporting personnel to make their exploits possible. These people stay out of the limelight, but they are indispensable, be it for actors, singers, athletes or human hallstands. This is also valid for our hobby and its naval niche. For decades, manufacturers have tried to produce faithful reproductions of major combatants, with much less effort being spent on auxiliaries.
| THE KIT |
Battlefleet Models has a heart for
the auxiliary fleet, supplying us with high-class miniatures of auxiliary
vessels of all sorts, without which our dioramas would look rather naked.
 was first designed and built be Cedric Chan for his 1:700 DKM Tirpitz diorama as
to be seen at
http://www.modelshipgallery.com/gallery/dio/dkm/tirpitz-700-cc/cc-index.html
It is not supposed to depict a
certain vessel but rather a generic barge, as all navies used for similar
purposes. As those vessels were also taken up from trade and converted
individually, each of them was unique. Hence this kit may be used either
straight from the box or as a base for a conversion.
As usual with this manufacturer, the
kit was excellently packed, and all parts survived the trip from Colorado to
Hesse, Germany. Lots of bubble wrap and shrink-wrap worked wonders other
manufacturers could improve in that respect.
The resin parts are cleanly and
crisply made, equally crisply molded and cast with hardly any excess resin to
trim off. Working with these parts should be trouble-free. The parts count being
as low as it is, this kit should appeal to resin newbies as a positive first
resin experience. The entire deck has a nice plank structure, which is helpful
for conversions. There is a very nice winch at the bow. Some parts prone to
damage or loss have been provided with spares, which is a ncie touch by the
manufacturer. Apart from the resin parts, the kit contains two
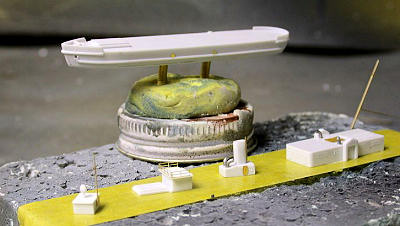 pieces of
brass wire and a sufficient amount of PE railing from Tomīs Model Works.
The instructions start with a picture
of Cedric Chanīs model, followed by the usual security notes and some useful
hints for working with the materials. There is a parts list and some images of
the parts showing their placement, it all being sufficient to build the model.
The website mentions additional recommended PE parts such as watertight doors,
inclined ladders, hatches and cable reels. Including this hint into the printed
instructions would have been helpful, even though most modelers building a kit
like this would not need it, but just consult their spare PE for the needed
items. In the end, everybody will probably build their own customized version of
this vessel, with all the PE and other additions looking useful to everyone.
| CONSTRUCTION |
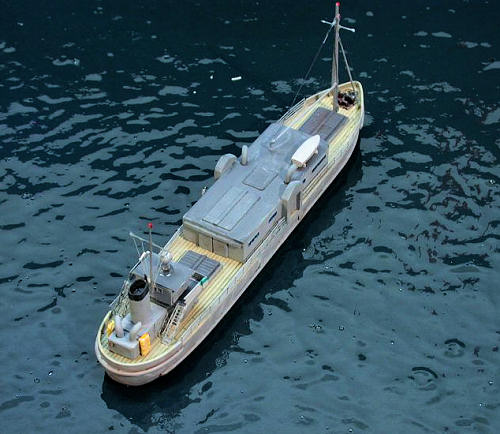
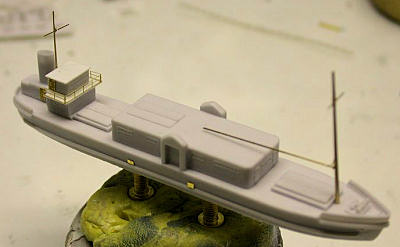 I wasnīt
entirely happy with the vessel in her original configuration. There were certain
aspects that didnīt look right to me, so I leafed through ship images and
decided how to convert my model. I assumed that my ship started her life as a
river barge, was taken up from trade and converted with workshop spaces,
retaining some of her cargo holds. So I made the superstructure a bit more
conventional by moving the funnel aft, using the resin wafer as part of the sup
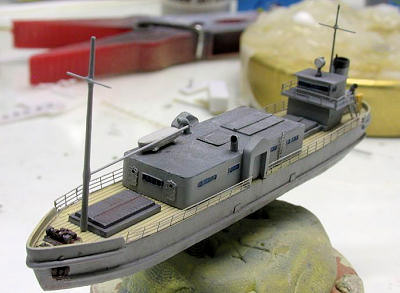 erstructure.
The lower row of windows at the pilot house was removed, and an open bridge was
added from paper and PE railings. Vents were added from solder. Cargo hatches
were placed ahead and astern the workshop, and the rather small and
ineffectually looking crane was deleted. Instead I added a tripod mast with a
derrick to the bow.
Building the vessel was a breeze, due to the excellent resin and the conversion-friendly kit design. Portholes were drilled with small drill bits, for watertight doors and inclined ladders WEM PE was used (Askold and HMS Tiger PE sets being excellent for that purpose). Some PE from LīArsénal (Structural Parts #1 and 2) was used, too. For the masts, conically turned brass from BMK and .2 mm brass from kotol.de was used. The canvas dodgers around the bridge were simulated by covering the PE railings with white glue.
| COLORS & MARKINGS |
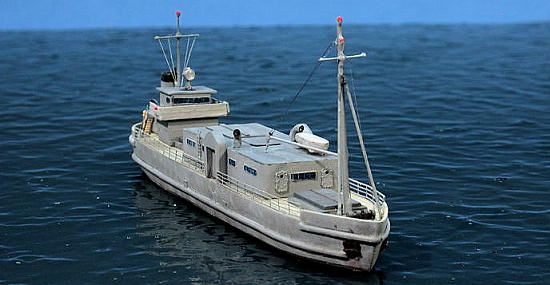 Pretty
soon, the parts were ready for painting. I used Revell Aqua Color #57 for
vertical surfaces and Vallejo London Grey for the horizontal surfaces. The
wooden deck was painted Vallejo Buff. A wash from Humbrol thinners and sienna
and black artistīs oil paints enhanced details, plus some gentle drybrushing at
the edges. The windows were carefully painted using dark blue Vallejo Model Air
and a very fine brush. The navigation lights were made from small pieces of
solder. The boat and the float are resin parts from the kit.
The model was rigged using stretched
tan sprue, Caenis ultrafine flyfishing thread and somewhat stronger flyfishing
thread (both from
| CONCLUSIONS |
This is a very helpful kit of a subject well suited to improve a diorama, offering good value for money and one of the best levels of quality found amongst naval resin manufacturers. Highly recommended, be it OOB or however converted!
August 2009
If you would like your product reviewed fairly and quickly, please contact me or see other details in the Note to Contributors.