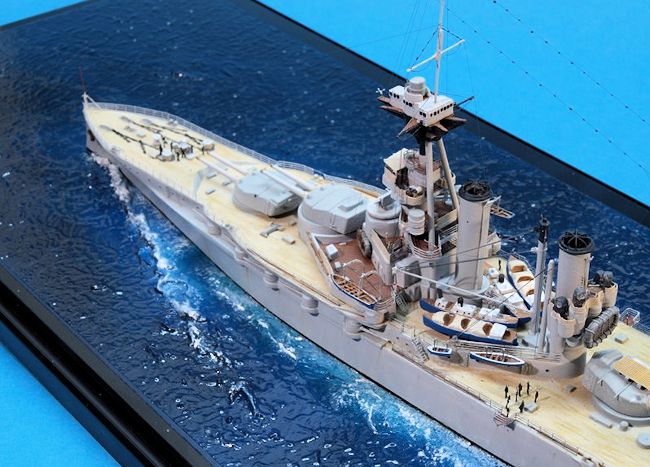
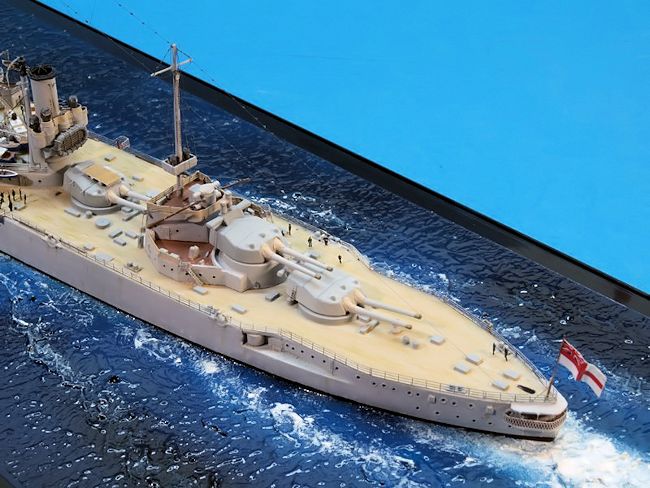
Airfix 1/600 HMS Marlborough
| KIT #: | A04210 |
| PRICE: | |
| DECALS: | |
| REVIEWER: | Frank Spahr |
| NOTES: |
SWEM
photo etch for Airfix Iron Duke
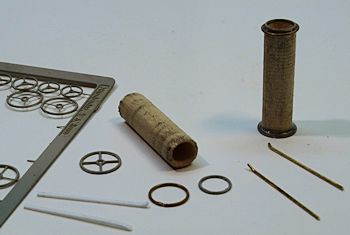
Master machined brass barrels ; # 700-033 British 16 in für main guns, #
700-006 japanese 15.5 cm for casemate guns |
| HISTORY |
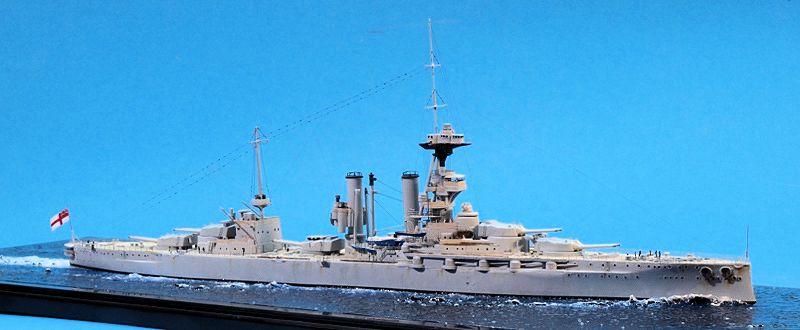
The British Iron Duke - class of dreadnought battleships comprised four vessels.
Apart from Iron Duek there were HMS Emperor of India, Benbow and Marlborough.
Ordered in 1911, they were commissioned around the outbreak of World War One,
fighting in the Grand Fleet´s frontline squadron. As compared to the preceding
King George V - class, they fielded a stronger secondary battery with twelve 6
inch guns
 instead of sixteen 4 inch. The higher weight necessitated an increase
in length and displacement, the latter around 2,000 tons. The main battery of
five twin 13.5 in turrets was identical to the preceding class, same as the
machinery. This class was to be the RN´s
penultimate coal-firing battleship class.
instead of sixteen 4 inch. The higher weight necessitated an increase
in length and displacement, the latter around 2,000 tons. The main battery of
five twin 13.5 in turrets was identical to the preceding class, same as the
machinery. This class was to be the RN´s
penultimate coal-firing battleship class.
Despite the larger displacement, the secondary battery had to be mounted lower
than in the preceding class, rendering the guns unworkable in poor weather.
Nonetheless the ships proved successful and popular in service.
Iron Duke served as flagship, Grand Fleet under Admiral John Jellicoe from
August, 1914 to January, 1917. She survived the longest, being demilitarized in
the early 1930s and used as a training ship up to the outbreak of World War Two.
She was then moored at Scapa Flow for use as afloating AA battery and stores
ship. Damaged by a German air raid already in September, 1939, she hat to be
beached, was later repaired provisionally, and returned to service. After the
war, she was sold for scrap, refloated in 1946 and broken up over the next two
years.
HMS Marlborough sustained damage at Jutland and was used to rescue members of
the Tsar´s family (and relatives of King George V) in 1919 whilst in the Black
Sea. She served on during the 1920s, being decommissioned in 1932. After use as
a target she was broken up.
| THE KIT |
The now defunct company White Ensign Models produced a dedicated PE set for the kit in the late 1990s. This is on the smaller side, compared to the sets for, say, Belfast or Warspite. It comprises two small frets with very delicate parts, one of them containing generic parts like railings, ladders, anchor chain and inclined ladders. The instructions refer to the unclear fit of the model and suggest doing research. It is not on the level of helpfulness and clarity of later WEM offerings or what Peter Hall offers these days with his own Atlantic Models kit range. You need to research, and do a good think now and then.
| CONSTRUCTION |
I
hadn´t built this kit in my youth, being not really interested in WW1 back then.
So it was a sort of a first contact when I bought the kit a few years ago, and I
must say I was underwhelmed. As I said before, Airfix did better then that, and
with my lack of interest in the period the kit (and the complimenting PE set,
which didn´t rock my boat that seriously, either) gathered dust for a while.
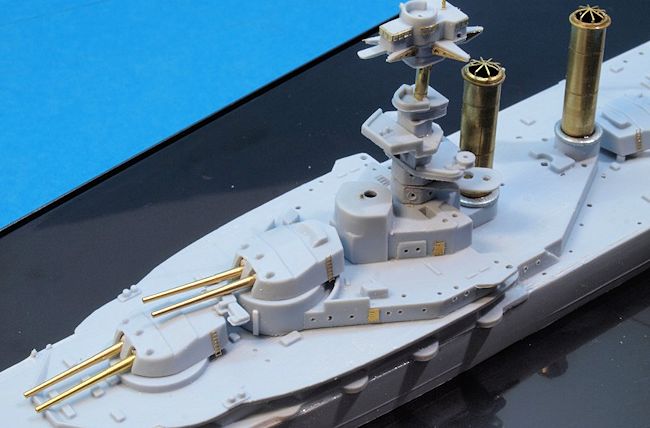
To
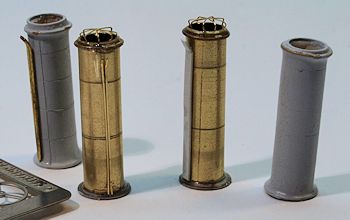
accept the new main guns, I had to shape styrene plates to the insides of the
turrets and drill holes into them. The brass barrels for the secondary guns were
glued into small holes drilled into the precut styrene tubing. At the model, I
closed lots of oversized holes in the decks using plugs made from sprue
stretched to the appropriate diameter. There were quite some seams to be
addressed, too. The raised "deck planking" suffered from removing the plugs and
the very clunky boat cradles, so I used really coarse files to restore some
longitudinal structure here.
 wire and styrene
stock respectively.
wire and styrene
stock respectively.
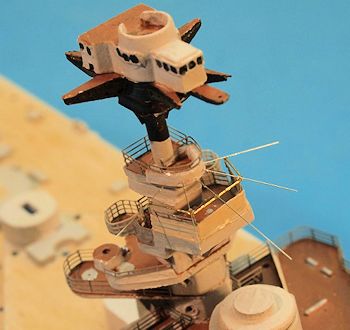
 yards´ footropes were made from Albion Alloys .1 mm nickel steel
wire, a very useful product. I also used it for the prominent awning over the
open bridge, the boat derricks´ cables and the rigging of the boat davits.
yards´ footropes were made from Albion Alloys .1 mm nickel steel
wire, a very useful product. I also used it for the prominent awning over the
open bridge, the boat derricks´ cables and the rigging of the boat davits.
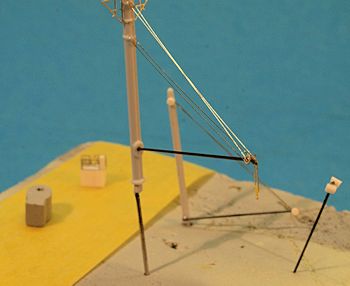
The various boat booms were made from brass wire and rigged with the
abovementioned .1 mm wire.
| COLORS & MARKINGS |
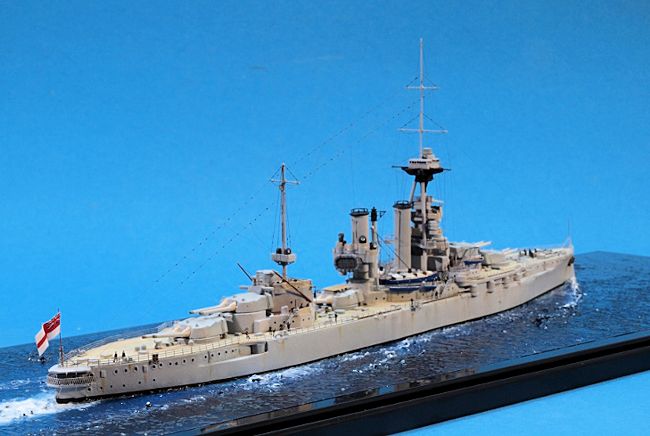
 The model was painted with acrylics, after a solvent-based primer coat. I used
the new Coastal Craft / AKAN acrylic paint for the very light AP 507C on all
vertical surfaces, the appropriate shade for service in the Mediterranean Fleet.
The paint worked well, but I still prefer the Vallejo type bottles I can get
single drops out of. The wooden deck was painted with some of my dwindling
supplies of JPS IJN deck tan, those decks I reckoned had linoleum covering
applied were painted JPS IJN Linoleum. Irregular application of some slightly
differing shades and some washing added life to the large wooden deck areas. I
did not aim at the basket ball court look, but at a well-maintained wooden deck
which is holystoned on a daily basis. The photo showed that the boats were
painted in some colour, which I reckoned might have been blue, which I used on
them. The insides of the beautiful open Kombrig boats were painted a rich brown
and received a dark wash.
The model was painted with acrylics, after a solvent-based primer coat. I used
the new Coastal Craft / AKAN acrylic paint for the very light AP 507C on all
vertical surfaces, the appropriate shade for service in the Mediterranean Fleet.
The paint worked well, but I still prefer the Vallejo type bottles I can get
single drops out of. The wooden deck was painted with some of my dwindling
supplies of JPS IJN deck tan, those decks I reckoned had linoleum covering
applied were painted JPS IJN Linoleum. Irregular application of some slightly
differing shades and some washing added life to the large wooden deck areas. I
did not aim at the basket ball court look, but at a well-maintained wooden deck
which is holystoned on a daily basis. The photo showed that the boats were
painted in some colour, which I reckoned might have been blue, which I used on
them. The insides of the beautiful open Kombrig boats were painted a rich brown
and received a dark wash.
| FINAL CONSTRUCTION |
Having painted the various subassemblies, I was able to attach the railings. I
used generic 1:600 WEM Kriegsmarine railings combined with some of the railings
from the PE set, which were rather too delicate for my ofentimes ham-fisted
approach. Canvas dodgers were simulated by applying white glue to the railings
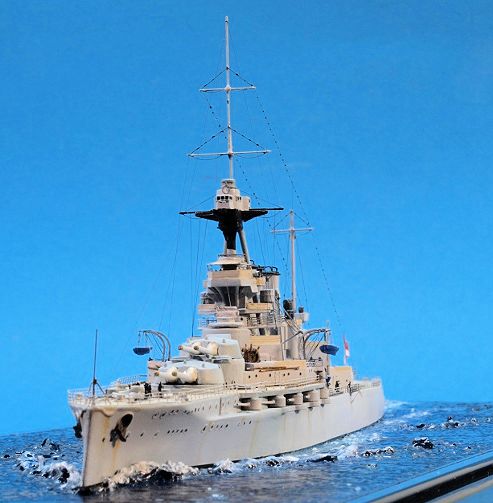
and painting it deck tan. The conspicuous awning over the open bridge was made
from white glue over a frame of .1 mm wire, the white glue being applied with an
extra-long brush. The cured glue was painted tan and some washing was applied.
 The model was then crewed with Lion Roar PE figures. The stern walk was
partially rebuilt using stock styrene, PE grating and fine wire. The model was
then rigged using UNI Caenis thread. The numerous isolators were hinted at with
droplets of white glue which were painted grey.
The model was then crewed with Lion Roar PE figures. The stern walk was
partially rebuilt using stock styrene, PE grating and fine wire. The model was
then rigged using UNI Caenis thread. The numerous isolators were hinted at with
droplets of white glue which were painted grey.
Now the ship might still have had the dreaded cage aerials in 1922, even though
I hope they phased them out after the war, same as the tedious torpedo nets.
But: These antennae hardly ever really show in period photos, and they are
utterly difficult to make at all, and it is even harder to end up with a result
that is so delicate it is not visually distracting and just looking crude and
heavy. For the sake of my sanity, I am comfortable to do without them.
The model was weathered very lightly using ochre oil paint, always bearing in
mind that this was a well-maintained vessel in peacetime fresh out of a refit.
The base was made after my usual method in a Trumpeter display box.
| CONCLUSIONS |
All in all this was an exciting and rewarding project, being more of a challenge
than earlier Airfix builds and needing some techniques new to me. Even if you
can build 1:700 scale high-end resin kits of this class, my model is unique, and
it is mine, warts and all.
I would like to dedicate this model to the fine people of WEM. You and your products helped me tremendously over the past ten years since I rediscovered ship modeling, and your company is sadly missed.
March 2015
If you would like your product reviewed fairly and fairly quickly, please contact the editor or see other details in the Note to Contributors.