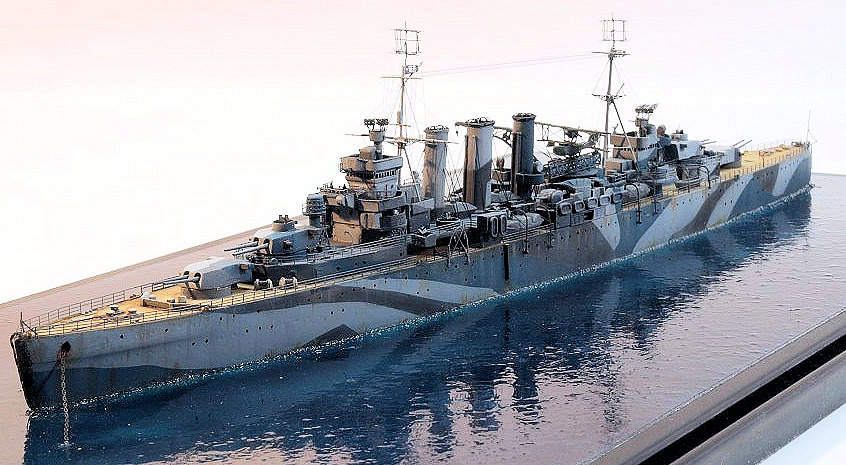
WEM 1/700 HMS Sussex
| KIT #: | |
| PRICE: | |
| DECALS: | |
| REVIEWER: | Frank Spahr |
| NOTES: | Resin kit |
| HISTORY |
HMS Sussex (96) belonged to the County Class of British heavy „treaty“ cruisers, conforming to the limits of the Washington treaty in terms of main armament and displacement. 13 ships in all were built, divided into three sub-groups, differing in hull shape and protection. Sussex belonged to the second group, the London class, which had no external torpedo bulges and was slightly longer than their predecessors of the Kent class.
 Sussex was built by
Hawthorn, Leslie and Co. at Hebburn-on-Tyne. She was laid down on 1
February 1927, launched on 22 February 1928 and completed on 19 March
1929.
Sussex was built by
Hawthorn, Leslie and Co. at Hebburn-on-Tyne. She was laid down on 1
February 1927, launched on 22 February 1928 and completed on 19 March
1929.
She had a long and distinguished career, serving virtually around the globe in peacetime, during the Spanish Civil War and World War Two. Early in the war, she participated in the hunt for the German raider Graf Spee. After serving in the ill-fated Norwegian campaign, and performing patrol duties from Scapa Flow, she had to enter Glasgow for repairs. There, on 18 September, 1940, she received heavy bomb damage, necessitating repairs that lasted two years. After more patrol service from Scapa, she was deployed into the Indian Ocean and later the Pacific. The Japanese surrender at Singapore was signed aboard her. She was retired in 1949 and broken up in 1950.
| THE KIT |
 This
resin kit was first produced in 1998. It represents Sussex after her
extensive repair and modifications to her armament and sensors in 1942. It
is a typical WEM kit, with mostly quite nicely cast resin parts and a
comprehensive PE fret, plus some brass wire intended for the masts.
Instructions are full and carefully done, with colour profiles of the camo
scheme referring to WEM´s Colourcoats. Some cleanup needs to be done, but
nothing really major.
This
resin kit was first produced in 1998. It represents Sussex after her
extensive repair and modifications to her armament and sensors in 1942. It
is a typical WEM kit, with mostly quite nicely cast resin parts and a
comprehensive PE fret, plus some brass wire intended for the masts.
Instructions are full and carefully done, with colour profiles of the camo
scheme referring to WEM´s Colourcoats. Some cleanup needs to be done, but
nothing really major.
I got the kit right before WEM ceased operations in the UK, together with some other much-needed goodies, and had kept it in the stash until this year, when Trumpeter started producing 1:350 kits of County Class cruisers. I had set my greedy eyes on them before thinking twice about my (admittedly not overly large) stash and space considerations. So I decided to miss out on the 1:350 offerings and just build two Counties: This one, and the venerable Airfix Suffolk kit. That would save some money, even if I used aftermarket items, and sure would save display space.
I decided to build the model virtually out of the box, and depict the ship at anchor in still water.
| CONSTRUCTION |
 I
started on the hull, drilling open some of the scuttles, as not all of them
seem to have been plated over. My main reference during this build were the
images of Richard Price´s Sussex model in the Shipcraft book, because it was
far better than anything I could achieve. He had refined the hull shape and
the hull surface with „planking“ and even rigoles over the scuttles,
something quite far out of my league. So I looked into the instructions but
also kept the pages of the Shipcraft book with this model open at all times.
I
started on the hull, drilling open some of the scuttles, as not all of them
seem to have been plated over. My main reference during this build were the
images of Richard Price´s Sussex model in the Shipcraft book, because it was
far better than anything I could achieve. He had refined the hull shape and
the hull surface with „planking“ and even rigoles over the scuttles,
something quite far out of my league. So I looked into the instructions but
also kept the pages of the Shipcraft book with this model open at all times.
I then selected a suitable Trumpeter display box, and drilled mounting holes into the bottom of the hull and the base. Screws were then permanently glued into the hull for the final mounting. Two more holes were drilled for mounting the hull on my vise during construction.
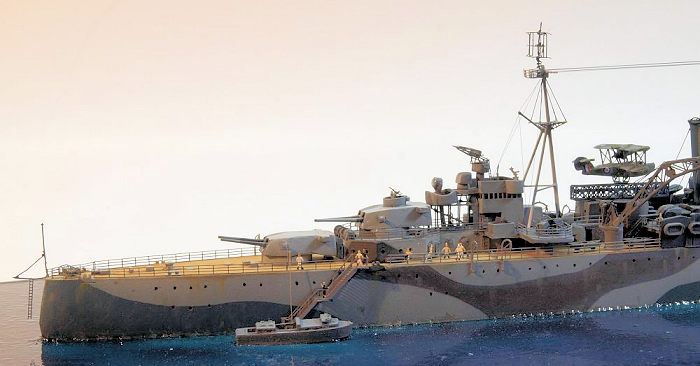
I then figured out where the accomodation ladder and the boat boom would end up relative to the base, and ground out recesses into the base for mounting my ship´s boats. One was to be placed at the accomodation ladder and two were to be moored to the boat boom.
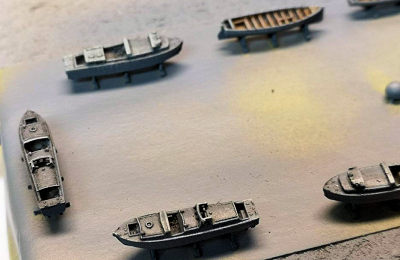 I
wasn´t that happy with the ship´s boats, and somewhat later decided to take
the plunge and use 3D printed items, by designer Micro Master obtained via
Shapeways. I had worked with his products before, and they are nothing less
than superb. He offers various sets of boats in various scales, but as
neither conformed to Sussex´ boat complement, I needed two sets to mix and
match. Nonetheless a good investment for future projects. These boats were
mounted on boat cradles, which I found quite convenient. They were exposed
to strong light to improve the curing of the resin, washed and separated.
Some cleanup along the boat sides was needed, but easily achieved with an X-Acto
blade.
I
wasn´t that happy with the ship´s boats, and somewhat later decided to take
the plunge and use 3D printed items, by designer Micro Master obtained via
Shapeways. I had worked with his products before, and they are nothing less
than superb. He offers various sets of boats in various scales, but as
neither conformed to Sussex´ boat complement, I needed two sets to mix and
match. Nonetheless a good investment for future projects. These boats were
mounted on boat cradles, which I found quite convenient. They were exposed
to strong light to improve the curing of the resin, washed and separated.
Some cleanup along the boat sides was needed, but easily achieved with an X-Acto
blade.
I needed to modify the base cutouts for the boats a bit, obviously, as they were made for the kit boats.
The base, being still water, was masked around the edges and only stippled with wall paint without any wave or wake effects. It was then sprayed green around the vessel and blue for the rest. After some serious drying time, ample amounts of solvent-based gloss clear from a rattle can were sprayed to achieve a reflecting surface.
During this time, work on the numerous subassemblies went on. I added quite some PE watertight doors to the various superstructure parts, plus rain deflectors around the open bridge and „wooden“ gratings.
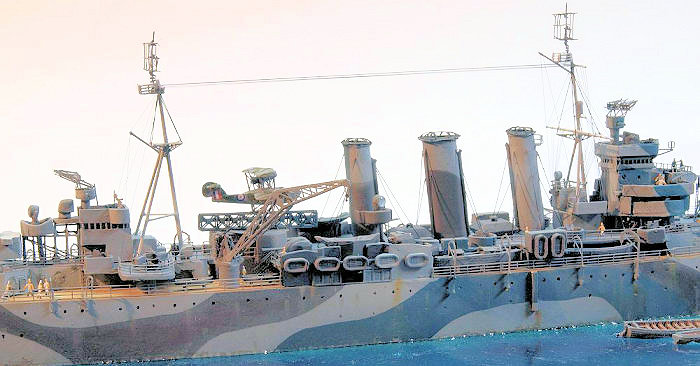
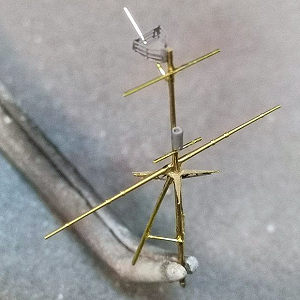
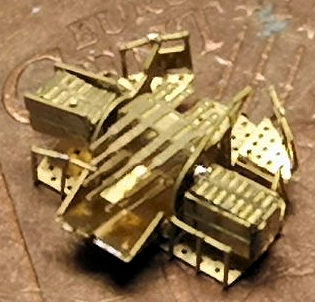 I
tend to tackle the most challenging subassemblies first, with the rationale
that if I botch them, I might not bother with the rest of the build. In this
case this concerned the Pom-poms and the radar aerials, both the masttop
type 281 and the multiple yagi type 282 atop the rangefinders. I could not
use the kit Pom-poms, as I lost one part and couldn´t get the
barrel/magazine combos slot properly into the gun framework. So I used Lion
Roar PE I had in my stash, which was even more iffy, yet I somehow got it
built. I had the same experience with the type 282, but used the 281 from
the kit, as I had no more Lion Roar items and couldn´t find where to buy
them. Nonetheless, I was not happy with the situation, as the WEM items were
seriously and visibly too large. Being sited so prominently on the masttops,
that wasn´t too nice. In the end, I got a Lion Roar British Radar set from a
modeling pal with both a good heart and a sizable stash, and replaced the
kit parts.
I
tend to tackle the most challenging subassemblies first, with the rationale
that if I botch them, I might not bother with the rest of the build. In this
case this concerned the Pom-poms and the radar aerials, both the masttop
type 281 and the multiple yagi type 282 atop the rangefinders. I could not
use the kit Pom-poms, as I lost one part and couldn´t get the
barrel/magazine combos slot properly into the gun framework. So I used Lion
Roar PE I had in my stash, which was even more iffy, yet I somehow got it
built. I had the same experience with the type 282, but used the 281 from
the kit, as I had no more Lion Roar items and couldn´t find where to buy
them. Nonetheless, I was not happy with the situation, as the WEM items were
seriously and visibly too large. Being sited so prominently on the masttops,
that wasn´t too nice. In the end, I got a Lion Roar British Radar set from a
modeling pal with both a good heart and a sizable stash, and replaced the
kit parts.
The accomodation ladder was also quite iffy to work with, same as the crane lattice boom and the PE Oerlikons, but I got there in the end.
I replaced the barrels of the primary and secondary armament with Master machined brass parts. I had to use equivalents for the 8 inch barrels, as they are not in Master´s program.
So I collected subassemblies as usual and prepared them for priming and painting.
| COLORS & MARKINGS |
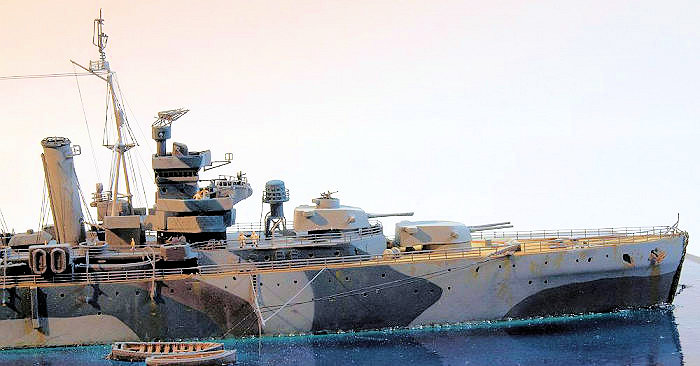
Sussex´ camo scheme is nicely rendered in the kit instructions. I chose acrylic equivalents to WEM´s Colourcoats from my stash. The resin parts were primed with Stynylrez primer, a product I have come to rely upon a lot. Masks were cut using the colour profile and some tweaking, and the camo scheme was sprayed. The wooden decks were sprayed a tan shade and then received a brown wash, which worked quite nicely. Deck details were picked out by brush. I was unable to mask the superstructure parts, so had to rely on brushpainting there for parts of the scheme.
| MORE CONSTRUCTION |
 That
done, I tackled the masts, quite a tedious task, too. I have some dwindling
stocks of generic tapered brass; these were used together with a machined
yardarm from Master for the main yard of the foremast, and generic brass
wire for the rest. The starfishes are PE parts from the kit. Following the
instructions and measurements went mostly well, but some fit issues with the
locations of the tripods were encountered. At this stage, I also built the
Walrus seaplane, mostly OOB, save some generic PE framework used around the
engine and between the wings. The plane was brush painted, decals were
sourced from a generic Starfighter sheet. The very limited rigging is Albion
Alloys .1 mm nickel silver wire. This was also used on the funnel stays,
mast stays and boat boom rigging.
That
done, I tackled the masts, quite a tedious task, too. I have some dwindling
stocks of generic tapered brass; these were used together with a machined
yardarm from Master for the main yard of the foremast, and generic brass
wire for the rest. The starfishes are PE parts from the kit. Following the
instructions and measurements went mostly well, but some fit issues with the
locations of the tripods were encountered. At this stage, I also built the
Walrus seaplane, mostly OOB, save some generic PE framework used around the
engine and between the wings. The plane was brush painted, decals were
sourced from a generic Starfighter sheet. The very limited rigging is Albion
Alloys .1 mm nickel silver wire. This was also used on the funnel stays,
mast stays and boat boom rigging.
Working from the centerline of the model outwards, I added my subassemblies and railings piece by piece. At this stage, most of the crew figures were added, too.
I rigged the model before the outboard railings were added, using Caenis monofilament mostly, glued with CA glue.
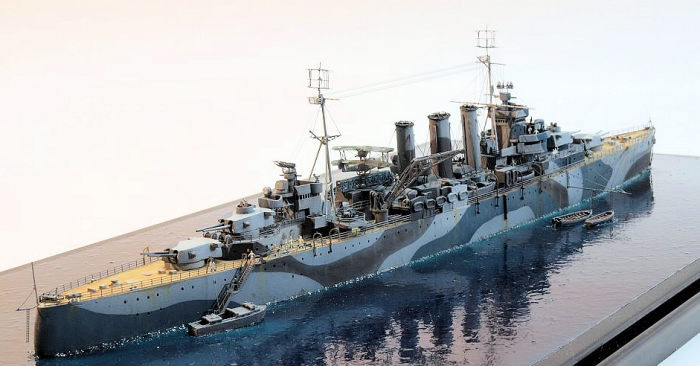 When
everything was completed so far, I added the outboard railings, the boat
boom, the accomodation ladder and the crane. Then it was time for a flat
coat, and then some weathering using artist´s oils. I aimed at making the
camo areas a bit more varied, and adding some rust streaks and salt water
streaks.
When
everything was completed so far, I added the outboard railings, the boat
boom, the accomodation ladder and the crane. Then it was time for a flat
coat, and then some weathering using artist´s oils. I aimed at making the
camo areas a bit more varied, and adding some rust streaks and salt water
streaks.
That achieved, a really final flat coat sealed any glue marks and other blemishes. I use Winsor & Newton Galleria acrylic flat finish. Now the lenses of the searchlights were picked out in a little white glue, and the model could be mounted to the base. After tightening the screws, any remaining gaps were filled with gloss heavy body acrylic gel from a fine syringe. The boats were mounted with the same gel.
| CONCLUSIONS |
I find working in 1:700 progressively harder. Some of the subassemblies were bordering on unbuildable to me. So I am glad I got away with it. I now have a good – looking model of an important warship class, and that´s what counts!
| REFERENCES |
https://en.wikipedia.org/wiki/County-class_cruiser
Alan Raven / John Roberts: British Cruisers of World War Two. Annapolis 1980.
Les Brown: County Class Cruisers (Shipcraft Series). Barnsley 2011.
16 March 2020
Copyright ModelingMadness.comIf you would like your product reviewed fairly and fairly quickly, please contact the editor or see other details in the Note to Contributors.
Back to the Main Page Back to the Review Index Page Back to the Previews Index Page