Revell Jolly Roger Pirate Ship
| KIT #: | |
| PRICE: | |
| DECALS: | |
| REVIEWER: | Martin Harms |
| NOTES: |
| HISTORY |
 In
1960 the Revell Jolly Roger pirate ship was on my wish list for my 7th
birthday. Strangely enough, this wish list has survived to this day - the
finished kit is long gone. The model was assembled by my Dad, mostly. This kit
triggered off a lifelong fascination for plastic model kits. I had long breaks
without building any models, but, so far, it has always caught up with me again.
In
1960 the Revell Jolly Roger pirate ship was on my wish list for my 7th
birthday. Strangely enough, this wish list has survived to this day - the
finished kit is long gone. The model was assembled by my Dad, mostly. This kit
triggered off a lifelong fascination for plastic model kits. I had long breaks
without building any models, but, so far, it has always caught up with me again.
In the mid 1980s I came across a re-run of the kit in a stationary shop in New
Zealand. I had to buy it, of course. I took it out of the cupboard now and then,
but never started the kit. But almost exactly 50 years after first holding the
kit in my hands, I had to have a go. Without Dad’s help this time!
| THE KIT |
The kit is based on an attraction in the original Disneyland of the
1950s. It was a restaurant named „Chicken of the Sea“. This was a public
relations exercise way to try and get people to eat Tuna in those days. How
things have changed! The ship itself was to represent the Pirate Ship from the
Disney Peter Pan cartoon.
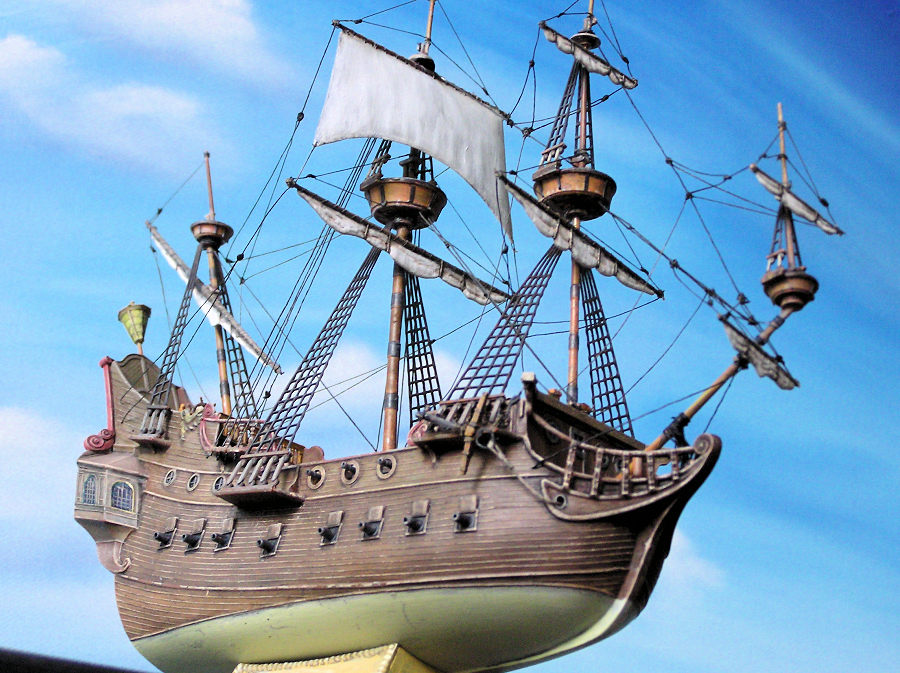
 The model is
quite authentic to the Disney attraction. Right down to the draft of only a foot
or so. The original was in water only about a foot deep. Saved children from
drowning if they fell into the water, I guess. Here is a
link to that ship. On the other hand, the artist who designed the original
Revell kit must have been knowledgable about sailing ships of the 16th and 17th
century. A lot of details are a lot more accurate than on the Disney Restaurant.
The model is
quite authentic to the Disney attraction. Right down to the draft of only a foot
or so. The original was in water only about a foot deep. Saved children from
drowning if they fell into the water, I guess. Here is a
link to that ship. On the other hand, the artist who designed the original
Revell kit must have been knowledgable about sailing ships of the 16th and 17th
century. A lot of details are a lot more accurate than on the Disney Restaurant.
| CONSTRUCTION |
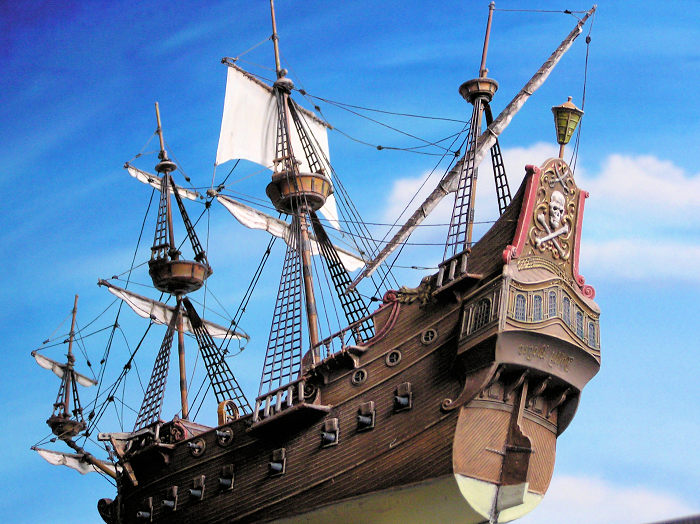
So this got me thinking and I decided to build the
model to depict a fictional ship of the 17th century rather than the 1950s
„Chicken of the Sea“. The kit parts fit quite well apart from the the warped
hull halves. At least from the standpoint of someone who is used to ancient
plastic kits… Careful clamping and some rubber bands while the glue sets, fixed
that problem. Some parts need to be refined a bit with files and scalpel but
all in all it is quite astonishing how well a kit from the early days of plastic
kits can be assembled 50 years down the track.
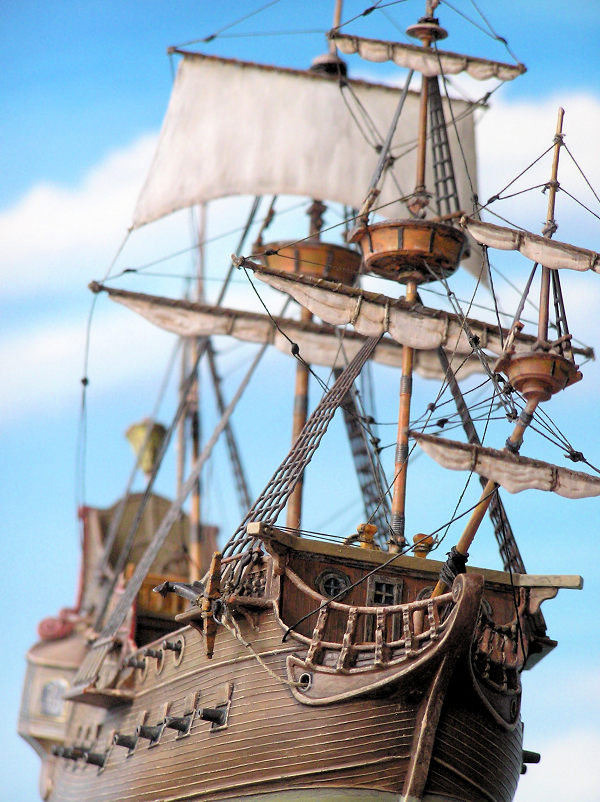
The most difficult parts to refine were the shrouds. I went the easy way and
sanded them flat from both sides. Afterwards I thinned them down with a scalpel.
The steering wheel and its stand were refined with cotton thread. Before I could
do that, I had to research how the real thing used to be operated.
All up, I most likely spent a lot more time researching about ships of the late
seventeenth century, than I did assembling and painting the model.
 The rigging
is a coarse simulation of the real thing. It is quite amazing how operational
the rigging is. Once I had figured out which rope did what in holding the masts
and and the yardarms in position and applied that knowledge the I was
astonished to see the effect. I actually dropped the model on the floor and the
rigging prevented a lot of damage to masts and shrouds. Cotton thread was soaked
in diluted PVA and then dried to simulate the slack of the ropes though their
own weight.
The rigging
is a coarse simulation of the real thing. It is quite amazing how operational
the rigging is. Once I had figured out which rope did what in holding the masts
and and the yardarms in position and applied that knowledge the I was
astonished to see the effect. I actually dropped the model on the floor and the
rigging prevented a lot of damage to masts and shrouds. Cotton thread was soaked
in diluted PVA and then dried to simulate the slack of the ropes though their
own weight.
| COLORS & MARKINGS |
For the coloring I researched web pages about
typical surface coatings from 300-400 years ago. Bright colours like red and
yellow were sourced from minerals and some plants, and where obtainable in those
days, but very expensive. Blue was almost non existent. The use of bright
colours was mostly restricted to figureheads in those days. There are quite a
number of contemporary (mostly Dutch) maritime oil paintings that show typical
paint jobs of the time.
I applied an undercoat of Revell enamel medium grey and then used I used artists
acrylics for the painting. Careful application of washes and dry brushing as
well as a mix of opaque layers with transparent washes are possible at little
cost as one can mix minute amounts of paint that does not change in hue when
drying.
| CONCLUSIONS |
All in all it was an interesting journey into the past of modelling, my own and that of the industry as it was then.
| REFERENCES |
Greg Ewald reviewed this kit before for this website and was less than complimentary.
22 February 2019
Copyright ModelingMadness.com
If you would like your product reviewed fairly and fairly quickly, please contact the editor or see other details in the Note to Contributors.
Back to the Main Page Back to the Review Index Page Back to the Previews Index Page