AMT/ERTL 1/1400 Enterprise C
| KIT #: | 80001 |
| PRICE: | @$30.00 in 1999 |
| DECALS: | One option |
| REVIEWER: | Donald Zhou |
| NOTES: | Advantages: Well detailed, simple, and easy to set up for lighting. Disadvantages: decals incomplete, some fit issues and no Aztec paint pattern provided. Glow in the dark paint used |
| HISTORY |
Space, the final frontier. These are the voyages of the star ship enterprise. Its continuing mission, to explore strange new worlds, to seek out new life and new civilizations. To boldly go where no one has gone before.
The
Federation starship USS Enterprise, NCC-1701-C was an Ambassador Class starship
launched approximately 2332 with Captain Rachel Garret commanding. She was the
fourth ship to bear the name of
 the Enterprise, preceded by the Enterprise-B, an
Excelsior class starship and succeeded by the Enterprise-D, a Galaxy class. Not
much is known about the ship except that it participated in the Battle of Narendra III and sacrificed herself and crew to defend the Klingon outpost and
in the process, won the admiration of the Klingons and cemented the peace
between the Empire and the Federation. What is not known was that during the
battle, a temporal rift opened and the Enterprise-C went into it and met an
Enterprise-D from an alternate universe where the Federation was losing a war
against the Klingon Empire. The start of that war was the Enterprise-C’s
“incursion and attack” of the Narendra outpost. The Enterprise-D was able to fix
the Enterprise-C and then fend off three Klingon K’Vort Class Bird of Preys.
Once returning to its own time, the timeline reset to the original timeline.
the Enterprise, preceded by the Enterprise-B, an
Excelsior class starship and succeeded by the Enterprise-D, a Galaxy class. Not
much is known about the ship except that it participated in the Battle of Narendra III and sacrificed herself and crew to defend the Klingon outpost and
in the process, won the admiration of the Klingons and cemented the peace
between the Empire and the Federation. What is not known was that during the
battle, a temporal rift opened and the Enterprise-C went into it and met an
Enterprise-D from an alternate universe where the Federation was losing a war
against the Klingon Empire. The start of that war was the Enterprise-C’s
“incursion and attack” of the Narendra outpost. The Enterprise-D was able to fix
the Enterprise-C and then fend off three Klingon K’Vort Class Bird of Preys.
Once returning to its own time, the timeline reset to the original timeline.
| THE KIT |
 I bought
this kit in 1999, in its original 1999 AMT/Ertl configuration. This means no
battle damage decals (something that AMT should have included in the first place
since the only time we saw the ship was damaged) and no corrections to some
detail discrepancies. The original version for example, the edge of the saucer
section have separation lines. These lines on the original version was way
overemphasized and too prominent. Other than that though, the kit also included
parts for later version of the Ambassador class, including the Yamaguchi (The
marking of which is now included in the Round-2 version of the Enterprise-C.
Previously, the Yamaguchi kit was sold separately). Other than that, there is
really nothing to describe…..These kits are the simplicity of easy. Only some 20
parts are in the box.
I bought
this kit in 1999, in its original 1999 AMT/Ertl configuration. This means no
battle damage decals (something that AMT should have included in the first place
since the only time we saw the ship was damaged) and no corrections to some
detail discrepancies. The original version for example, the edge of the saucer
section have separation lines. These lines on the original version was way
overemphasized and too prominent. Other than that though, the kit also included
parts for later version of the Ambassador class, including the Yamaguchi (The
marking of which is now included in the Round-2 version of the Enterprise-C.
Previously, the Yamaguchi kit was sold separately). Other than that, there is
really nothing to describe…..These kits are the simplicity of easy. Only some 20
parts are in the box.
| CONSTRUCTION |
As I’ve said, Star
Trek kits are the simplicity of easy. Constructions can be construed from
memory…It is that easy! Assemble the top and bottom of the saucer, add in the
lower sensor dome (clear) and viola, saucer section done! Lower hull
construction went as: Assemble the two halves of the lower hull, add in the
navigational deflector dish (p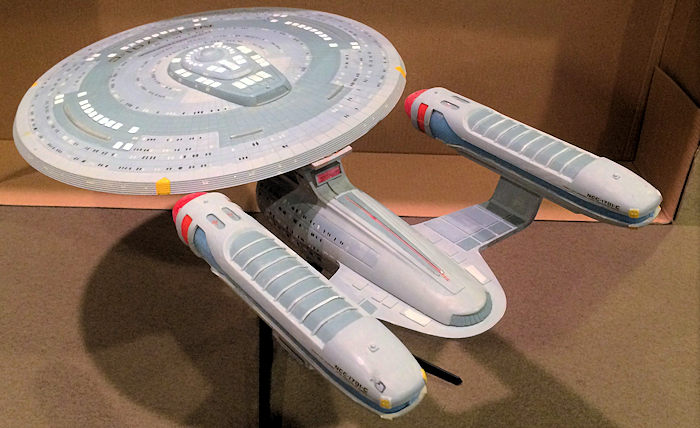 ainted light sky blue on the inside), add the two phaser strips for the warp nacelle pylons and add in the impulse exhaust
deflector (clear piece, red on the inside). Done! Warp nacelles went like: paint
the bussard ram scoops red on the inside, add into the front of the nacelles,
paint the Bussard scoop connector orange, paint the two clear warp expeller
pieces light sky blue on the inside, attach them to the nacelle and then add the
top nacelle parts….Done! And there you go, all the major assembly done! The only
problems are the seams. This kit just does not fit well and I had to use auto
spot glazing and Squadron White putty to patch up the seams. There are two
really nasty ones between the warp expeller and the nacelle. At that time, I do
not know how to seal it (These days, I just reach for my superglue, nail file,
and then Testor’s clear glue) and left it as it is. The rest was patched up and
then painting can begin! Took me only a day to complete all the major assemblies
and 14 hours of that was waiting for the putty to dry plus the sanding session!
ainted light sky blue on the inside), add the two phaser strips for the warp nacelle pylons and add in the impulse exhaust
deflector (clear piece, red on the inside). Done! Warp nacelles went like: paint
the bussard ram scoops red on the inside, add into the front of the nacelles,
paint the Bussard scoop connector orange, paint the two clear warp expeller
pieces light sky blue on the inside, attach them to the nacelle and then add the
top nacelle parts….Done! And there you go, all the major assembly done! The only
problems are the seams. This kit just does not fit well and I had to use auto
spot glazing and Squadron White putty to patch up the seams. There are two
really nasty ones between the warp expeller and the nacelle. At that time, I do
not know how to seal it (These days, I just reach for my superglue, nail file,
and then Testor’s clear glue) and left it as it is. The rest was patched up and
then painting can begin! Took me only a day to complete all the major assemblies
and 14 hours of that was waiting for the putty to dry plus the sanding session!
| COLORS & MARKINGS |
Since this
kit was done when I was still a model young on, without any airbrush (parents
won’t get me one…..What was their words….oh yes, “there is no way we will allow
you to change a “handgun” for an “artillery piece”! Sigh, how’s that song go,
“parents just don’t understand?”), I have to hand paint it….As it turn out, like
my Enterprise-D kit, hand paint is the only way to go. Now, the instructions
would like you to paint the model with a base paint of Light Grey…This is too
light in my opinion. By this time, I’ve watched “Yesterday Enterprise” so many
times (yes, I’m a Trekker) I know the color by heart. The paints I went with to
tone the “lightness” up was light ghost grey, dark ghost grey and medium grey
with gunship
 grey for details (mostly for the phaser strips).
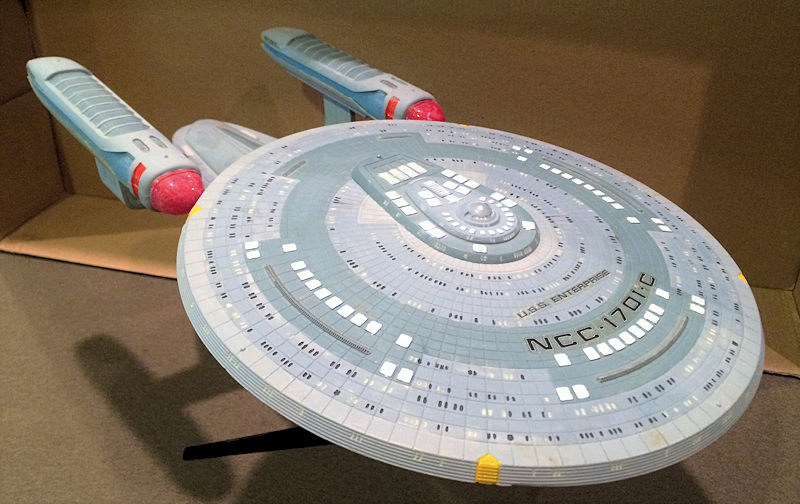
Now, the instruction do give you the major paint detail demarcation lines. However, the Aztec details are missing. All Star Trek ships since the Enterprise Refit carry a multi-hued pattern called Aztec paint scheme. These days, aftermarket companies make plenty of Aztec decals for the various Federation starships so you can buy them. At that time though, I didn’t know and didn’t bother. I just followed the paint instruction and paint it accordingly. Light ghost grey for Light grey, dark ghost for the next lightness color etc. Afterwards, after all the major greys are on, I painted the life boats white, the phaser strips gunship grey and the thrusters yellow.
The most tedious paint job of them all, as with any Federation starship models are the windows. I chose black for rooms that have lights off and in a spot of the moment while on a trip to the local model shop, I spotted a bottle of glow in the dark paint! I bought it to add a little extra to the model for the windows with the lights on.
 The pattern
was haphazard and random. I started with the flat black first and applied it to
those windows I want “off”, and then with the glow in the dark paint, painted on
to the remaining windows as “on”. I also slobber it onto the bussard ram scoops,
the warp expellers and the navigation deflector dish for some extra oomph! It
took me a week to complete all of the window, the most time consuming part of
this project. With that done, time to finish this thing.
The pattern
was haphazard and random. I started with the flat black first and applied it to
those windows I want “off”, and then with the glow in the dark paint, painted on
to the remaining windows as “on”. I also slobber it onto the bussard ram scoops,
the warp expellers and the navigation deflector dish for some extra oomph! It
took me a week to complete all of the window, the most time consuming part of
this project. With that done, time to finish this thing.
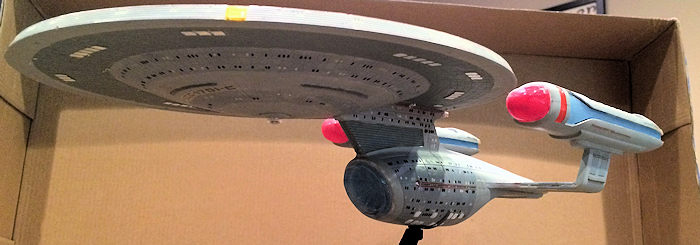
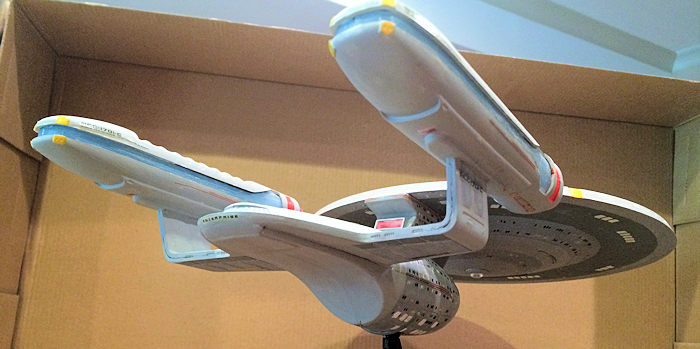
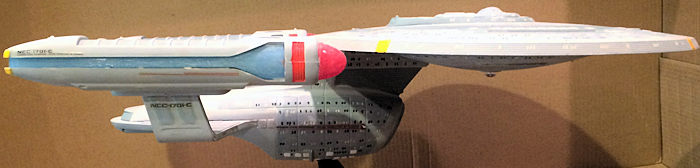
Final construction consists of putting all the major subassembly together, which was easy. Just do be careful when mating the saucer section to the neck. I found out that the neck tends to knock the saucer section to the right. I found out only after the cement was dried so I can’t fix this model now. Don’t know what the round-2 version is like but do correct it if you are building it. That’s it, the model is done! The final piece of equipment is the display stand. This consists of two pieces and look good when finished.
| CONCLUSIONS |
This model,
along with the Enterprise-D and E have been sitting in a box since I graduated
from college (GO BBBUUUCCCKKSSS!!!). Again, can’t thank the friend who kept that
box in his basement for the past 15 years or so while I was on an adventure to
California, then China, then met my wife then have two sons before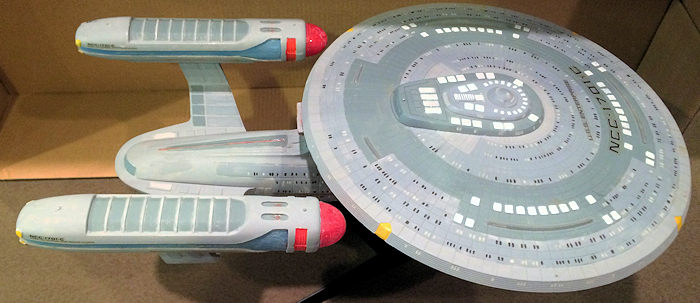 coming back
States side enough about this. You can imagine what it was like when I opened
the box and saw this thing…..Bring back so many memories when I was a young on
doing all of this without an airbrush and is a great example of what happens
when you are young! The only thing missing is the display stand. That was lost
unfortunately. Fortunately, after getting both of my Tamiya 1/32 Corsairs, I
promptly stole one of the display stand and then grafted onto the model! The
display stand insertion point is slightly larger and required me to dremel it to
size and use super glue. But in the end it works and that’s what counts! Star
Trek models are a great starting point for anyone who wants to start this hobby
or is getting back into it. They are not hard to assemble, just need some skills
with the painting and especially some patience when painting the windows.
Otherwise it is highly recommended!
coming back
States side enough about this. You can imagine what it was like when I opened
the box and saw this thing…..Bring back so many memories when I was a young on
doing all of this without an airbrush and is a great example of what happens
when you are young! The only thing missing is the display stand. That was lost
unfortunately. Fortunately, after getting both of my Tamiya 1/32 Corsairs, I
promptly stole one of the display stand and then grafted onto the model! The
display stand insertion point is slightly larger and required me to dremel it to
size and use super glue. But in the end it works and that’s what counts! Star
Trek models are a great starting point for anyone who wants to start this hobby
or is getting back into it. They are not hard to assemble, just need some skills
with the painting and especially some patience when painting the windows.
Otherwise it is highly recommended!
7 November 2016
Copyright ModelingMadness.com If you would like your product reviewed fairly and fairly quickly, please contact the editor
or see other details in the
Note to
Contributors.