AMT/Ertl 1/1400 NCC-1701-D USS Enterprise
| KIT #: | 6676 |
| PRICE: | $19.00 in 1989 |
| DECALS: | One option |
| REVIEWER: | Donald Zhou |
| NOTES: | Advantages: Well detailed, simple, and easy to set up for lighting. Disadvantages: decals incomplete, some fit issues and Azetec paint scheme extremely complex |
| HISTORY |
Space, the final frontier. These are the voyages of the star ship Enterprise. Its continuing mission, to explore strange new worlds, to seek out new life and new civilizations. To boldly go where no one has gone before.
The Federation starship USS Enterprise,
NCC-1701-D was a Galaxy Class starship launched approximately 2364 with Captain
Jean-Luc Picard commanding. She was the fifth ship to bear the name of the
Enterprise, preceded by the Enterprise-C, an Ambassador class starship and
succeeded by the Enterprise-E, a Sovereign class battleship. During its 7 year
career, the
 Enterprise-D became a legend, serving as the Federation flagship and
in the process, discovered numerous beings and served as negotiations site for
several treaties. These beings include the omnipotent “Q” and the malevolent
Borg, which became the num. 1 threat to the Federation and the entire Alpha
Quadrant.
Enterprise-D became a legend, serving as the Federation flagship and
in the process, discovered numerous beings and served as negotiations site for
several treaties. These beings include the omnipotent “Q” and the malevolent
Borg, which became the num. 1 threat to the Federation and the entire Alpha
Quadrant.
She was also involved in several conflicts, the most famous which was battle of earth, which she saved the planet from the Borg after the devastating battle of Wolf 359. She was so badly damaged during this battle that she required five weeks of refit at Earth Station McKinley, during which she received upgrades to her phaser arrays and others. And there was also the ad hoc blockade of the Klingon home world during its Civil War, in the process, it was discovered (by Data, on the Sutherland, a Nebula class starship) that the Romulans was aiding the House of Duras, which succeeded in altering the course of the war in favor of Chancellor Gowron.
Speaking of Romulans, she also engaged with the conniving and reclusive species several times, up and including near engagements at Galondon Core and then prevented a Romulan conquest of Vulcan.
 The ship was destroyed at Viridian III
after the notorious Duras sisters figured out her shield frequency. Before Data
and Riker figured out they can cause their Bird of Prey to cloak and fire a pack
of photon torpedoes at it, destroying it, the ship suffered ship wide damage
that caused a warp core breach. After the saucer section separated from the
secondary hull, it crashed on the planet, necessitating a complete loss (PLOT
HOLE ALERT! PLOT HOLE ALERT!!! Why couldn’t they just eject the warp core out
into space? All Federation ships have a hatch that contain the warp reactor for
this occasion. In fact, it is marked clearly on the model itself. Why? Simple.
The ship was complex due to its saucer separation capability. The model built
for it necessitated both the saucer and engineering hull having their separate
light and power source, making it patootey to move and film. The crews hated it
and destroyed it at the first chance they got!).
The ship was destroyed at Viridian III
after the notorious Duras sisters figured out her shield frequency. Before Data
and Riker figured out they can cause their Bird of Prey to cloak and fire a pack
of photon torpedoes at it, destroying it, the ship suffered ship wide damage
that caused a warp core breach. After the saucer section separated from the
secondary hull, it crashed on the planet, necessitating a complete loss (PLOT
HOLE ALERT! PLOT HOLE ALERT!!! Why couldn’t they just eject the warp core out
into space? All Federation ships have a hatch that contain the warp reactor for
this occasion. In fact, it is marked clearly on the model itself. Why? Simple.
The ship was complex due to its saucer separation capability. The model built
for it necessitated both the saucer and engineering hull having their separate
light and power source, making it patootey to move and film. The crews hated it
and destroyed it at the first chance they got!).
After its destruction, the crew was then transferred to a
new Sovereign class warship named NCC-1701-E USS Enterprise
| THE KIT |
 I bought this kit in 1990, in its
original 1989 AMT/Ertl configuration. These days, finding this kit is well, good
luck! The only kit of this left is the 1994 Testor’s “Complete Edition” with
cement and several small bottle of paints. And those are all going for upwards
of $90 a pop if not more! In fact, this ship was the second I bought after I
messed up the first one. Like any Star Trek kits, this kit is the simplicity of
easy, contain no more than 40 parts and it’s easy to assemble due to the lack of
small parts.
I bought this kit in 1990, in its
original 1989 AMT/Ertl configuration. These days, finding this kit is well, good
luck! The only kit of this left is the 1994 Testor’s “Complete Edition” with
cement and several small bottle of paints. And those are all going for upwards
of $90 a pop if not more! In fact, this ship was the second I bought after I
messed up the first one. Like any Star Trek kits, this kit is the simplicity of
easy, contain no more than 40 parts and it’s easy to assemble due to the lack of
small parts.
| CONSTRUCTION |
As I’ve said, Star Trek kits are the simplicity of easy. The only thing you need to do before construction is to decide to build either a complete ship or separated, with the saucer and engineering sections on their own display stand. I chose the former.
Constructions can be construed from
memory…It is that easy! Saucer section went as, put the top and bottom half
together. Careful that the lower section backs completely into the rear end
slot. I goofed on the first one and the saucer section went sideways. Insert the
bridge module section and the clear bridge dome. This is basically the only
small part of the kit. Cement the two clear impulse impellers, painted red from
the inside since they are clear. The next part is decision. If you want to
display the saucer separate, then assemble the “Captain’s Yacht” and p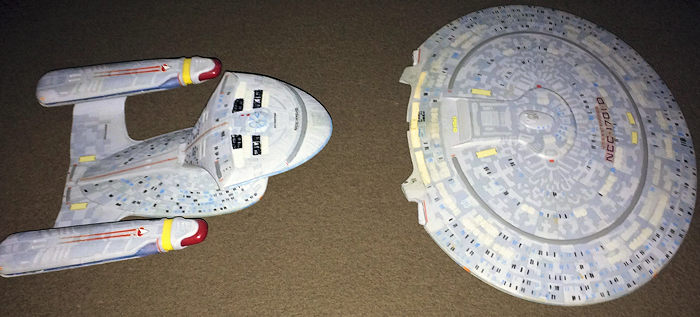 ut it on
the saucer display stand. If not, then just cement it into its slot (which serve
as the display stand insertion point). Cement in the main shuttle bay door.
Saucer done!
ut it on
the saucer display stand. If not, then just cement it into its slot (which serve
as the display stand insertion point). Cement in the main shuttle bay door.
Saucer done!
Secondary hull, assemble the three piece neck together and cement it onto the top hull. Cement the clear navigation deflector dish housing, painted red on the inside since its clear, and then cement on the dish itself, painted red on the inside, and blue strip for details. Insert the bottom hull and then insert the main tractor beam emitter along with the clear main impulse impeller and the secondary and third shuttle bay doors. Secondary hull done.
Warp drives went as, paint the bussard ram scoop red on the inside and the warp expellers light sky blue since both are clear. Cement the scoops into the front housing and then the separate expellers on the bottom before closing them with the top. Warp drives done!
The only problem once again, are the seams. The kit is actually pretty tight fitting except the three piece neck section due to its complex shape. This left plenty of seams to tackle, which I fixed using red spot glazing and Squadron white. Again, the assembly took me only 2 hours. The rest of the day was waiting for the putty to dry and the sanding session.
| COLORS & MARKINGS |
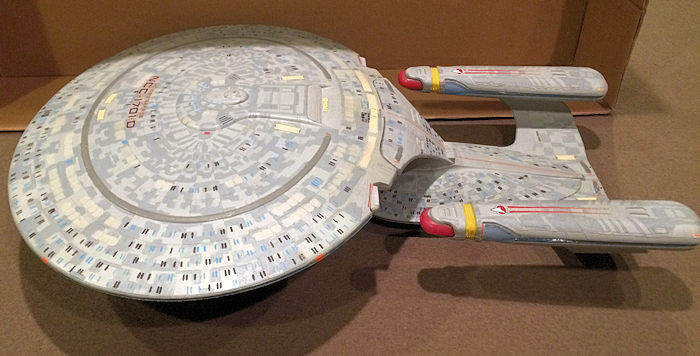
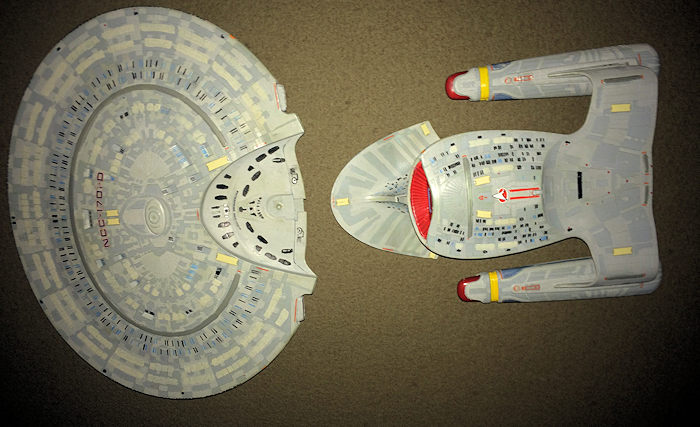
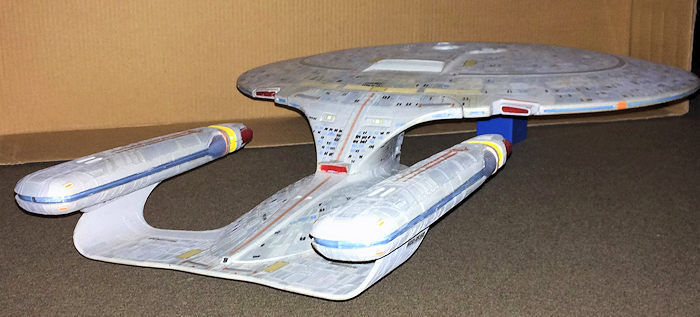
Like the Enterprise-C, this model was hand painted. There is just no way around it since the entire Aztec paint scheme was provided and the demarcation lines is marked on the kit itself. One look at the paint diagram and I assure you you will get your eyeballs crossed. Trust me, it is that complex! In fact, reading several modeling magazines about people who built this kit, every one of them acknowledged an airbrush is useless. Several people tried to mask the kit and gave up quickly after getting their eyes into a jumbled mess! As you can see from the photos, the Aztec paint scheme is quite complex.
The color selection in my opinion, is
wrong! It’s defiantly not blue grey and duck egg blue. The duck egg blue
especially is too light. After playing around with the color on my first kit,
including silver, radome tan, and several other shades of grey (yes, I was young
and dumb then), I totally destroyed the kit an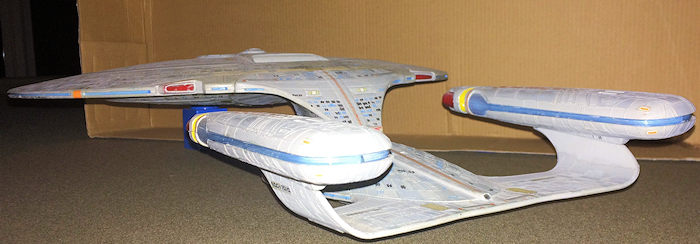 d tossed it. For my second one, I
simply settle down to my go to, light ghost grey and dark ghost grey for the
Aztec and dark gull grey for the phaser strips.
d tossed it. For my second one, I
simply settle down to my go to, light ghost grey and dark ghost grey for the
Aztec and dark gull grey for the phaser strips.
Painting started with the light ghost grey. I can only paint two hours before my eyes started to get crossed. It was a PITA and took me a week to finish everything.
Detail painting included radome tan for the life boats, dark gull grey for the phaser strips, light sky blue for the sensor strips and various paints for the battle bridge section. Now, the second PITA part of the kit, the windows. For the lights “off” windows, I used flat black. For windows that’s “on”, I used light sky blue. It took another week to finish the windows after which my young eyes was screaming!
| FINAL BITS |
 Final construction consists of putting
all the major subassembly together, which was easy. Again, a decision needs to
be made on whether to keep the ship separated or together. I decided to keep the
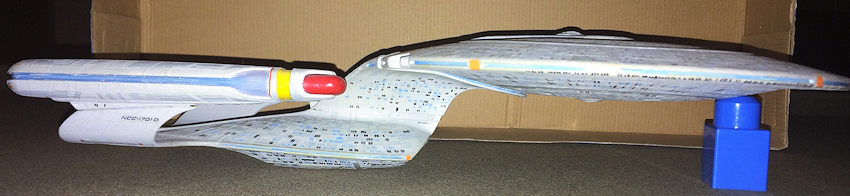
ship separated and together by not cementing the saucer to the battle bridge.
This of course, meant the good looking display stand is out, hence why the ship
is supported by that Megablock in the pictures. Decal sections are not complete
but all the major registration numbers and hull signs are there, including that
blasted warning signs to denote the fact the warp reactor’s hatch can be blown
off and the warp core can be ejected!!!!! Again, major plot hole is a major plot
hole for Star Trek: Generations! I think you can get the complete decals now
from third-parties.
Final construction consists of putting
all the major subassembly together, which was easy. Again, a decision needs to
be made on whether to keep the ship separated or together. I decided to keep the
ship separated and together by not cementing the saucer to the battle bridge.
This of course, meant the good looking display stand is out, hence why the ship
is supported by that Megablock in the pictures. Decal sections are not complete
but all the major registration numbers and hull signs are there, including that
blasted warning signs to denote the fact the warp reactor’s hatch can be blown
off and the warp core can be ejected!!!!! Again, major plot hole is a major plot
hole for Star Trek: Generations! I think you can get the complete decals now
from third-parties.
| CONCLUSIONS |
This model, along with the Enterprise-E and C have been sitting in a box since I graduated from college (GO BBBUUUCCCKKSSS!!!). Again, can’t thank the friend who kept that box in his basement for the past 15 years or so while I was on an adventure to California, then China, then met my wife then have two sons before coming back States side enough about this. You can imagine what it was like when I opened the box and saw this thing…Especially this since this was my first Star Trek model…..Bring back so many memories when I was a young on doing all of this without an airbrush and is a great example of what happens when you are young! And even today, it draws attention from trekkers and non-trekkers alike. Non-trekkers may not recognize the C or E or B, but they will recognize the original ship along with this. Especially a fellow coworker who is a huge Star Trek fan. He had to take a pic with this and my 1/350th scale –A! This is especially good for him since this kit is long out of production except the Round 2 all clear version….Which is also hard to come by now.
Star Trek models are a great starting point for anyone who wants to start this hobby or is getting back into it. They are not hard to assemble, just need some skills with the painting and especially some patience when painting the windows. Otherwise it is highly recommended….If you can find one!
15 December 2016
Copyright ModelingMadness.com
If you would like your product reviewed fairly and fairly
quickly, please
contact
the editor or see other details in the
Note to
Contributors. Back to the Main Page
Back to the Review Index Page
Back to the Previews Index Page