Polar Lights Jetson's Car
 The Golden Age of Television Cartoons gave us the Jetsons in 1962. It gave us a
comical look at what the possibly not all that distant future might be like. It
was the first program to be broadcast in color on ABC, and like another Hanna
Barbara cartoon, The Flintstones, it was originally aired in prime time.
The Golden Age of Television Cartoons gave us the Jetsons in 1962. It gave us a
comical look at what the possibly not all that distant future might be like. It
was the first program to be broadcast in color on ABC, and like another Hanna
Barbara cartoon, The Flintstones, it was originally aired in prime time.
Twenty-four episodes were created in its original run and it would continue to
rerun on Saturday mornings into the next decade and is still in syndication
today. In the mid-1980’s a new series was created for syndication with
most of the original voice actors returning and another fifty-one episodes being
created along with an animated film. There has been talk of a live action film
or series for some years now, though nothing has yet materialized.
While clichéd in its own way and now anachronistic in some of the ideas
presented or the manner in which they were depicted, the show really did predict
the future in some ways with computers becoming more and more integrated into
daily life, instant food products, an increasingly “pushbutton” society, video
chat, remote learning, robots (even robot “maids” in the from of Roomba and
similar devices), and more. Some of these things may not look the same or be the
same in form or function, yet they have actually become a part of our modern
society for better or worse. Unfortunately, or perhaps fortunately, their iconic
flying car is something that had not yet materialized, though more and more
companies seem to be taking a serious look at the idea. That is the subject of
this review.
Released by Polar Lights in 2001, the kit consists of only around twenty parts
including the Jetson family figures. I loved the Jetsons as a child and
initially was interested in the kit for its nostalgic novelty. However, not
being a figure modeler, I was a bit concerned about this aspect of such a build,
feeling that I would likely disappoint myself.
 That
changed when I saw one in an open box at an IPMS model show and saw the figures
of the Jetson family were fully assembled, pre-painted vinyl figures, including
the loyal family mutt Astro. I had just about decided to purchase the kit that I
was looking at when I my number was called during the raffle, and low and
behold, I won one. Deciding that it must be fated for me to build it, I happily
collected it and brought it home.
That
changed when I saw one in an open box at an IPMS model show and saw the figures
of the Jetson family were fully assembled, pre-painted vinyl figures, including
the loyal family mutt Astro. I had just about decided to purchase the kit that I
was looking at when I my number was called during the raffle, and low and
behold, I won one. Deciding that it must be fated for me to build it, I happily
collected it and brought it home.
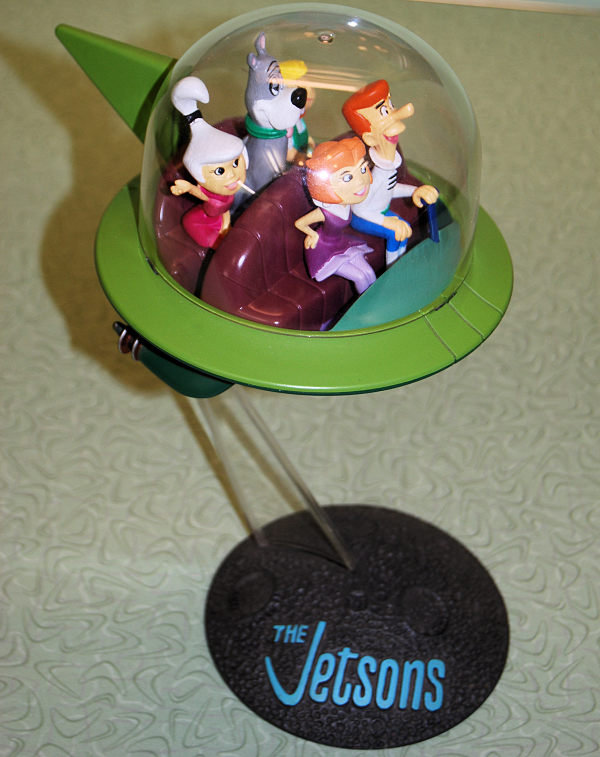
The parts are very minimal and simple, but well molded in apple green plastic,
and designed fro snap fit. There were upper and lower hull halves of the
saucer/bubble car, a large clear plastic bubble dome, seats, and some external
parts for the exhaust for field generators, propulsors, or whatever they were.
You get a tall clear stand and base with detail to look like and asteroid or
moon, replete with craters, emblazoned “the Jetsons” it in raised letters
matching the television logo. There is also a part for and exhaust cloud of some
sort to be placed at the back of the vehicle. However, I have rarely seen this
used on completed model. I have it some thought, but did not like the look and
discarded it. The only one that I have seen that look good with this part was a
photo on the internet where someone had taken this clear part and dipped it in
something glossy, probably Future and then added it. Has I thought of this at
the time, I might have gone this route.
The evening that I acquired the kit, realizing that it would be a quick and
simple build, I dove into it. The first thing that I did was get out my dvd set
of the original Jetsons series and put it on in my shop to set the mood and to
get a look at how to paint it. As far as the interior of the machine is
concerned, I quickly noticed that there is no right or wrong to painting it.
The interior color is not consistent throughout the series. Sometimes it is more
of a brown, other times more magenta, as well as some other colors that I
noticed. I chose to mix and match it a little. For the interior carpet area and
seats, I went with magenta. Being primarily a military aircraft, ship, and real
spacecraft modeler, this was not something that I had on hand, though I had the
makings of it. Knowing that this was something that I would never be using
again, I simply mixed it up from Testors Purple, Tetsors Dark Gloss Red, and
splashes of Gloss White until I had a color that I was satisfied with and
sprayed it on.
 The “dash pad” that is molded into the upper hull was then painted in Tamiya X-5
Green. The control stick I often see painted in either green or silver. However,
while not the same shape as the one from the television show, the color show for
this in the show is the on consistency: always black. In this case it would be
Tamiya Flat Black.
The “dash pad” that is molded into the upper hull was then painted in Tamiya X-5
Green. The control stick I often see painted in either green or silver. However,
while not the same shape as the one from the television show, the color show for
this in the show is the on consistency: always black. In this case it would be
Tamiya Flat Black.
Now, with these first parts dry, the actual assembly would begin. All of the kit
parts were cleanly molded and required only some cleanup with an X-acto. The kit
is a snap together affair and the snap fit actually works on this one, mostly.
There were two areas that I had to use actual gluing in and a couple where I
chose to err on the side of caution.
The control yoke-stick-thing snapped in place in the floor board. Then I turned
may attention to the tail empennage. The triangular part snapped together, but
with a visible gap and seam that was filled with CA glue and snaded smooth. The
lower propulsor units also were glued together, smoothed out and glued in place
rather than relying on the snap fit.
I was going to gamble on the hull fitting as planned, so I set about painting
it. The entire lower hull was sprayed in Tamiya X-5 green. While this dried, I
masked off the dash pad and sprayed the upper hull in Testors Apple Green as
well as the vertical fin. One everything was dry, I mated the two sections
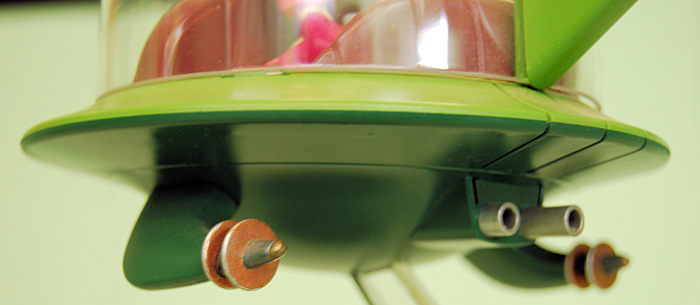
together and found that I had a very positive and clean join. I then painted and
accented the rings and tips of the propulsor units on either side with several
metallizers (Testors Aluminum, Steel, Copper, and Brass) until they “popped”
enough to satisfy me. The exhaust ports were painted in Testors Aluminum.
I could tell that this was going to be very top heavy on the tall stand. To deal
with this, I glued a 4oz. spoon shaped surf fishing sinker in the hollow of the
base with five-minute epoxy. When this was dry, I sprayed the asteroid section
of the base in Testors Flat Grey. One dry followed up with a heavy wash of
Tamiya Flat Black in denatured alcohol to accent the pockmark craters. The clear
support was fitted in place and given some thick CA glue for good measure.
 While the
lettering on the show credits are shown in white, and usually depicted as such
on this display base, I had some Model Master Turquoise that I wanted to use for
this. This was brushed on the raised letters by hand and I think that the color
gives it a nice look appropriate to the period from which the Jetsons hails.
While the
lettering on the show credits are shown in white, and usually depicted as such
on this display base, I had some Model Master Turquoise that I wanted to use for
this. This was brushed on the raised letters by hand and I think that the color
gives it a nice look appropriate to the period from which the Jetsons hails.
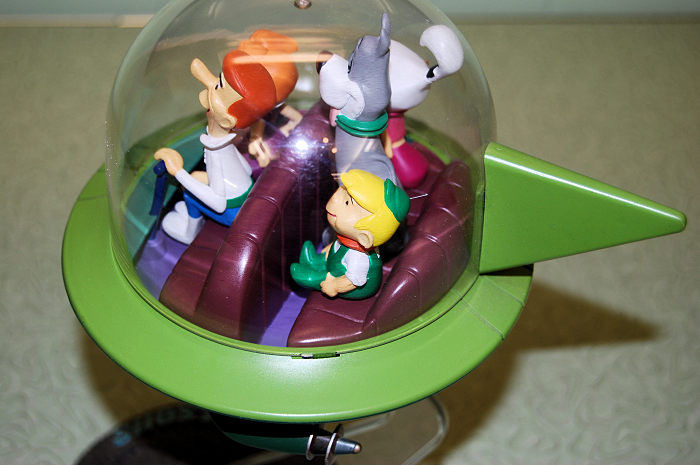
Now I unbagged the figures of the family and put a small drop of glue on each to
ensure that they would stay in place on their mounting points. The only addition
that I made was adding a small piece of silver music wire to the back of Elroy’s
cap, as this antenna (actually more complex, with rings) can always be seen on
the show.
The clear bubble is nicely molded, but does have a mold mark dead center at the
top, though since it is dead center, it looks as though it is supposed to be
there. I addressed this by gluing a little whip antenna to it, though this keeps
coming off and getting lost. In retrospect, I should have given the whole thing
a dunk in Future, but only cleaned mine up with Windex initially. (I may give it
the Future treatment, maybe right after I finish this even. And fit a new whip
antenna!)
It is
designed with twist lock mounts that work quite well, but allow it to be removed
easily if one wishes. All that I had to do was snap the tail into the slot, give
it a twist, and it was done! Meet George Jetson!......
This is a nicely molded, very simple kit that can be completed satisfactorily,
without painting in less than an hour due to its excellent design, layout, and
construction plan. It would make a great introductory kit for that fledgling
junior modeler. It can also be detailed with just a little work and really
stands out.
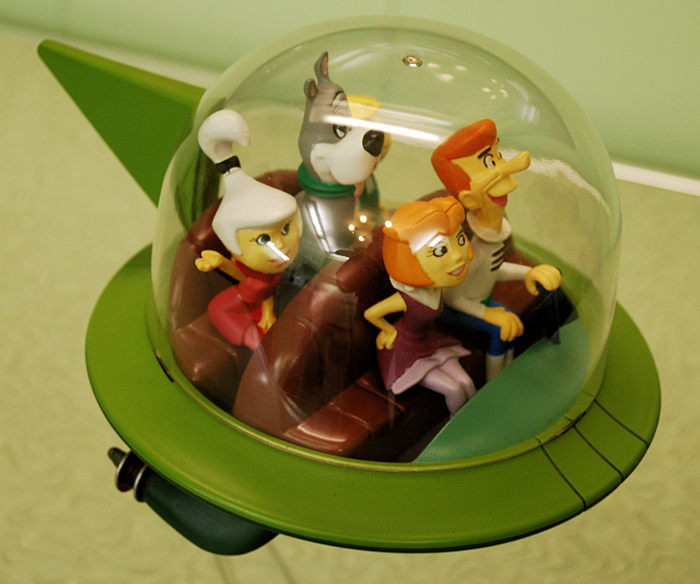
As for why Polar Lights no longer issues it with the entire lineup of Jetsons
family figures is a bit of a mystery. To me, while still presentable, the car
looks a bit empty with only George and Astro. Jane, Judy, and Elroy add a great
deal of splashy color to the model really compete the vibe. I hope that they
will once again be included in future releases.
While I did not time this build, It was finished over the course of one evening.
I would estimate that there was no more than two hours, and actually working
time probably something in the order of minutes rather than hours. It was simple
and fun, which we do not get enough of in this hobby these days.
The Jetsons -
Wikipedia
Christopher
Campbell
8 November 2022
Copyright ModelingMadness.com. All rights reserved. No
reproduction in part or in whole without express permission.
If you would like your product reviewed fairly and
fairly quickly, please
contact
the editor
or see other details in the
Note to
Contributors.
Back to the Main Page
Back to the Review
Index Page
Back to the Previews Index Page