| KIT #: | 946 |
| PRICE: | ~$30.00 |
| DECALS: | None |
| REVIEWER: | Christopher Campbell |
| NOTES: | Simple kit with good fit, but some parts are brittle |
| HISTORY |
Debuting in 1964 in prime time on ABC. It many ways, it may be the ultimate animated adventure series ever. It features genius scientist-adventurer Dr. Benton Quest, quintessential man of action Race Bannon, Dr. Quest’s son Johnny, the titular character, Hadji, Dr. Quest’s trusted ward and Johnny’s closest friend and sidekick, trusty bulldog bandit and a plethora of villains, exotic locales, and recurring characters, both bad and good. One of them was a former love interest of Race’s, Jezebel Jade, mysterious, exotic, and formidable in her own right.
 The
show had everything. There were robots, real monsters, pterosaurs, all
manner of spies, smugglers, and criminals (including a Nazi war criminal in
on episode), nefarious dilletantes, yetis, Komodo dragons, and all manner of
Cold War super science and gadgets, real or theoretical. They visited
virtually every corner of the globe, the highest mountains, and the depths
of the ocean. Featured in the opening and closing credits and many episodes
was the Quest Dragonfly supersonic transport, flown Race Bannon and Dr.
Quest.
The
show had everything. There were robots, real monsters, pterosaurs, all
manner of spies, smugglers, and criminals (including a Nazi war criminal in
on episode), nefarious dilletantes, yetis, Komodo dragons, and all manner of
Cold War super science and gadgets, real or theoretical. They visited
virtually every corner of the globe, the highest mountains, and the depths
of the ocean. Featured in the opening and closing credits and many episodes
was the Quest Dragonfly supersonic transport, flown Race Bannon and Dr.
Quest.
Its original run was for twenty-six episodes, though it continues to be shown in syndication. It spawned comic books, toys, lunch boxes, adventure story records, and probably things that I am unaware of. There is still, or at least relatively recently merchandise being produced. (Around the same time that this kit was released, I ran across a “Quest Labs” adult jacket, though found it a bit too pricey, no matter how much I wanted it.)
New episodes and television films were produced in the 1980’s and again in the 1990’s. These were updated in style and setting to the era in which they were produced. There was a heavy emphasis on a virtual world that could be entered through a supercomputer. All the main cast returned, a little older. Johnny and Hadji were now in their teens. There was also a new character, Jesse Bannon, daughter of Race, and clearly a chip off the old block.
There have been perpetual rumors of Quest live action film for nearly four decades. This has never materialized and would seem to be eternally in what is known in the film world as “development hell.” If done well, there are doubtless millions who would love to see it. Who knows if we ever will, though? For now, we still have the various series to enjoy while we build our models.
| THE KIT |
 Released in 2014 the kit comes in a top opening box with nice art of the “Questjet”
in flight. It is a relatively simple kit with a well printed instruction
sheet and decals consisting of a simple emblem for the stand. No scale is
given for the kit, though I would say from looking at it that it is in the
1/200 range, perhaps a little bigger or smaller.
Released in 2014 the kit comes in a top opening box with nice art of the “Questjet”
in flight. It is a relatively simple kit with a well printed instruction
sheet and decals consisting of a simple emblem for the stand. No scale is
given for the kit, though I would say from looking at it that it is in the
1/200 range, perhaps a little bigger or smaller.
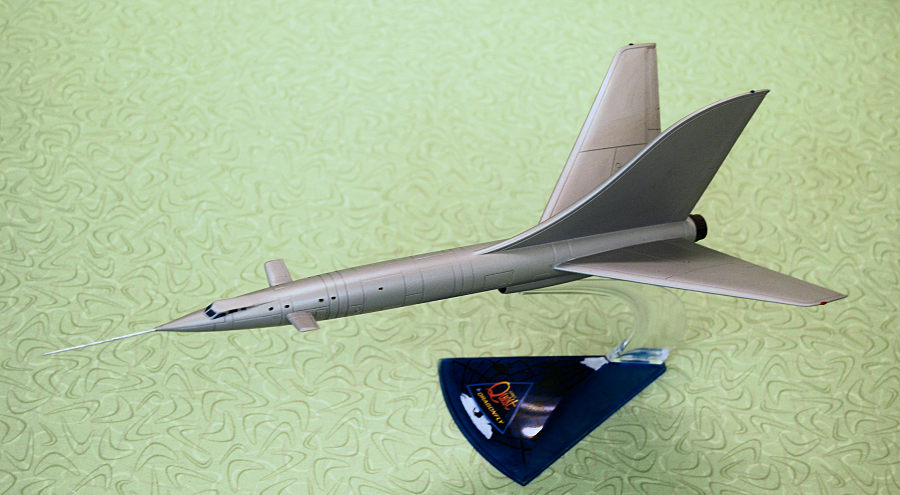
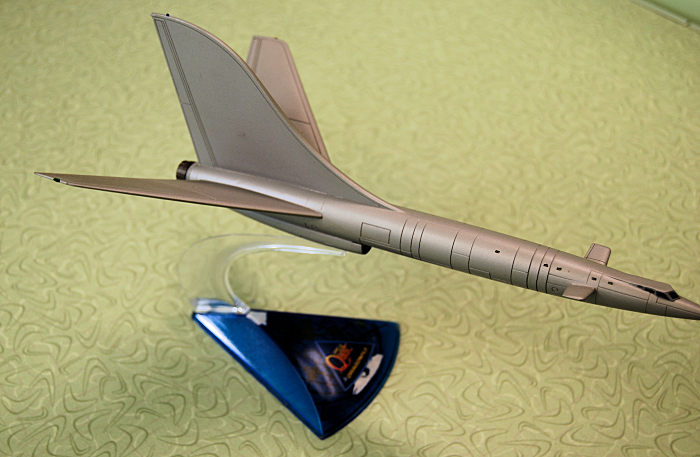
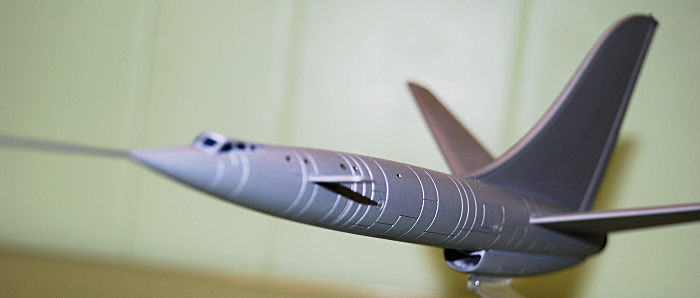
Overall completed length is around twelve inches. Wingspan is just under six inches. The model itself has about a dozen parts molded in a buff color a little paler than most resin. Parts have clean, crisp molding with recessed panel lines. They might be a little deep or overdone for the scale, but who is really to say. The source material is a cartoon, after all.
There is a clear, two-piece stand, a canopy and a clear part for the engine exhaust that can be tinted to give the impression of jet exhaust or afterburner since this is an in-,flight model only. Decals consist of a simple emblem for the stand base.
I made a reference to the color of the plastic being reminiscent of resin. I should also note that I observed some brittleness to a couple of parts that reminded me of it as well. This is by no means a severe fault with the kit, though it is something to be aware of when you prepare to build it.
| CONSTRUCTION |
Usually, I am aware of new model kit releases coming up well in advance. Somehow, this one flew below my radar. This was a period during which I was increasingly having to care for my elderly parents, so my mind was often on other things. I saw it before I even knew that it was being tooled at the Chattanooga IPMS show just after it had been released.
Some of my earliest memories are of watching Johnny Quest on Saturday mornings on a “big” Sears black and white television in our living room in the late 1960’s. It was a gateway to an exotic world of adventure and excitement that has stuck with me today. Race Bannon is, in a manner of speaking, my role model and may have had a hand in making me into an adrenalin junkie. Femme Fatale and sometimes love interest Jade was seemed like the perfect woman. And I, and many boys, wanted to be Johnny Quest, along for the ride. I saw this kit and had to have it.I purchased it and went to work on it the next day.
 This was going to be a simple, easy build. There was no question about that.
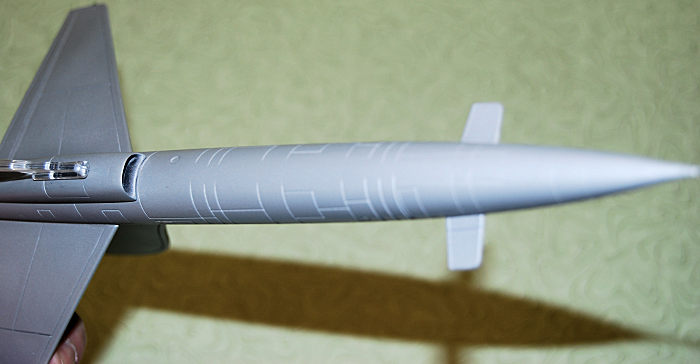
The first thing that I did was remove the fuselage halves and start to open
up the two small slot windows on either side aft of the cockpit. This was
done by drilling them out with a small bit chucked in a pin vise and
trimming with an #11 X-Acto blade. Once completed, the exterior was sanded
lightly with 0000 steel wool. Then the cockpit and exhaust area were sprayed
with Tamiya Flat Black.
This was going to be a simple, easy build. There was no question about that.
The first thing that I did was remove the fuselage halves and start to open
up the two small slot windows on either side aft of the cockpit. This was
done by drilling them out with a small bit chucked in a pin vise and
trimming with an #11 X-Acto blade. Once completed, the exterior was sanded
lightly with 0000 steel wool. Then the cockpit and exhaust area were sprayed
with Tamiya Flat Black.
The fuselage halves were then glued together with gap filling CA glue and proved to need no filling. Seams were cleaned up with some sanding with 400 grit sandpaper followed by 0000 steel wool. The one-piece wings were then attached with the same glue and again no filler was needed, just more of the same to clean up the joint a little. The fit an alignment was very positive and I think that one would almost have to try to misalign the wings, at least in my experience. So, wow! I just put together four parts and the model was nearly done in less than an hour. The is something to be said for enjoying a very easy build sometimes.
I now went to attach the canards on the forwards section of the fuselage and one of them snapped in half at the panel line while I was trimming it with an X-Acto so that the mounting stub would fit into the slot in the fuselage. This came as quite shock, especially since part of it launched itself away from my work bench at the speed of the jet itself, forcing me to search for it for nearly half an hour!
While the plastic had exhibited some minor brittleness, a part of this sort breaking in such a manner was a true first for me. Fortunately, it was a clean break and could be repaired with a little CA glue and sanding. Once this was complete, the canards were finally installed.
Now it was ready to paint. Ironically, the most time-consuming part had been trying to find the missing part of the broken canard!
| COLORS & MARKINGS |
I have seen this kit built up in two different colors: some sort of natural metal or white. In the cartoon it appears white, though I had always thought that the intention was that it was to be seen as depicting a very shiny, very polished natural metal of some sort. That being said, those that I have seen painted in overall gloss white look really cool. The box art is a bit ambiguous as well. It could be either white with shading depicted or natural metal.
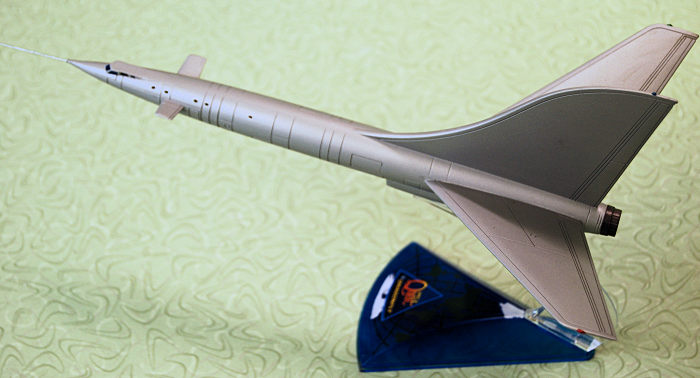
I decided to go with the latter, but decided to mix my own witches brew of metallizer until I liked the shade that I got. I could no longer tell you the exact colors or proportions. However, it went something like this: Model Master Titanium, Model Master Aluminum Plate, Model Master Chrome, Testors, and a few drops of Gloss White. The concoction was put in a paint jar and shaken on my Robart paint shaker until I liked what I saw.
I rubbed the entire model down with a dryer sheet to polish out scratches and blew everything off with the air compressor. The cockpit was stuffed with some wet paper towel bits and my cocktail of metallics was sprayed on with no problem. (There might have even been a little chemical interaction in play on this one. It seemed to dry faster than normal, even for metalizer.
Attention was then turned to the exhaust nozzle. This was painted in mix of Titanium, Burnt Iron and Graphite Black Metallic inside and out. The clear bit to simulate the exhaust flame was given a dusting of Tamiya Clear Red and Clear Orange, a I did not want to tint it too much, given that it was already going to be in a dark location.
 At this point I painted the continents and other global detail on the inside
of the stand base in various colors as seemed appropriate. Once this was
dry, both it and the inside of the canopy were sprayed in Tamiya Clear Blue.
While this was drying, I hand painted the inside of the intake in Tamyia
Flat Black. Then the framing of the canopy was hand painted with the same
paint that I had used on the air frame.
At this point I painted the continents and other global detail on the inside
of the stand base in various colors as seemed appropriate. Once this was
dry, both it and the inside of the canopy were sprayed in Tamiya Clear Blue.
While this was drying, I hand painted the inside of the intake in Tamyia
Flat Black. Then the framing of the canopy was hand painted with the same
paint that I had used on the air frame.
Before attaching it, I filled the small window slots that I had previously cut out with Micro Krystal Clear using a toothpick. Any excess was wiped away and once dry it was also tinted with the same clear blue using a fine brush.
The stand support arm was glued in place with CA glue and the decal was placed in the center of the stand base. This went on cleanly and adhered without any special encouragement, seeming to set itself almost before I could attempt to apply setting fluid. Once certain that it was fully dry, I gave the who stand base a dunk in Future. And set it aside to dry.
The canopy was glued in place using G-S Hypo Watch Crystal Cement. Then the support arm tab was slid into the ventral slot and I could look at the Dragonfly on the stand and see how I liked it. I did, very much. Only a few more things to do.
The kit comes with two long pitot instrumentation booms because they know that you are going to break at least one. I advise using extreme caution removing this, it is VERY fragile. Do not clip anything with sprue nippers. Remove it by scoring with an X-Acto blade handle with care. That was what I did and still managed to break one. I check to see if I gad a good fit, did some very minor trimming at the base, and glued it one with Ca glue. This was also then painted in the same paint as the aircraft.
Red, Green, and Blue running lights were added to the wing tips and tail accordingly using Tamiya Clear Paint and a toothpick. The tiny porthole windows in the fuselage were accented with Tamiya Smoke. After being allowed to dry. The whole thing was shot in a light coat of Future.
| CONCLUSIONS |
This is a very easy kit to build. The only thing that I would fault it for is the brittle nature of the plastic that I noted previously. Otherwise, it is a breeze to build. After seeing some built up in gloss white, I am tempted to repaint it, or perhaps even build another. As I was building this, the idea occurred to be build a second one in white, the decal this one in a “what if” U.S.A.F. paint scheme as a fictional recon platform, a task at which it would likely excel. I would recommend this kit to any fan of the Johnny Quest series, sci-fi models, Cold War era super science, or any excuse to build it. I think the build time on this was no more than three or four hours. Anyone with any modeling experience should be able to complete this over a weekend with ease.
6
December 2022
Copyright ModelingMadness.com. All rights reserved. No
reproduction in part or in whole without express permission.
If you would like your product reviewed fairly and fairly quickly, please
contact the editor or see other details in the
Note to
Contributors.