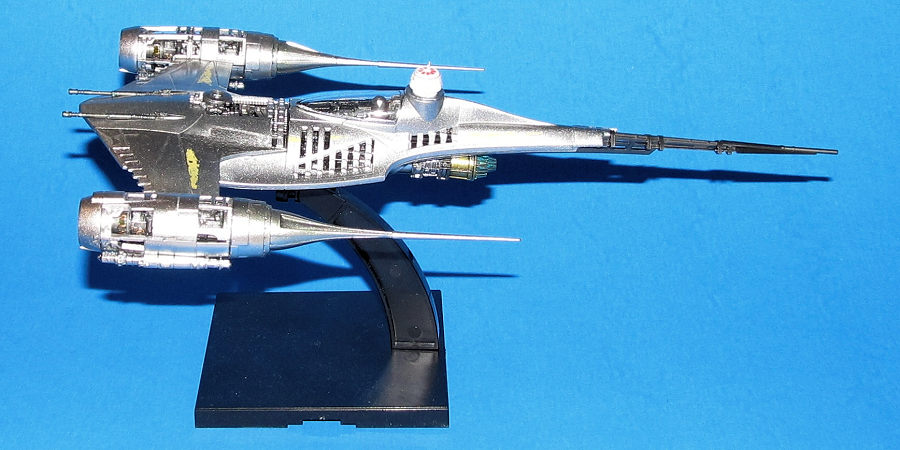
Bandai Mandalorian N-1 Starfighter
| KIT #: | 5069166 |
| PRICE: | $60.00 |
| DECALS: | One option |
| REVIEWER: | Dan Lee |
| NOTES: | Snap kit |
| HISTORY |
 After the
destruction of the Mandalorian’s last ride, the Razor Crest, the Mandalorian aka
Din Djarin needed a new ship that provided the speed and firepower necessary for
his tough dangerous jobs as Grogu’s (aka “Baby” Yoda) babysitter and bounty
hunter.
After the
destruction of the Mandalorian’s last ride, the Razor Crest, the Mandalorian aka
Din Djarin needed a new ship that provided the speed and firepower necessary for
his tough dangerous jobs as Grogu’s (aka “Baby” Yoda) babysitter and bounty
hunter.
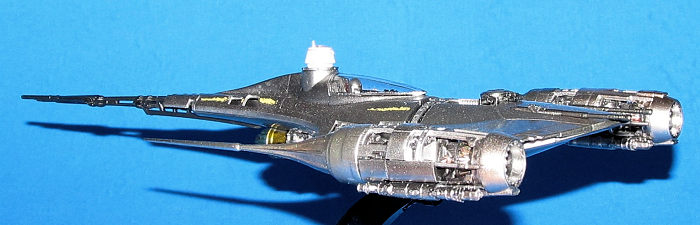
On Tatooine he found it in a hanger on Mos Eisley. It was a cut down heavily modded old Naboo N-1 Starfighter with most of its characteristic yellow paint stripped off as well as major engine/power upgrades.
| THE KIT |
 The latest
Bandai kit comes with 2 sprues of very clean (minimal mold markings) chrome
silver (ish) plastic, 2 sprues of gunmetal colored plastic, one clear sprue and
one sprue for the stand as there is no landing gear for this model. All the
parts are highly detailed and do not require much clean up as Bandai typically
places the sprue ejection marks in hidden areas.
The latest
Bandai kit comes with 2 sprues of very clean (minimal mold markings) chrome
silver (ish) plastic, 2 sprues of gunmetal colored plastic, one clear sprue and
one sprue for the stand as there is no landing gear for this model. All the
parts are highly detailed and do not require much clean up as Bandai typically
places the sprue ejection marks in hidden areas.
It also comes with some decals for the yellow paint markings as well as for a droid.
There are three minor parts options with this kit. Option to put Mando or Mando with Grogu in the pilot’s seat, a droid socket or Grogu’s cabin in the rear of the fighter as well as in flight on a stand or not.
There is a bit of a surface issue with the silver I found as my kit the plastic has swirl markings all over it which ruins the illusion of surface chroming.
| CONSTRUCTION |
 It all began
with removing the parts off the sprue. I painted the cockpit with brushes and
thinned paints (as I didn’t have my spray booth set up at the time). I used
Xtracrylic Dark Gull Grey and Gunze Flat black for the cockpit while the seat
was painted Red Brown. Any small details were picked out with a fine tipped
brush or dry brushed with silver and/or white paint.
It all began
with removing the parts off the sprue. I painted the cockpit with brushes and
thinned paints (as I didn’t have my spray booth set up at the time). I used
Xtracrylic Dark Gull Grey and Gunze Flat black for the cockpit while the seat
was painted Red Brown. Any small details were picked out with a fine tipped
brush or dry brushed with silver and/or white paint.
I also brush painted the Mando and Grogu figure using various Vallejo paints. When dry I used Tamiya panel line Black highlighter to bring out the tiny details.
The control panel was gloss coated and the instrument panel decal was added.
| COLORS & MARKINGS |
I took all the chrome parts and primed it with a new paint I found at the hobby shop: Ultimate Mirror Chrome by Spazstix. It’s supposed to allow for a mirror chrome finish so I decided to give it a go. It’s actually an enamel spray for RC models, but can be used on static models as well. Off to the garage I went (I spray acrylics inside the workshop only.)
First they ask you to prime it with their black backer primer. I sprayed each part with a thin coat before spraying on a thicker coat. I made the mistake of spraying the paint when it was a bit windy (dust flecks everywhere) and also forgot to put the parts into a container to keep dust off (it’s amazing what you forget after not building models for a year and half!)
This required some fine sanding with Tamiya 2000/3000 grit sponges as well as 3M 5000 grit polishing pad. This is a bit different than my old micromesh sanding pads. Part of the problem is that I found my new set of sanding pads wore out too fast and would mix old paint residue (despite my cleaning them) onto the new paint so I decided to go with the more expensive and disposable stuff. I got rid of most of the dust flecks and paint flaws using the sponges and pad.
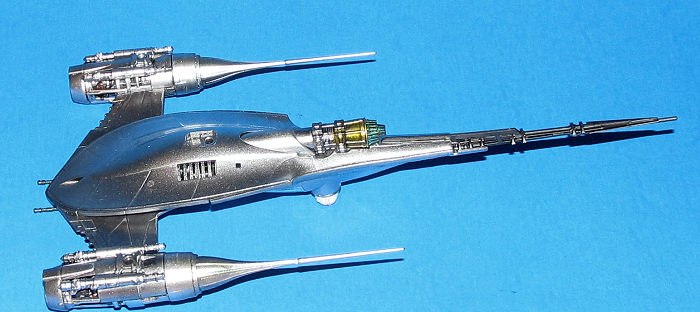 Once it was
dry I sprayed the parts with chrome spray. It actually worked as advertised, but
only on the areas that weren’t marred by dust flecks. It took several times to
remove about 90% of the dust marks and get the chrome nice and smooth.
Once it was
dry I sprayed the parts with chrome spray. It actually worked as advertised, but
only on the areas that weren’t marred by dust flecks. It took several times to
remove about 90% of the dust marks and get the chrome nice and smooth.
I then used Spazstix acrylic clear coat. That’s where I encountered some issues. It seems I didn’t allow the under coats time to cure properly and it all bubbled up on some parts. Not really happy with that result because I had to do it over again. I gave each coat about 48 hours to cure before spraying.
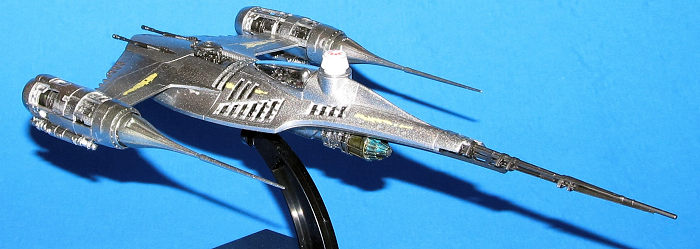
The remaining parts I painted differently. I finally got around to reassembling my paint booth and airbrush setup so I sprayed the gunmetal parts with Tamiya XF-56 Metallic Grey and the droid head flat then gloss white. Once they were dry, I used a small paint brush and various colors to pick out the fine details. The main engine underneath was painted like it was an old school jet engine. I brush painted it clear yellow to “heat” age the engine and painted the nozzle with a mix of clear blue and several shades of metallic colors.
After all the parts were painted, I assembled the bulk of the kit.
I used the decals for the droid head and got them to line up. Once in place I used Microsol/Set to get them to snuggle onto the details. The few decals on the model surface were added.
As for weathering, outside of the details on the engine, I used the Vallejo Space Dust set to “weather” the chrome surface. The thing about the space dust is to spray it on in light coats and build it up. I decided to add very subtle tonal shifts especially around the pointy engine nozzles and the front of the ship.
I did a final spray of the acrylic coat and that was it.
| FINAL CONSTRUCTION |
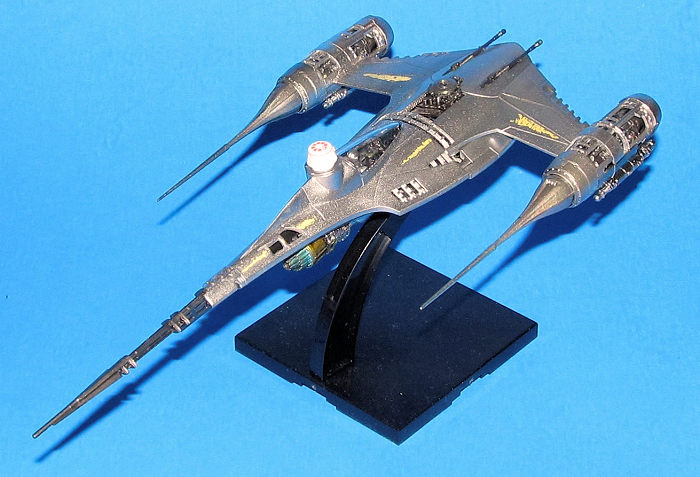
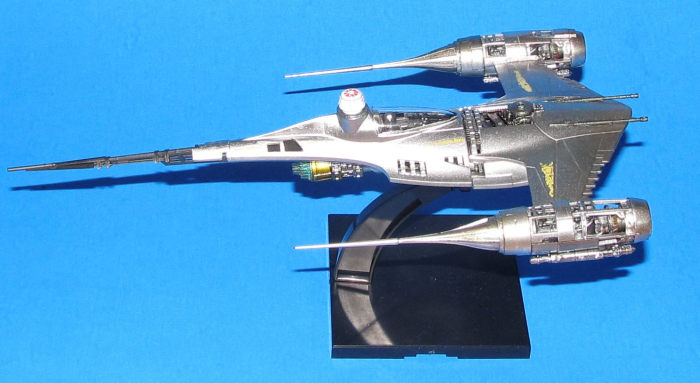 I selected
the droid socket despite the “reel” life one had the Grogu dome instead. Why? I
like having droids on my Star Wars vehicles unlike Djin who doesn’t trust
astromechs.
I selected
the droid socket despite the “reel” life one had the Grogu dome instead. Why? I
like having droids on my Star Wars vehicles unlike Djin who doesn’t trust
astromechs.
The canopy was masked off and painted using the chrome system (black backer, chrome then final acrylic coat.) Once done, it was easily snapped into place.
Lastly I assembled the stand and put the Mando Starfighter on it.
| CONCLUSIONS |
Despite some mistakes and impatience caused mistakes, I had a lot of fun building this kit. It’s also the best chrome mirror finish I have ever done so no complaints from me. Recommend the Spazstix system if you want a chromed mirror surface as well as the Vallejo Space Dust set.
I recommend this kit for any level of skill who is into Star Wars.
6 August 2026 Copyright ModelingMadness.com. All rights reserved. No
reproduction in part or in whole without express permission from the editor. If you would like your product reviewed fairly and
fairly quickly, please
contact
the editor
or see other details in the
Note to
Contributors.