Atlantis UFO Encounters: Monument Valley
| KIT #: | AMC 1007 |
| PRICE: | $20.00 |
| DECALS: | None |
| REVIEWER: | John Summerford |
| NOTES: | LED strip light system from Micro Mark |
| HISTORY |
Courtesy Britannica.com
 The first
well-known UFO sighting occurred in 1947, when businessman Kenneth Arnold
claimed to see a group of nine high-speed objects near Mount Rainier in
Washington while flying his small plane. Arnold estimated the speed of the
crescent-shaped objects as several thousand miles per hour and said they moved
“like saucers skipping on water.” In the newspaper report that followed, it was
mistakenly stated that the objects were saucer-shaped, hence the term flying
saucer.
The first
well-known UFO sighting occurred in 1947, when businessman Kenneth Arnold
claimed to see a group of nine high-speed objects near Mount Rainier in
Washington while flying his small plane. Arnold estimated the speed of the
crescent-shaped objects as several thousand miles per hour and said they moved
“like saucers skipping on water.” In the newspaper report that followed, it was
mistakenly stated that the objects were saucer-shaped, hence the term flying
saucer.
Sightings of unidentified aerial phenomena increased, and in 1948 the U.S. Air Force began an investigation of these reports called Project Sign. The initial opinion of those involved with the project was that the UFOs were most likely sophisticated Soviet aircraft, although some researchers suggested that they might be spacecraft from other worlds, the so-called extraterrestrial hypothesis (ETH). Within a year, Project Sign was succeeded by Project Grudge, which in 1952 was itself replaced by the longest-lived of the official inquiries into UFOs, Project Blue Book, headquartered at Wright-Patterson Air Force Base in Dayton, Ohio. From 1952 to 1969 Project Blue Book compiled reports of more than 12,000 sightings or events, each of which was ultimately classified as (1) “identified” with a known astronomical, atmospheric, or artificial (human-caused) phenomenon or (2) “unidentified.” The latter category, approximately 6 percent of the total, included cases for which there was insufficient information to make an identification with a known phenomenon.
| THE KIT |
Like my previous Flying Saucer build from Atlantis, a flimsy end-opening box holds a diorama backdrop and bag of parts. This kit is a little more complex in that not only is there a top and bottom piece creating a 5-inch diameter model, there is a battery powered LED, interior cabin, and three landing legs. All of the plastic parts are clear styrene. The top and bottom pieces lock by twisting counterclockwise. No detail is supplied in the interior piece, just a series of chambers. The legs can be posed either retracted or extended.
The instructions are printed on the backside of the box
| CONSTRUCTION |
I tested the LED and it failed. Either the batteries became depleted, or the LED is defective. Regardless, a single LED was going to be inadequate for my purposes, so I ordered a roll of strip LEDs, a 12-volt transformer, and associated connectors from Micro Mark.
 While
waiting for the equipment, I blanked off the rectangular openings next to the
locking tabs on the bottom piece. Planning on painting the interior except where
I wanted the light to shine through, I masked the inside of the stepped cone
with a circle of tape. The sides of each step on the outside were masked with
curved pieces cut from Maketar paint masks Nose Cone kit. These proved to be
very handy.
While
waiting for the equipment, I blanked off the rectangular openings next to the
locking tabs on the bottom piece. Planning on painting the interior except where
I wanted the light to shine through, I masked the inside of the stepped cone
with a circle of tape. The sides of each step on the outside were masked with
curved pieces cut from Maketar paint masks Nose Cone kit. These proved to be
very handy.
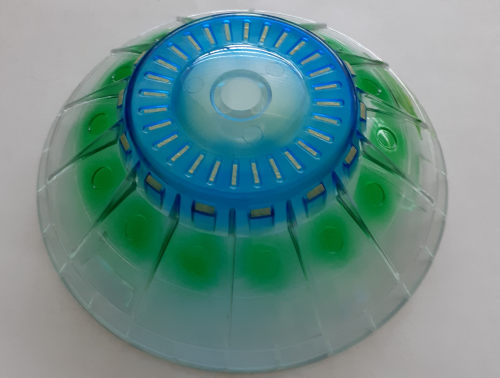
Inside the upper piece, the oval windows were sprayed transparent green and the upper windows transparent blue. These were masked inside and out, then primed with black Alclad II and the interior sprayed with Chrome to reflect as much as light as possible.
The base was cut from some scrap wood, sanded and painted. A channel was cut in the bottom and a hole drilled for the wiring to lead up along the inside face of a leg and into the interior of the model. The gray top is a square of foam-like fabric that was found at the chain hobby store next to sheets of colored felt.
By this time, the LEDs arrived and testing the system revealed that some of the connectors didn’t make good contact with the imbedded flat copper wiring. I’m glad I ordered extras.
| COLORS & MARKINGS |
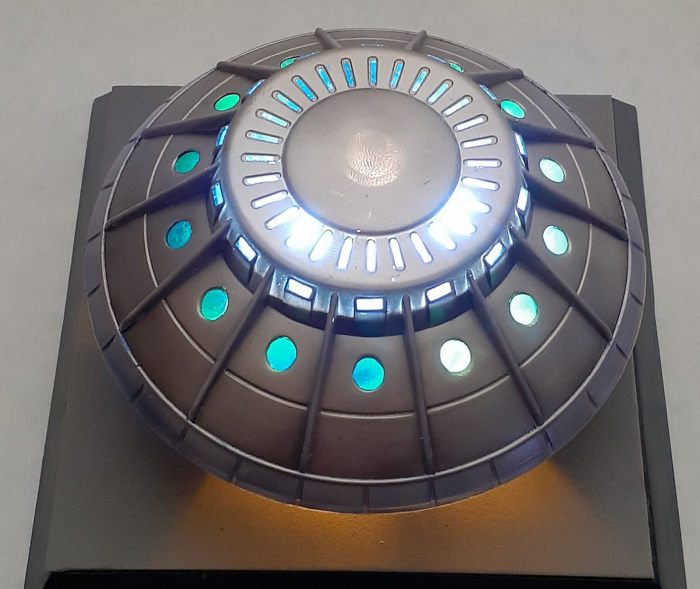
The legs, and exterior of the model was primed with Alclad II gloss black base. In an effort to make the model look other-worldly creepy. it was sprayed with a cocktail of Alclad’s Chrome, Pale Burnt Metal, and a splash of Copper. A clear coat of gloss followed. The ribs and lower rim were masked for Mission Models’ Color-Change Purple and Color-Change Blue respectively. Before application, some clear flat was sprayed on to give the acrylic paint some texture to adhere to. The difference between the color-change paints is subtle. The blue paint was given a coat of gloss.
Unfortunately, some of the LEDs would be exposed next to the leg. These were identified and painted the same as the UFO. That didn’t work very well, so black tape was pressed over the LEDs.
| FINAL CONSTRUCTION |
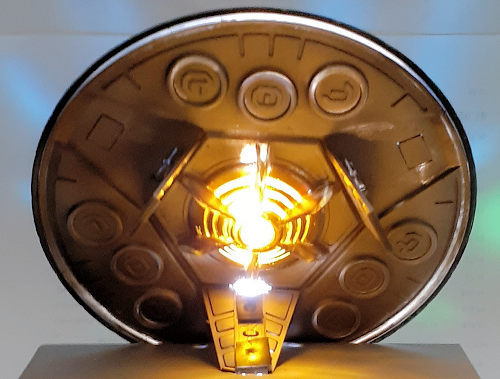
 Everything
was unmasked and no touch-ups were needed. The interior piece was omitted to
make room for the lighting. A piece of color gel for theater lights was cut into
a disk and glued to the opening of the cone on the bottom piece.
Everything
was unmasked and no touch-ups were needed. The interior piece was omitted to
make room for the lighting. A piece of color gel for theater lights was cut into
a disk and glued to the opening of the cone on the bottom piece.
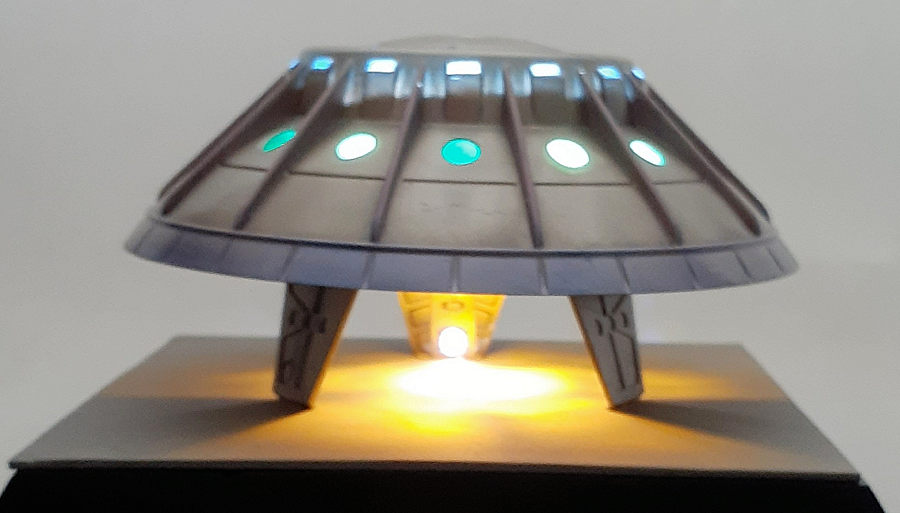
One hole by a leg mount was enlarged to feed the LED strip into interior. then legs were glued in place and the gaps at the other two legs filled. After the LED strip was placed in the base’s channel and fed up through the hole, it was inserted through the hole in bottom of the model. An adhesive coating is on the backside of the LED strip and the backing paper at the section by the leg was removed and the strip pressed to the leg. This secures the model to the base.
Inside, the LED strip was positioned so that three diodes faced down into the cone on the bottom. A connector was added and section of three diodes were taped facing up. A test confirmed that everything worked when powered, so the upper piece was twisted into place, completing the project.
| CONCLUSIONS |
This kit presents a blank canvass to apply one’s imagination. Much of the nearly twelve hours spent on this project was devoted to masking. The price is right, but the LEDs and hardware cost nearly five times as much, so one must decide if something else should be done. Still, the lights add a delightful level of creepiness to the model.
21 February 2022
Copyright ModelingMadness.com. All rights reserved. No reproduction in part or in whole without express permission.
If you would like your product reviewed fairly and fairly quickly, please contact the editor or see other details in the Note to Contributors.