
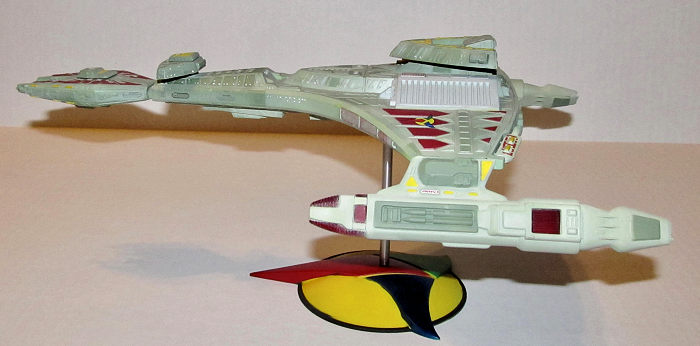
AMT 1/1400 Vor'cha Klingon Battlecruiser
| KIT #: | 1027 |
| PRICE: | $34.95 SRP |
| DECALS: | One option |
| REVIEWER: | Dan Lee |
| NOTES: |
| HISTORY |
The Vor'cha-class attack cruiser is
a powerful Klingon vessel that debuted in The Next Generation episode "Reunion".
Its combat role is stated to be comparable to that of a heavy cruiser. The
Vor'cha-class is the first new Klingon ship design portrayed outside of The
Original Series era, and was designed by Rick Sternbach. The studio model for
the ship was built by Greg Jein. Sternbach designed the Vor'cha-class to r epresent
the alliance between the United Federation of Planets and the Klingon Empire by
The Next Generation, and consequent technology exchange and collaboration. Thus,
the nacelles of the craft were created to be similar to those on Starfleet
vessels, while the color was intentionally placed as a midpoint between the dark
green of the Bird of Prey and the light gray of the USS Enterprise-D.
epresent
the alliance between the United Federation of Planets and the Klingon Empire by
The Next Generation, and consequent technology exchange and collaboration. Thus,
the nacelles of the craft were created to be similar to those on Starfleet
vessels, while the color was intentionally placed as a midpoint between the dark
green of the Bird of Prey and the light gray of the USS Enterprise-D.
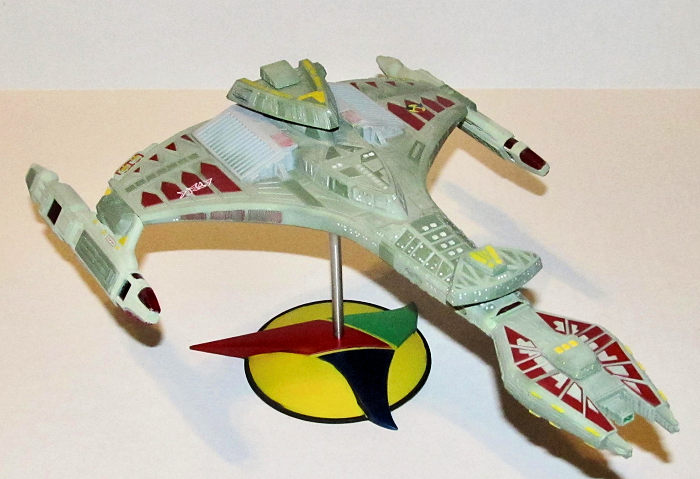
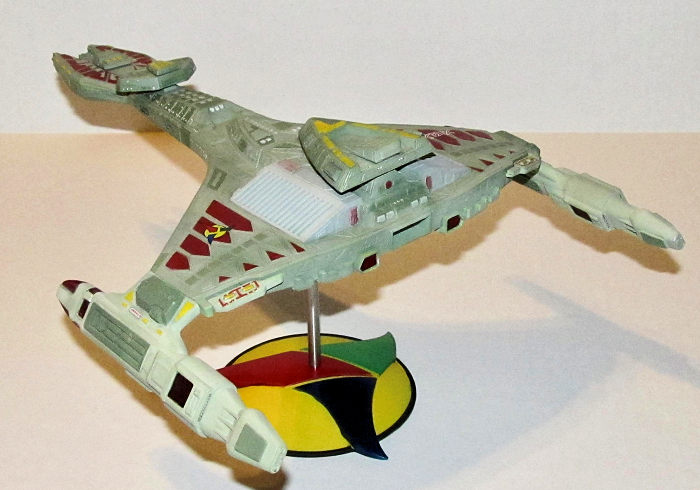
The design of the Vor'cha-class maintains the typical Klingon configuration with a forward module supported by a thick horizontal neck running aft and spreads out into a larger secondary hull. With a crew of 1,900 and a length of 500 meters, Vor'cha-class vessels are one of the largest Klingon ships in the Star Trek universe. They are heavily armed, sporting 18 disruptor cannons as well as three photon torpedo launchers. In addition, the forward section of the cruiser is equipped with a particularly powerful disruptor beam. The ships are equipped with both warp and impulse engines, and make use of cloaking devices. In the Deep Space Nine episode "Return to Grace", the cruiser is stated to have enough firepower to threaten subterranean bases with orbital bombardments. The Vor'cha-class is frequently seen in The Next Generation and Deep Space Nine episodes depicting Klingon ships; in its earliest appearances, the class represents the flagship of the Empire, under the command of first Klingon Chancellor K'mpec and later Gowron.
From Wikipedia
| THE KIT |
The kit consists of 39-40 parts on several sprues made up of a light green plastic, 10-11 clear red parts and a Klingon ID symbol shaped base with a sturdy metal stand. The parts are well detailed for the early 90s and have a little bit of flash that will require some cleanup. I did notice that the bow sections of the engine pods have issues as the parts do not line up because they are different sizes. Some modification/plastic surgery will be required rather than try to work around it and more than likely ruin the clear red plastic parts that are part of the engine pod bow.
 Polar
Lights provides a simple instruction sheet based on the original instructions.
It comes with a paint guide that does not always provide enough detail so it is
better to go with the pictures on the box rather than the paint guide.
Unfortunately the vagueness of the paint guide has been a weakness of the old
AMT Star Trek kit instructions so I usually end up having to spend a lot of time
referring back to pictures on the internet.
Polar
Lights provides a simple instruction sheet based on the original instructions.
It comes with a paint guide that does not always provide enough detail so it is
better to go with the pictures on the box rather than the paint guide.
Unfortunately the vagueness of the paint guide has been a weakness of the old
AMT Star Trek kit instructions so I usually end up having to spend a lot of time
referring back to pictures on the internet.
The new stand is well designed, balanced and sturdy and a definite improvement over the original.
Lastly, it comes with a tiny decal sheet with Klingon script which I assume is the ship's name (no, I am not fluent or literate in Klingon) and Klingon national ID. It has been my experience that Polar Lights decals tend to be similar to Tamiya decals in that they are a bit thick and require use of Solvaset.
| CONSTRUCTION |
 The Vor'cha
is one of AMT's better later efforts (for the most part) so the seams were
mostly hidden or easy to fix except for the engine pods. I still did use a
decent amount of Vallejo plastic putty to cover up the biggest gaps, but I
didn't need much sandpaper or CA glue except on the really badly done engine
pods (more on that later.)
The Vor'cha
is one of AMT's better later efforts (for the most part) so the seams were
mostly hidden or easy to fix except for the engine pods. I still did use a
decent amount of Vallejo plastic putty to cover up the biggest gaps, but I
didn't need much sandpaper or CA glue except on the really badly done engine
pods (more on that later.)
Assembly was straight forward with some sanding of the sprue nubs. I left the parts of the main hull as sub assemblies till after painting was completed and left off the clear red parts till I was done painting.
| COLORS & MARKINGS |
The Vor'cha proves that it is not easy being green. I used Tamiya Sky as the base color for everything except the clear parts. Various sections all over the main hull, bridge, bow and engine sub assemblies were masked off and painted NATO Green on the top and bottom to provide some contrast to the lighter Sky color. This took several sessions to do and quite tedious. Even then I had to use toothpicks dipped in rubbing alcohol to scrape away the excess paint.
I then masked off the red portion
of the feathers over several sessions, several hours and several rolls of
colored rice paper tape then the areas were painted Tamiya Red. When the paint
was dry, I repeated the work and tape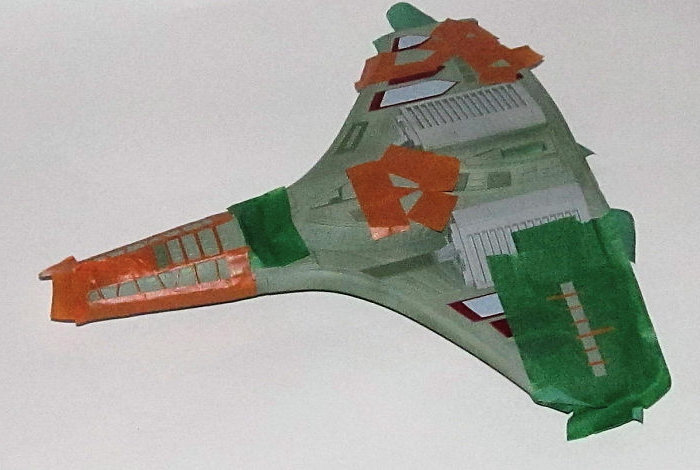 to mask off more areas. This continued till I was finished the red feathers. The
bow sections required additional masking for the raised detail painted Sky.
to mask off more areas. This continued till I was finished the red feathers. The
bow sections required additional masking for the raised detail painted Sky.
I continued the masking/painting process with other areas like the grey shoulders (?) and the yellow hull markings. The white areas were painted using thinned Tamiya Flat white paint with a fine brush and/or toothpicks. I had to repeat this when the paint was dry as the first coat didn't always cover well the first time.
The base of the stand was painted using several masking sessions as it involved five different colors (red, blue and green on a yellow background with black trim.) I ended up using a total of three rolls of rice tape for masking purposes on this entire model. In the past, I would have avoided this amount of effort due to laziness but felt this level of effort was required to do this model justice.
The model was gloss coated using a couple of light coats of Future. When it was dry, I added the few decals to the model. I ended up using a couple of drops of Solvaset on all of them to get them to snuggle down into the details.
Next the model was lightly weathered using a mix of black and burnt sienna watercolor to provide some contrast and shadowing effect on the surface details. I used red watercolor paint for areas along the leading edge of the “wings.”
Once the weathering mix was dry and excess was removed, I sprayed on the final flat coat to seal everything in.
| FINAL CONSTRUCTION |
Once the final paint coat was dry and before the gloss coat was done, the main hull subassemblies were glued together using Tamiya Extra Thin glue except the engine pods.
 The engines
required more work than the main hull and other subassemblies. I ended up having
the fill/sand the engine pods several times as the seams didn't want to
disappear. The bow areas of the engine pods were the worst part of the kit as
they don't line up and the mating areas were different sizes! I cut off the bow
areas on both engine pods and corrected them using plastic card to fix the size
differences/alignment issues and replace the attachment points. For both, the
clear red parts were glued onto the rebuilt plastic parts with Tamiya Clear glue
then attached to the rest of the engine pod with CA glue.
The engines
required more work than the main hull and other subassemblies. I ended up having
the fill/sand the engine pods several times as the seams didn't want to
disappear. The bow areas of the engine pods were the worst part of the kit as
they don't line up and the mating areas were different sizes! I cut off the bow
areas on both engine pods and corrected them using plastic card to fix the size
differences/alignment issues and replace the attachment points. For both, the
clear red parts were glued onto the rebuilt plastic parts with Tamiya Clear glue
then attached to the rest of the engine pod with CA glue.
When the glue dried, the clear red areas were masked off and painted as per the COLORS AND MARKINGS section. The engines were then added on to the main hull with fast setting CA glue and the model placed on its stand. The various clear red plastic parts that were not installed in the previous build steps were added with a dab of white glue.
| CONCLUSIONS |
 I have
found in my experience that no Star Trek model ship is really easy to paint and
requires some forethought to build because of the shapes and paint schemes. The
Vor'cha battlecruiser was a lot easier to assemble than paint. If you hate
masking then you should probably avoid this kit at all costs. If building
Klingon warships is your thing and don't mind masking then this kit is a decent
late effort from last days of AMT as redone by Polar Lights.
I have
found in my experience that no Star Trek model ship is really easy to paint and
requires some forethought to build because of the shapes and paint schemes. The
Vor'cha battlecruiser was a lot easier to assemble than paint. If you hate
masking then you should probably avoid this kit at all costs. If building
Klingon warships is your thing and don't mind masking then this kit is a decent
late effort from last days of AMT as redone by Polar Lights.
I had fun with this build and am happy with the final result.
Dan Lee
9 October 2018
Copyright ModelingMadness.com
If you would like your product reviewed fairly and fairly quickly, please contact the editor or see other details in the Note to Contributors.
Back to the Main Page Back to the Review Index Page Back to the Previews Index Page