| KIT #: | FG-2 |
| PRICE: | $21.00 |
| DECALS: | One option |
| REVIEWER: | Dan Lee |
| NOTES: | Kit rework required |
| HISTORY |
 The Curtiss R3C was a single seat racing biplane
designed for both ground and sea landing (R3C-1 and R3C-2 respectively.) Its
major claim to fame was winning the 1925 Schneider Racing Trophy and setting a
world speed record when flown by aviation great Jimmy Doolittle. Only
three R3Cs were produced with the sole survivor on display at the Smithsonian
National Air and Space Museum (Udvar-Hazy) in the markings it had when it was
flown by Jimmy Doolittle when he won the Schneider Cup.
The Curtiss R3C was a single seat racing biplane
designed for both ground and sea landing (R3C-1 and R3C-2 respectively.) Its
major claim to fame was winning the 1925 Schneider Racing Trophy and setting a
world speed record when flown by aviation great Jimmy Doolittle. Only
three R3Cs were produced with the sole survivor on display at the Smithsonian
National Air and Space Museum (Udvar-Hazy) in the markings it had when it was
flown by Jimmy Doolittle when he won the Schneider Cup.
The anime classic Porco Rosso showed a heavily modified and armed version as flown by the antagonist air pirate mercenary/actor Donald Curtiss.
| THE KIT |
For over 60 years, the Hawk/Testors R3C was the
only kit of this plane in 1/48 scale (and it still is if you want an accurate
one.) It shows its age with its over simplified detail, but with a lot of work
can make an excellent replica of the real life R3C. Fine Molds released this gem
in 2007 based on the plane from Porco Rosso and is a fairly simple kit, but with
much better interior detail and comes with two figures of Donald Curtiss (one in
scale for the cockpit) and the other larger scale figure for display. One major
difference between the actual R3C and the Donald Curtiss version is that it is
armed, the wings are gull shaped and t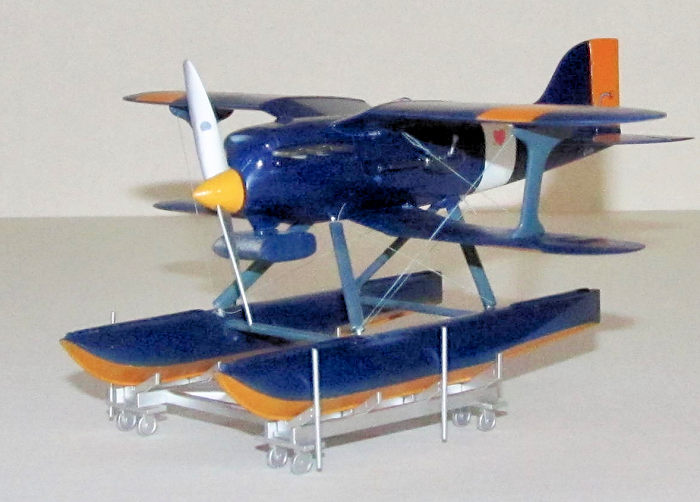 he big chin oil cooler on the Donald
Curtiss version while the actual R3C was unarmed, had straight wings and no oil
cooler of any sort.
he big chin oil cooler on the Donald
Curtiss version while the actual R3C was unarmed, had straight wings and no oil
cooler of any sort.
It contains two sprues of dark blue plastic, one grey sprue, one tan sprue, one clear sprue, a decal sheet, a pair of screws/float weights to keep it from tail sitting and a set of polycaps to allow the prop to spin. A grand total of 53 plastic and 2 metal parts in all along with a decal sheet and a detailed instruction booklet in Japanese. One third of the parts are for the beaching trolly.
The detail is amazing despite the simplicity of the kit as they provide a somewhat detailed engine and interior. Fine Molds provides a decal for the seatbelts, but one can scrounge up some photo-etch replacements if one desires.
For the most part the parts are clean but my copy has a small amount of flash around the floats. The kit itself looks like it is very easy to put together which is not surprising as it appears this kit (like their Star Wars kits) was designed more for folks who are more fans of the film than experienced modelers. The decal sheet contains all the necessary markings for Donald Curtiss’ plane, but more experienced modelers will probably prefer to paint most of the markings.
Despite it being written in Japanese, in my personal experience I have found Fine Molds instructions visually easy to follow and they use Gunze/Tamiya color call outs so it will not be hard to figure out what paints are needed. Also provides what I can only assume is a detailed history of the actual R3C series planes in Japanese.
| CONSTRUCTION |
It seems quite easy based on the instructions, but it actually wasn't. The cockpit was simple enough to do. I followed the paint guide and used the decals as per the instructions. The only extra I added was some Eduard Imperial Japanese Army Lap Belts to the seat. The engine was not painted and glued in place as I didn't plan to expose the engine compartment. The upper wing and engine cover were glued in place.
 The fuselage was glued together without issue
while I added the supplied screws (weights) to the floats before gluing them
together as well.
The fuselage was glued together without issue
while I added the supplied screws (weights) to the floats before gluing them
together as well.
The instructions say you should add the float support parts to the floats. I wish I had thought things thru a bit sooner and saved myself some grief, but I did not.
Dealing with the seams on the fuselage weren't much of a big deal with the usual filling/sanding (plus the parts sat in a box for two weeks to eliminate the dreaded phantom seam.) The floats were a damn nightmare to work on. It did not help that there was a lot of detail that needed to be protected as well as the seams from the float supports which I ended up breaking a couple off.
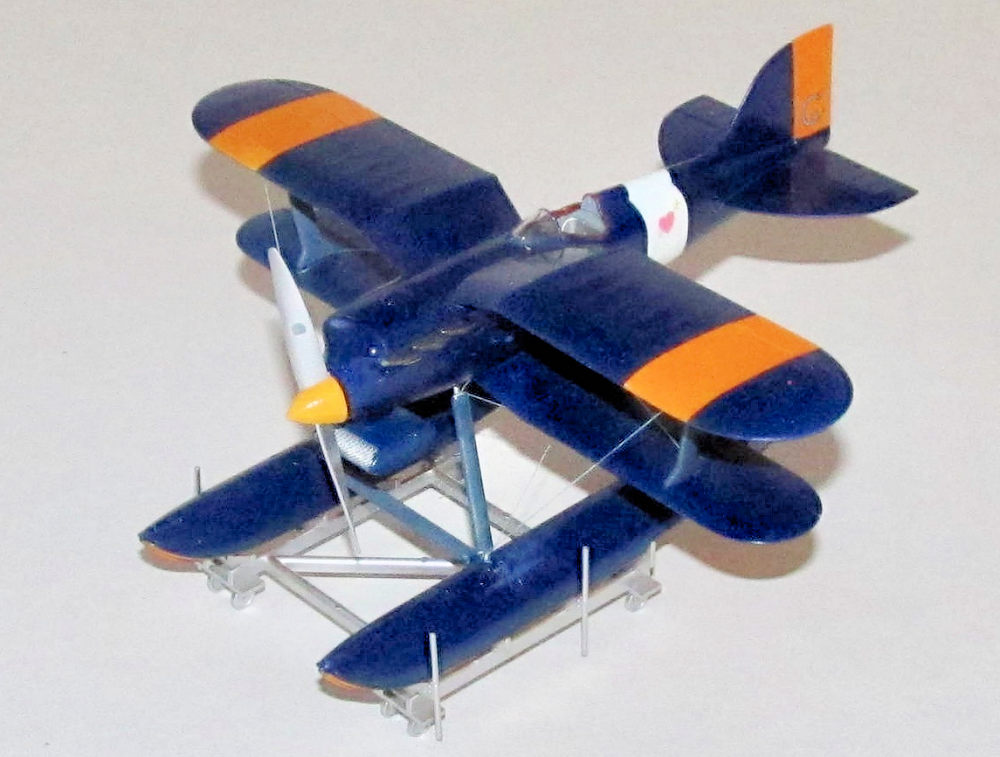
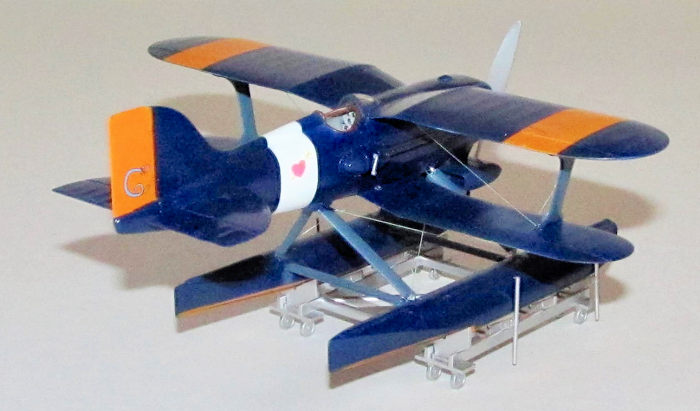
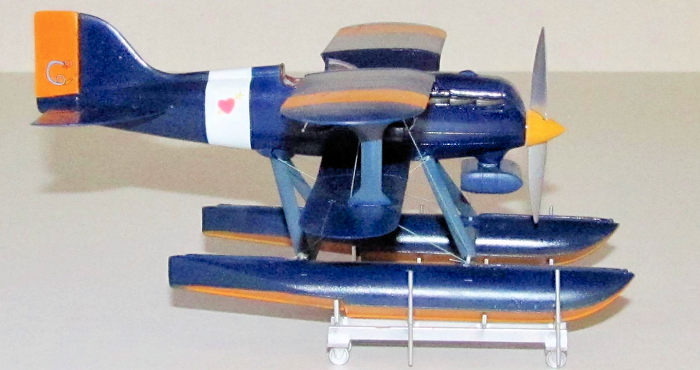
| COLORS & MARKINGS |
The kit was designed to be built without painting. I opted to paint it to cover up all the sanding marks and filler I used.
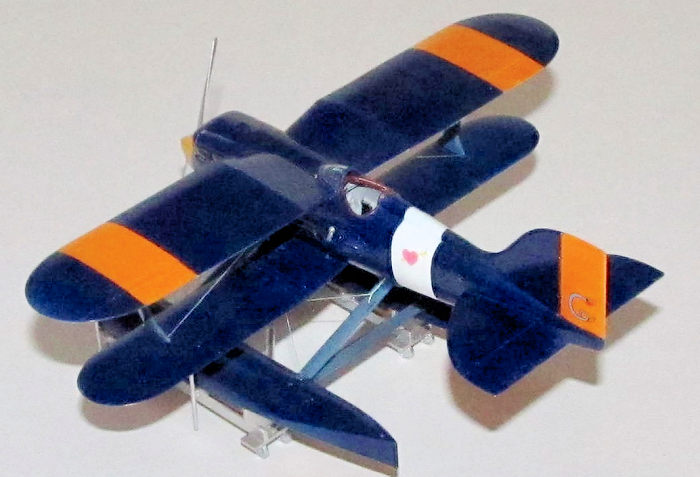 I used Tamiya acrylic XF-2 Flat white, X-4 Blue
and X-6 Orange for the main colors. I sprayed on the flat white to cover the
areas that were to be white and orange. When the paint was dry, I masked off the
areas that were supposed to be white then I sprayed on orange for the wings.
When the orange paint was dry then I masked off those areas and then sprayed on
the X-4 Blue. The wing and float struts were painted intermediate blue as per
instructions.
I used Tamiya acrylic XF-2 Flat white, X-4 Blue
and X-6 Orange for the main colors. I sprayed on the flat white to cover the
areas that were to be white and orange. When the paint was dry, I masked off the
areas that were supposed to be white then I sprayed on orange for the wings.
When the orange paint was dry then I masked off those areas and then sprayed on
the X-4 Blue. The wing and float struts were painted intermediate blue as per
instructions.
The propeller was straight forward to do. The prop hub was prepainted yelllow while the prop was painted Tamiya gloss silver from the spray can. The various parts were gloss coated for the decals.
I didn't use most of the decals as they were for the orange portions of the
plane. I only used the decals for the insignia and stencils. Once dry, I sprayed
on the final gloss coat.
| FINAL CONSTRUCTION |
After painting the lower wing and struts were glued in place with CA glue as I ended up having to fill/sand the seams for the lower wing. The elevators, gun covers and nozzles were painted and then glued on.
I had some issues with the floats and had to do
some major surgery. The forward struts were only held on as a butt join and
broke. I tried to reglue them on using CA glue, but I made a mess of it and had
to start over. I ended up having to sand off the glue and repaint those areas
that I screwed up. I clipped off the
 badly reattached forward float struts and
then drilled out the ends and glued in some plastic rod. I cut the rod to size,
drilled 0.6mm holes then reattached them using Tamiya extra thin glue to the
fuselage and floats.
badly reattached forward float struts and
then drilled out the ends and glued in some plastic rod. I cut the rod to size,
drilled 0.6mm holes then reattached them using Tamiya extra thin glue to the
fuselage and floats.
I used light blue extra fine EZ Line for the rigging. I drilled holes in the wings, the floats and the fuselage then rigged in the following order: between the float struts, the wings to fuselage then wings to floats as I worked inside out. Admittedly, I only did a portion of the rigging because I ran out of patience for it and it would have been easier if I had pre drilled holes. The clear canopy was added using Micro Krystal Klear.
The stand was assembled and spray painted Tamiya gloss silver from the spray can. Once dry, I added the R3C-0 to the stand and the kit was completed.
| CONCLUSIONS |
The what seemed to be a rather simple kit required a lot more work than I thought especially the floats. The R3C-0 needs quite a bit more effort. I don't recommend this kit for the beginner unless you don't paint it or deal with the seams.
11 June 2018
Copyright ModelingMadness.com If you would like your product reviewed fairly and fairly quickly, please
contact
the editor or see other details in the
Note to
Contributors.
Back to the Main Page
Back to the Review
Index Page
Back to the Previews Index Page