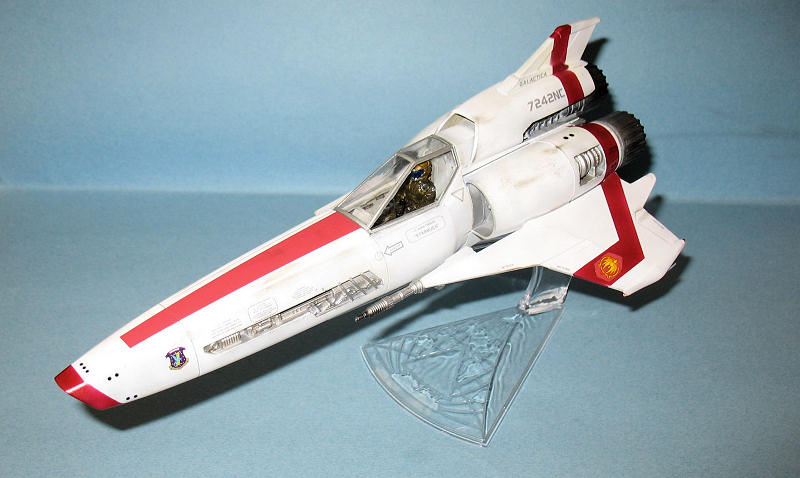
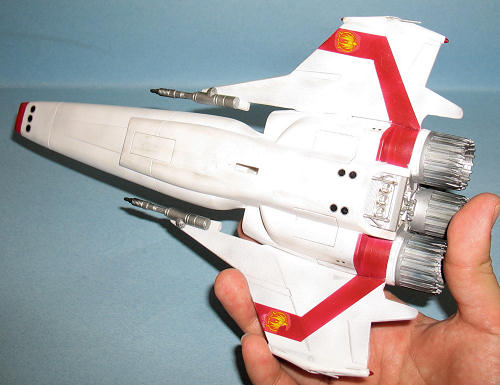
Moebius 1/32 Colonial Viper Mk II
| KIT #: | 912 |
| PRICE: | $29.99 MSRP |
| DECALS: | One option |
| REVIEWER: | Dan Lee |
| NOTES: | New Mold kit |
| HISTORY |
In 2003, Battlestar Galactic was reimagined/rebooted/remade
into a mini series and then TV series.
Loosely based on the original show, the series made a critical impact and
sustained good ratings unlike the original show which lasted one season.
One plot difference was that the Cylons were actually robots built by
humans that rebelled and wanted to take over/wipe out humanity rather than alien
robots. However, the producers and
writers kept many of the elements in the show including the Vipers which were
redesigned to a 21st aesthetic.
 One of the more upsetting to fans of the old BSG was
the introduction of Kara “Starbuck”
One of the more upsetting to fans of the old BSG was
the introduction of Kara “Starbuck”
The Mk II Viper was the mainstay of the Colonial
Fleet’s Fighter Wings for the majority of the Cylon War.
It was simple to fly and was strictly a stick and rudder kind of space
fighter. In part this was because of
the Cylon’s ability to subvert humanity’s sophisticated computer systems.
It was armed with two kinetic energy weapons (more sophisticated aircraft
cannons), a Javelin missile launcher with an eight shot magazine and the ability
to carry one or two nuclear missiles.
When humanity was mostly wiped out by the Cylon’s
final offensive, the Mk II Vipers were considered ancient relics.
It was fortunate that the supposed museum Battlestar Galactica carried
two squadrons of these relics in her starboard launch bay when the final Cylon
offensive began or she would have been defenseless as her more sophisticated
wing of Mk
| THE KIT |
See Scott’s
preview of the Mk II Viper.
| CONSTRUCTION |
Moebius’s Viper comes with an option for landing gear
up and down. I did a lot of test
fitting and
 ran some scenarios in my head dealing with the painting and masking
of said Viper. I came to the
conclusion that in flight with the landing gear closed up made the better, saner
option.
ran some scenarios in my head dealing with the painting and masking
of said Viper. I came to the
conclusion that in flight with the landing gear closed up made the better, saner
option.
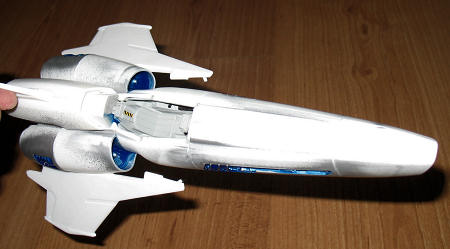
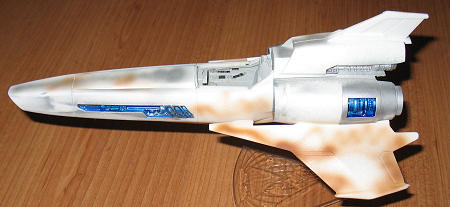
First thing I did was take the parts outside and spray
the metallic areas along the fuselage, engines and the intakes with Tamiya TS-30
Old Silver Leaf. I would normally
use Tamiya Aluminum and Talon Aluminum but I needed something that was tougher
and could endure the constant handling required.
Once the silver was dry, I coated the silver areas
with MicroMask to prevent any overspray.
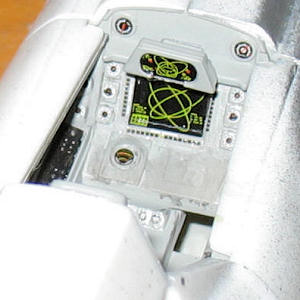
Next I sprayed the cockpit dark gull grey and added
the various clear bits and decals to the cockpit.
I painted the details with Citadel paints (black, red, white and silver)
before I installed the cockpit into the fuselage.
 The forward fuselage fit well together but it needed a
fair amount of sanding/filling to get the seams correct.
One are was the seams in the nose that require a serious amount of work.
I took the easy way around it and I took some 10 thou plastic card and
covered up the seams and made it look like there was some interior details.
Also, I found there were some sink marks on the bottom of the nose that
needed some work. I had to sand/fill
the area behind the cockpit before adding the engines because it would be much
more difficult to do otherwise. The
wings were fairly straight forward.
The forward fuselage fit well together but it needed a
fair amount of sanding/filling to get the seams correct.
One are was the seams in the nose that require a serious amount of work.
I took the easy way around it and I took some 10 thou plastic card and
covered up the seams and made it look like there was some interior details.
Also, I found there were some sink marks on the bottom of the nose that
needed some work. I had to sand/fill
the area behind the cockpit before adding the engines because it would be much
more difficult to do otherwise. The
wings were fairly straight forward.
I highly recommend that you follow the build order of
the instructions to assemble the engine section because it can be very fiddly if
you do it wrong. Just watch out for
the alignment of the top engine and I suggest that if you are going to do the
Viper in flight that you fill in areas around the landing gear doors from the
inside or you will get a lot of very obvious gaps.
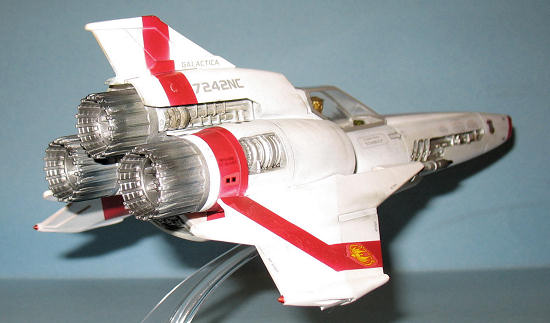
I left the engine nozzles off till after painting was done.
Various seams were sanded and filled. The Moebius kit does not required the intensive amount of work that the RM kit required, but it isn’t a Tamiya slammer either.
| COLORS & MARKINGS |
Painting
One thing I should note is that painting instructions
are vague and one has to really hunt through them to find what one should paint
what.
 I opted to replace the insignia red markings with
painted versions. Why would this
normally lazy modeler do something like that?
Well, it seemed like a better option than decals which I have grown to
despise when used on complex curves due to my (on going) experience with the
Polar Lights’ 1/1000 Refit USS
I opted to replace the insignia red markings with
painted versions. Why would this
normally lazy modeler do something like that?
Well, it seemed like a better option than decals which I have grown to
despise when used on complex curves due to my (on going) experience with the
Polar Lights’ 1/1000 Refit USS
The original plastic was preshaded with various
leftover colors which were from other painting projects including Red Brown,
Dark Grey and OD. Next, I sprayed on
three very light coats of Tamiya Gloss White X-2.
Originally it was supposed to be flat white, but it seems I mislabeled
the bottle when I made masking tape labels of my paint.
Unfortunately, the Gloss paint came out grainy and I had to rub the model
down with 3200 grit to smooth it out.
Next I laid down several layers of tape to protect the
white from the in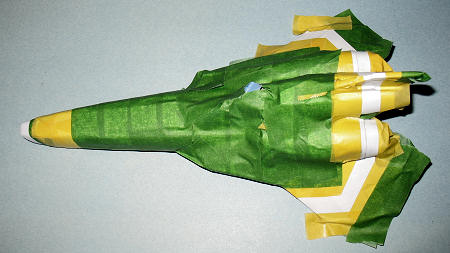 signia red and mask the areas which needed insignia red.
I sprayed on some Gunze Insignia Red and removed the tape.
Due to the complex nature of the Viper’s curves, I was dismayed to
discover that I need to do a lot of touch up work.
It took several attempts to get things done to my satisfaction.
signia red and mask the areas which needed insignia red.
I sprayed on some Gunze Insignia Red and removed the tape.
Due to the complex nature of the Viper’s curves, I was dismayed to
discover that I need to do a lot of touch up work.
It took several attempts to get things done to my satisfaction.
I realized that I had made a mistake with the top
marking as it was slightly but noticeably out of alignment.
It was then that I discovered I had some phantom seams that showed up
rather prominently on topside nose of the red and white Viper.
I was getting a bit frustrated at the time, but I managed to keep my
frustration in check, lightly sand the phantom seams away and repaint the
affected areas. I decided to use the
top nose decal instead of redoing the masking/painting.
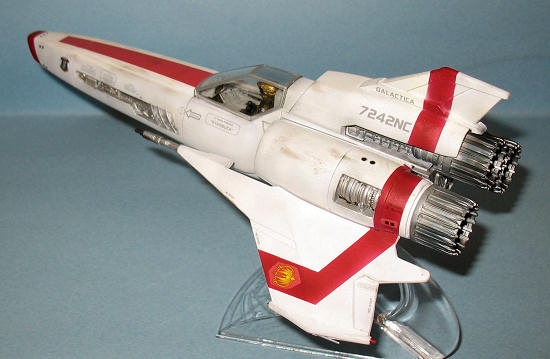
The canopy was masked and was sprayed first with a
coat of Tamiya Chrome Silver and then a coat of Talon Aluminum.
The little wingtip antennas were painted the same way while the guns were
cleaned up and painted Tamiya chrome silver, Talon Dark Aluminum and Tamiya
gunmetal.
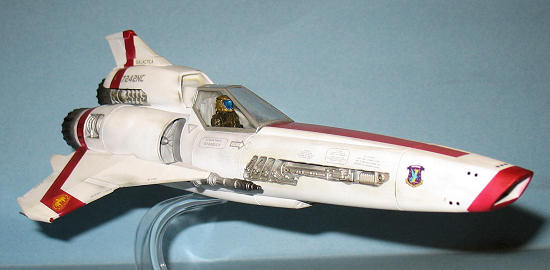
Decals
Moebius provides some very good decals and options for
Apollo and Starbuck’s Vipers. Having
a weakness for attractive feisty female characters, I joined Team Starbuck and
used the markings of her Viper. The
decals went together well except for two
 details.
One, the Yellow Galactica markings for painted on red markings lack a
white background and promptly disappeared into the red.
I was forced to cut out the yellow markings from the decals which is why
there are two shades of red. The
other detail that bothered me was that Moebius forgot about the thrusters
located in the red band and I had to cut those out from the decal sheet as well.
Otherwise, I had no issues using the decals.
details.
One, the Yellow Galactica markings for painted on red markings lack a
white background and promptly disappeared into the red.
I was forced to cut out the yellow markings from the decals which is why
there are two shades of red. The
other detail that bothered me was that Moebius forgot about the thrusters
located in the red band and I had to cut those out from the decal sheet as well.
Otherwise, I had no issues using the decals.
Weathering and Final Coat
As it seems to be a tradition from Star Wars onward
that the good guys vehicles always had to be dirty.
BSG’s Vipers were no exception.
I used the Tamiya Weathering kit to give the VIper a beat up look and
weather the engine nozzles (also sprayed the insides Gunze Steel) and then used
a watercolor wash to darken up the other metallic areas.
It was all sealed in with two coats of
| FINAL CONSTRUCTION |
The last things that needed to be done were adding the
engine nozzles, guns, antenna, pilot figure and canopy.
The guns and antennas were glued to their respective positions on the
wings as per the instructions and the wing tip lights were painted using
 Clear
Red and Silver.
Clear
Red and Silver.
The resin pilot figure was hand painted using Citadel,
Tamiya and
Once the paint was dry, I used a dark watercolor wash
to bring out some details and then glued Starbuck into place with a dab of CA
glue.
The canopy was glued in place using white glue and
Tamiya extra thin glue and the entire model was mounted onto the excellent
stand.
| CONCLUSIONS |
 Moebius’ Viper is to the old RM Viper as the New BSG
is to the Old BSG; a vast improvement over but not without some faults of its
own. It is still rather fiddly and
I’m so happy that I built the kit with the landing gear up or I probably would
have had nightmares masking and painting it.
Moebius’ Viper is to the old RM Viper as the New BSG
is to the Old BSG; a vast improvement over but not without some faults of its
own. It is still rather fiddly and
I’m so happy that I built the kit with the landing gear up or I probably would
have had nightmares masking and painting it.
It is isn’t the easiest kit to build or paint, but if
you are a fan of the new BSG or like SF models then I recommend it.
This VIper is one cool kit (at least for me.)
September 2010
If you would like your product reviewed fairly and quickly , please contact me or see other details in the Note to Contributors.