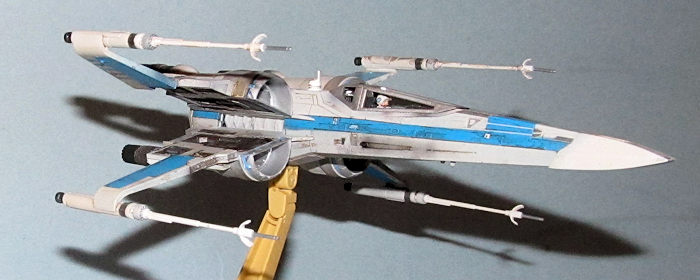
Bandai 1/72 Resistance T-70 X-Wing
| KIT #: | 202289 |
| PRICE: | 2592 ¥ |
| DECALS: | One option |
| REVIEWER: | Dan Lee |
| NOTES: | Warning: don't build while clueless |
| HISTORY |
The Incom-FreiTek T-70 X-wing starfighter was a model of starfighter developed for the New Republic based off of the classic T65B X-wing starfighter design of the Galactic Civil War. Taking advantage of new advances in miniaturization and providing a more heavily armored fighter, the T-70 would see mass production for use in the growing New Republic. However, owing to the Military Disarmament Act and rampant corruption, continued production of the craft would fall into the hands of a few well-connected starship manufacturers. In time, it would be replaced by the T-85 X-wing.
Owing to its prevalent use in local
planetary defense forces and cheaper cost of appropriation, it would see
extensive use within General Leia Organa's Resistance against the First Order.
Additional craft were donated by sympathizing Senators within the Galactic
Senate. Poe Dameron would become famous for his own T-70 X-wing fighter
codenamed Black One, from which he led both Blue and Red Squadrons from the
 Resistance
base on D'Qar. The vessels would also see the destruction of Starkiller Base in
the Assault on Starkiller Base thirty years after the Battle of Endor.
Resistance
base on D'Qar. The vessels would also see the destruction of Starkiller Base in
the Assault on Starkiller Base thirty years after the Battle of Endor.
Compared to the new generation of First Order TIE fighters, the T-70s were more expensive and complex, but also more versatile and able to fight both starfighters and capital ships.
The T-70 X-wing starfighter was a cruciform starfighter measuring 12.41 meters in length with a maximum capacity of a single pilot and bottom-loaded astromech droid, which fit into a socket that could be variably configured for different models. The vessels targeting computer, flight controls and other essential piloting instruments were located inside an armored cockpit module, under which a removable liquid-cooled flight computer further aided the pilot in ship-based operations. Access panels for computer access and storage existed inside the 'nose' of the vessel, along with an auxiliary generator and storage area typically used for stashing survival gear. A small, sensor window marked the location of the ships primary sensor array at the very tip of the nosecone, located behind an emergency beacon. Behind the pilot, a built-in life support system allowed the occupant to breathe in an oxygenated atmosphere.
The T-70 featured a variety of offensive
and defensive capabilities, the most prevalent being the presence of four
wing-mounted Taim & Bak KX12 laser cannons. In a single wing, power couplings
allowed an electrical current to power laser canon charge cells to accumulate
enough energy for a laser bolt. From there, a laser generator would convert the
energy-rich gas into a particle beam, with an installed static discharge
coupling located behind the generator and a laser generator heat sink placed
around the device. The beam would then travel down the 'barrel,' entering a
plasma combination injector from where it would enter a laser cooling sleeve and
would be focused through a long laser blast condensing channel, from where a
laser-blaster converter at the end of the 'barrel' would fire a fully-charged
energy blast. The long barrel would additionally help increase the stability and
range of the energy bolt. Furthermore, a single
 externally
mounted half-circle magnetic flashback suppressor helped protect the 'barrel'
from feedback damage.
externally
mounted half-circle magnetic flashback suppressor helped protect the 'barrel'
from feedback damage.
To improve the KX12 laser cannons field of fire, an integrated S-foil system would allow the craft to enter two distinct flying profiles; one, a 'cruise mode' where all four wings would be retracted, and an 'attack mode,' where all four wings would scissor open, giving the X-wing starfighter both its signature shape and name. An S-foil actuator located in the rear of the ship next to the hyperdrive would help control S-foil mounted maneuvering repulsors and S-foil rear repulsor arrays within the T-70's wings.
The T-70 also featured the ability to fire physical ordinance in the shape of a standard configuration of eight miniaturized Krupx MG7-A proton torpedoes, concussion missiles, or mag-pulse launchers owing to the presence of a quick-change magazine; which allowed the pilot to swap their torpedoes with other payloads. A proton-torpedo firing rack held such ordinance underneath the armored cockpit, where the spent torpedo casings would also be stored alongside the live ammunition. Having learned a valuable lesson from the destruction of so many T-65B X-wings at the Battle of Yavin, Incom Corporation included provisions for an aft-facing underslung blaster cannon, which could offer greater rearward defense than a deflector shield generator alone. This shield generator was mounted in the rear of the vessel opposite the hyperdrive, and helped protect the ship from both superficial and severe weapons damage. Sensor-scattering ferrosphere paint also aided the ship in avoiding enemy detection.
| THE KIT |
 Bandai does
the same with the Resistance X-Wing as it does with the other Star Wars kits as
it consists of three sprues of multi-colored plastic (including laser bolts in
clear red) to allow those who are adverse to painting to build/assemble the kit
. The parts are very well detailed for 1/72 scale, free of flash, but have some
mold marks. You can build the craft in landed configuration or in-flight (the
kit comes with a stand.) It comes with a sheet of water slide decals and a sheet
of identical stickers for those who don't do decals.
Bandai does
the same with the Resistance X-Wing as it does with the other Star Wars kits as
it consists of three sprues of multi-colored plastic (including laser bolts in
clear red) to allow those who are adverse to painting to build/assemble the kit
. The parts are very well detailed for 1/72 scale, free of flash, but have some
mold marks. You can build the craft in landed configuration or in-flight (the
kit comes with a stand.) It comes with a sheet of water slide decals and a sheet
of identical stickers for those who don't do decals.
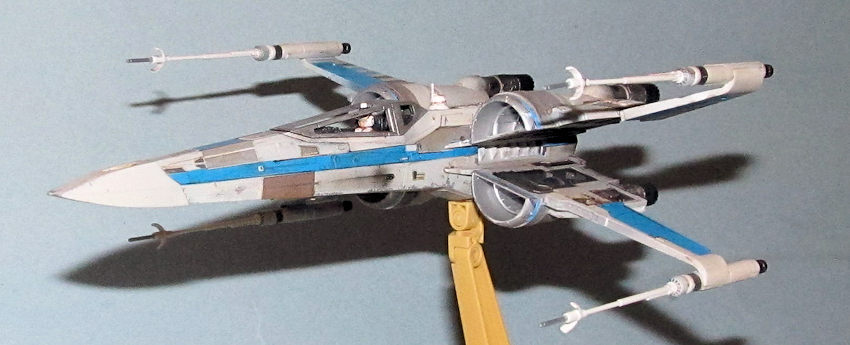
Unlike many kits, the Bandai Resistance X-Wing also provides two different canopies. One is a two piece clear piece that is supposed to used in landing configuration with the canopy open. The other is a silver colored piece (no masking required) that has no clear plastic for inflight mode. I build most of my Star Wars vehicle models inflight so I will use the silver canopy piece.
| CONSTRUCTION |
I started the kit pretty much as soon as I opened the box in Jan 2016 which is why there is no preview and assembled most of the fuselage but did not install the main console, the wings or the top section of the rear flight deck. The reason for this was because the pilot figure would be much harder to add if it was added to the model and the top section that covered the X-wings. I found that there were some gaps and poor fit as the various colored pieces did not want to go together properly especially around the forward section of the fuselage. The color plastic works fine if you just want to slap the kit together, but the poor fit makes things very difficult if you actually want to put some work into it.
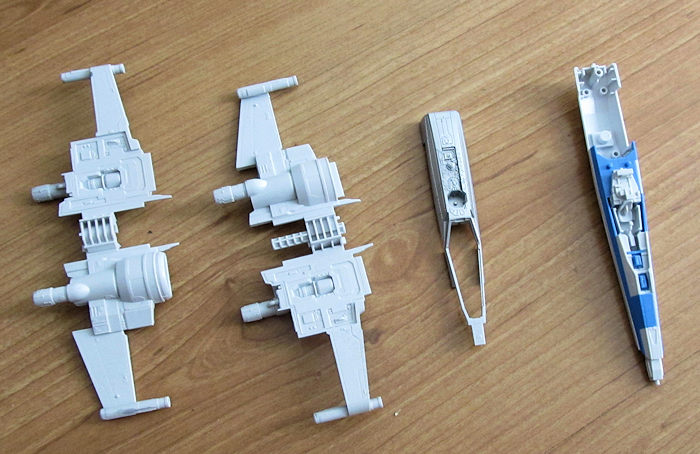 I glued
the wings and engines together, but did not add them to the model as their
interiors needed painting. I left off the laser cannons as they have a tendency
to get busted over the normal course of handling. The model was put in the box
and left alone till about June 2016.
I glued
the wings and engines together, but did not add them to the model as their
interiors needed painting. I left off the laser cannons as they have a tendency
to get busted over the normal course of handling. The model was put in the box
and left alone till about June 2016.
There were some wing panels that needed sanding and filling as there were some attachment points that needed work. I used some gap filling CA glue to seal them up and sanding the excess away. This was not the only problematic part of the kit as I was forced to mask off certain sections of the fuselage with low tack masking tape. I then put down two thin layers of gap filling CA glue to deal with the gaps and smooth out uneven sections due to the multicolor sections of plastic. I ended up sanding away some of the detail (which was unavoidable) but managed to smooth out/level the uneven sections. The lost panels lines were rescribed while the detail was replaced with cut 5 thou pieces of plastic card.
At about this time to my dismay, I realized that I lost the cockpit console. A frantic search in all the usual places I have normally lost parts (which inexplicably include the top of the microwave) did not turn up anything. Instead of moping that this part was lost and gone forever, I just continued building. The rest of the model was not assembled till after painting.
| COLORS & MARKINGS |
I started off by spray the “inside” engine sections of the X-wings Tamiya Burnt Iron and Metallic Grey which would be difficult to do once assembled (as I learned the hard way in a previous X-wing build.) They were masked off later when I was ready to paint the base colors.
 What was
left of the cockpit was painted flat black (it was supposed to be Dark Gull Grey
but I wanted to hide that something important was missing) then masked. Next I
sprayed Tamiya TS-30 Polished Silver as the base coat for the various metal
dings, for the interior of the engines, the top deck and the rear deck.
What was
left of the cockpit was painted flat black (it was supposed to be Dark Gull Grey
but I wanted to hide that something important was missing) then masked. Next I
sprayed Tamiya TS-30 Polished Silver as the base coat for the various metal
dings, for the interior of the engines, the top deck and the rear deck.
Bandai suggests a base off white color that requires mixing various paints. I can actually count and mix (X drops of this and Y drops of that) but my problem is that even if I do this correctly that the intended color rarely turns out the same which is why I personally prefer premixed paint especially for the inevitable touchups. I opted to get some of the new Model Master Acrylic FS36622 which was a touch darker than the off white plastic, but falls under the close enough category. I sprayed it on without an issue. BTW, the “new” Model Master Acrylic seems to be much better than the Acryl line and closer to the late Polly Scale line which I was fond of. I didn't even have to thin it and sprayed it straight out of the bottle (after mixing the contents of course.)
My original choice for the blue color was Intermediate Blue, but that turned out to be too dark. The next choice was Tamiya X-14 Sky Blue which is a bit brighter than the plastic, but it was handy.
I used a lot of low tack painters tape to
cover up the various off white sections of the fuselage and wing panels. Once
done, the Sky Blue was sprayed on. It turned out okay and required some touchup
as I oversprayed on some areas and undersprayed on others.
As per usual, sections of the Model Master Acrylic lifted but it was okay. I
went over various sections with a sharpened toothpick to scratch various paint
dings everywhere.
Once it was dry, I sprayed on a thin coat of Future/Pledge as the
basis for the glo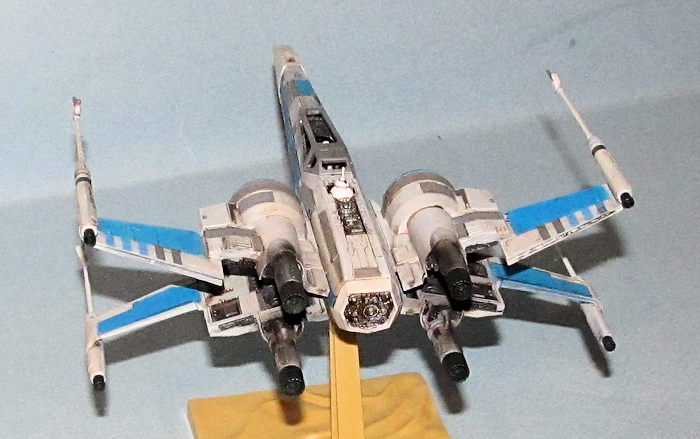 ss
coat on both the wings and fuselage.
ss
coat on both the wings and fuselage.
Detail parts like the engine nozzles, laser cannon bits, canopy and laser cannon exhausts(?) were painted Tamiya metallic grey, MM FS36622/silver, Vallejo Steel and Tamiya metallic grey respectively.
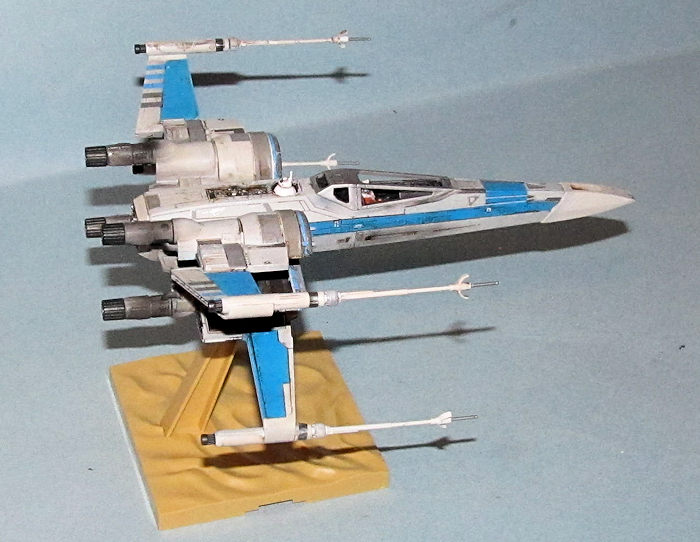
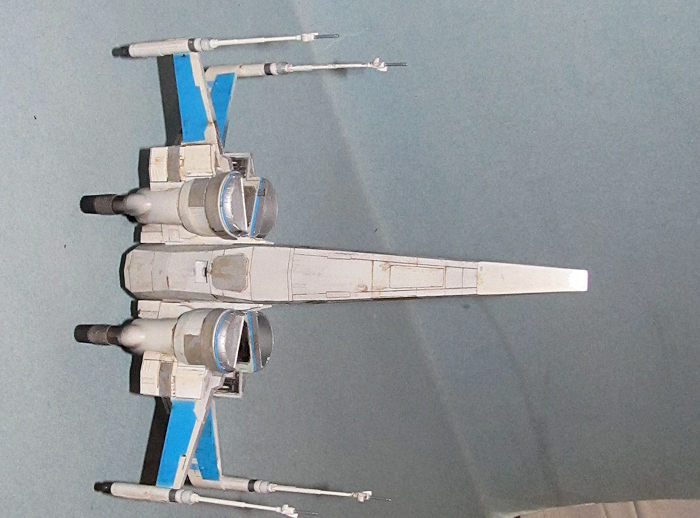
I mostly used the many stencil decals for the most part. These went on well for the most part, but I wish I had cut out the silver intake strips instead of using the entire intake decals on a curved surface as surprisingly these decals did not conform to a curved surface. I doused them with Solvaset twice and they were still a wrinkled mess as you can see in some of the pictures. Not happy about it, but not much I can do. Otherwise, the decals went on with a bit of Microset.
I laid down a thin watercolor wash with some areas were dirtier than others (especially around the engines.) The excess was wiped away using damp Q-Tips. A thin coat of Tamiya Flat Coat was sprayed on to seal everything in. Lastly, I sprayed flat black and gunmetal around the engine sections to show carbon scoring from the heat as based on movie and the box photos.
| FINAL BITS |
 The various
painted sections of wing and fuselage including the nose were assembled together
based on the instructions. I glued the S-Foils into attack position.
The various
painted sections of wing and fuselage including the nose were assembled together
based on the instructions. I glued the S-Foils into attack position.
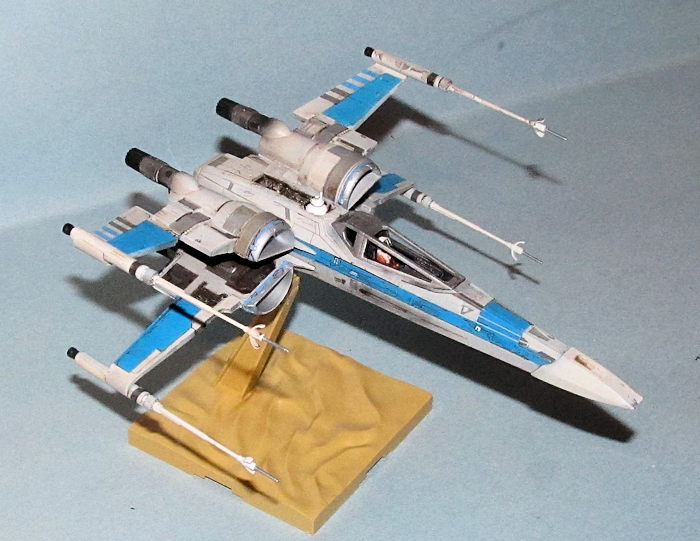
The BB-8 figure was glued, sanded and sprayed Tamiya gloss white. Once dry, the decals were added using Microset initially then I used Solvaset to force the decals to conform to the rounded surface. Meanwhile the pilot figure (Poe Dameron?) was brush painted flat white, international orange, 'flesh color' and silver. Once dry, a thin wash to pop out some detail was done and the excess gently wiped away. I sprayed on a gloss coat then added the helmet decals.
Both droid and pilot were added to their respective positions, added the canopy and then the completed X-wing was added to the stand.
| CONCLUSIONS |
This is the most difficult of the Bandai kits I have built so far. I understand why Bandai made the fuselage pieces based on the separate colors (for those who just wanted to slap it together), but I would have preferred standard fuselage pieces that would have made eliminated most of the filling and sanding I had to do because I wanted to paint it. It is one of those design compromises based on the lowest common denominator that didn't make everyone happy. Oh well. The Bandai X-wing was a lot more work than I hoped for, but that's life. It still makes a decent model, but it requires the above mentioned modeling skills and some planning to avoid the pitfalls if you want to paint/weather it. Also losing parts is not recommended either.
Finally, I have also included a picture of the Bandai X-wing together with my almost 10 year old 1/72 Fine Molds X-Wing “Red Five” for comparison. If you're wondering why Fine Molds X-Wing looks like it was dipped into the swamps of Dagobah well because it kind of was. I had built this during my brief dirty overdone weathering phase where it seemed everything I built was coated in mud/grime. In hindsight I think it looks pretty stupid, but as with many of my stupid ideas it seemed like a good idea at the time.
| REFERENCES |
Wookipedia
18 October 2016
Copyright ModelingMadness.com
If you would like your product reviewed fairly and fairly quickly, please contact the editor or see other details in the Note to Contributors.