| KIT #: | 946 |
| PRICE: | $34.99 SRP |
| DECALS: | One option |
| REVIEWER: | Dan Lee |
| NOTES: |
| HISTORY |
 People of a certain age will remember Jonny Quest.
The animated TV series about the adventures of a young All-American boy, his
Punjabi sidekick, super spy bodyguard and scientist father aired originally in
1964 on ABC. This series started off with probably the best intro/theme song
ever for an American cartoon and went from there as it showed more violence,
suggestive themes and adult situations than any American cartoon of its era
(which was later protested by parents groups.) It ran for one season and 24
episodes before it was cancelled. Like Star Trek, it became more popular during
reruns as all three networks ran it during their Saturday morning cartoon
lineups during the 1960s to 1980s.
People of a certain age will remember Jonny Quest.
The animated TV series about the adventures of a young All-American boy, his
Punjabi sidekick, super spy bodyguard and scientist father aired originally in
1964 on ABC. This series started off with probably the best intro/theme song
ever for an American cartoon and went from there as it showed more violence,
suggestive themes and adult situations than any American cartoon of its era
(which was later protested by parents groups.) It ran for one season and 24
episodes before it was cancelled. Like Star Trek, it became more popular during
reruns as all three networks ran it during their Saturday morning cartoon
lineups during the 1960s to 1980s.
I first saw this as a 10 year old during one of the many times NBC re-ran edited versions on Sat mornings. The 10 year old me thought it was one of the coolest shows ever and wished that I could have lived the life of Jonny Quest (like a lot of kids who saw this show.)
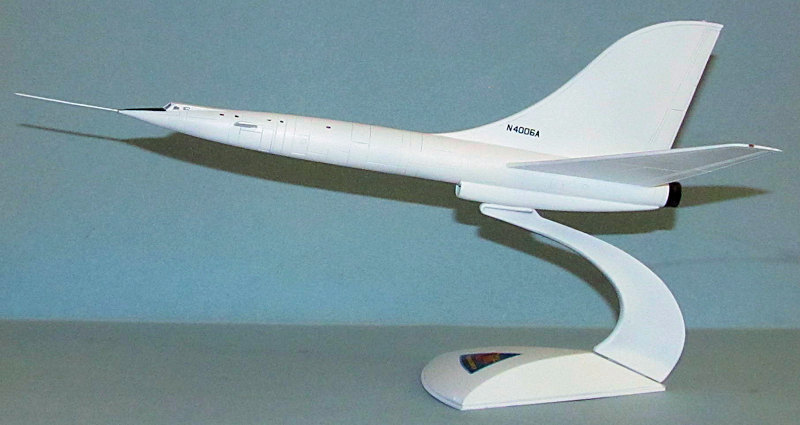
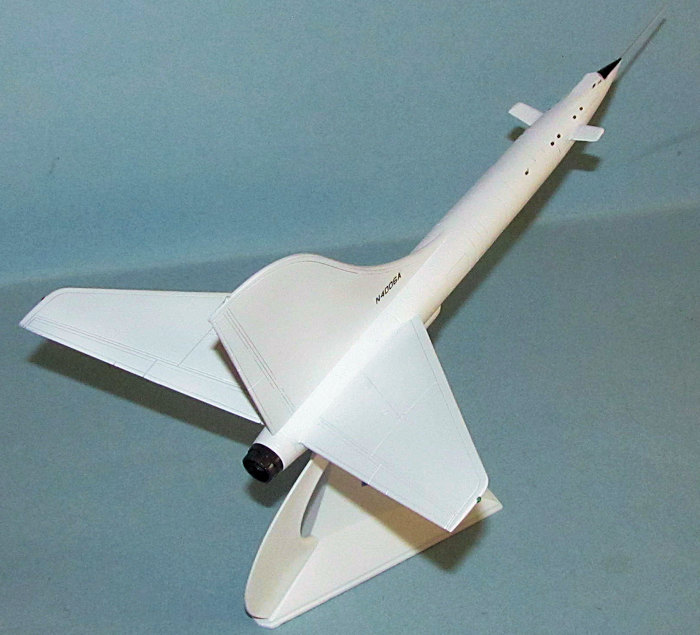
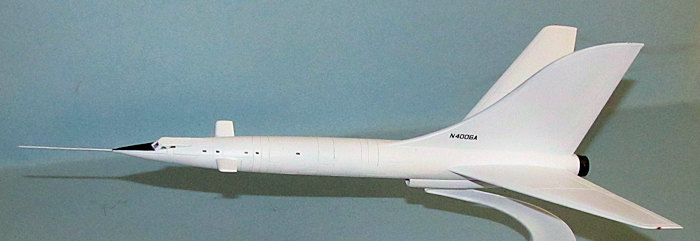
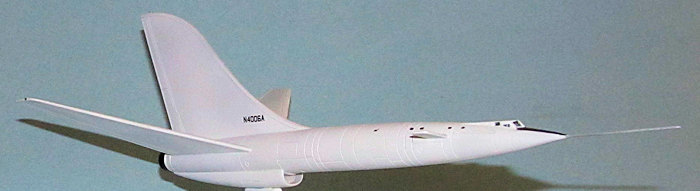
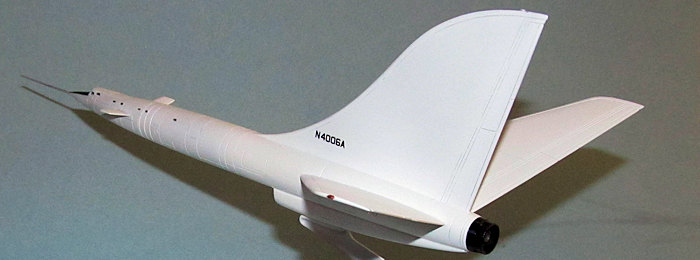
One of the vehicles shown in the intro was the Quest Dragonfly, a V/STOL supersonic suborbital jet of fantastic range that could fly to all corners of the world.
| THE KIT |
In the preview I said the Dragonfly was 1/144. I am wrong. It is closer to 1/200 when I compared it to the few 1/144 scale aircraft I actually do have.
| CONSTRUCTION |
 There is no cockpit so I just slapped the fuselage
halves together and glued the parts with Tamiya extra thin glue. The fuselage
pieces lined up well except the tail on my copy was slightly warped so I did
some judicious bending under hot water to fix the bend so that it doesn't look
obvious. The remaining white parts were removed off the sprue and lightly sanded
to remove the mold seams.
There is no cockpit so I just slapped the fuselage
halves together and glued the parts with Tamiya extra thin glue. The fuselage
pieces lined up well except the tail on my copy was slightly warped so I did
some judicious bending under hot water to fix the bend so that it doesn't look
obvious. The remaining white parts were removed off the sprue and lightly sanded
to remove the mold seams.
At this point I put the pieces in the box and let the glue cure for several months as real life interfered with this build and to remove phantom seams, but mostly due to real life issues.
When I had a chance I filled the seams with Tamiya's version of Mr Surfacer and with gap filling CA glue. After that cured, I took care of the seams via wet sanding using various grits of wet/dry sandpaper (400, 600 and 1000.) Once the seams were done to my satisfaction I then rescribed panel lines that I had removed via sanding/filling.
 Next I glued the intake piece, the canards and the
wings to the fuselage. I then added more Tamiya Liquid Surface primer and CA
glue to area behind the intake piece as there was a step between the fuselage
and intake to fix. Once cured I sanded that area smooth.
Next I glued the intake piece, the canards and the
wings to the fuselage. I then added more Tamiya Liquid Surface primer and CA
glue to area behind the intake piece as there was a step between the fuselage
and intake to fix. Once cured I sanded that area smooth.
I then used Vallejo Plastic Putty to fill in the gaps at the join of the wings and canards to the fuselage. The excess was wiped away using several Q-Tips wetted with water.
Finally I glued on the extra long nose probe and the clear piece for the control cabin. The nose piece required some filling and sanding to conform to the fuselage as there was a step on the bottom of the fuselage at the join. The clear piece was masked off using carefully cut pieces of Tamiya tape.
| COLORS & MARKINGS |
The whole plane is supposed to be white, but I used Tamiya's Fine Grey Primer sprayed right from the can first as it is better to prime a white plastic model with something that isn't white (sprayed the top half and then the bottom half.) When it was cured and dry, I had to sand down some paint runs and dust particles off the primer coat. I then used polishing cloths (3200, 3600, 4000, and 6000 grit) to smooth out the primer coat. I then sprayed it using white primer. Again when it was dry I had polished it with polishing cloths to smooth out the second coat and added imperfections.
The stand was primed and polished at the same time.
Upon careful review I noticed I still had several
paint runs to deal with (all around the middle of the model where the top and
bottom coats met.)
 These were sanded down and polished.
At this point I realized that I had some gaps around the clear piece so I used Vallejo plastic putty to deal with those gaps as the excess was removed with a slightly damp Q-Tip. Once dry, I sprayed on some Tamiya flat white. I sprayed three coats to get the white paint coverage I wanted. After that I sprayed on a clear coat for decals. Decals? How can one prep for decals if there aren't any with the kit except the one for the stand! Well, I realized that the Quest Dragonfly is going to need civil registry decals so I went to my pile of decal spares to find anything. I found some 1/72 black lettering from an old Airfix Lynx decal sheet. The letters and numbers were cut out and arranged to make an imaginary FAA registry number. I used Micro Set to settle them down. The Quest decal was added to the stand.
Next I carefully hand painted the fuselage windows black and the wing/fin tip lights silver, then red (for port) and green (for starboard) while the extra long pitot tube was sprayed with Vallejo white alluminum.
Finally, I masked off the nose and sprayed on a black anti-glare panel. I had to do this a couple of times as I had paint leak under the Tamiya tape. Once done to my satisfaction I sprayed on two thin coats of Valljeo Semi-gloss for the final coat.
The final step was to glued the plane to the stand as there is no landing gear to speak of.
| CONCLUSIONS |
The Jonny Quest Dragonfly is a nice stand kit and
something you can fun with. Relatively easy to build and paint. Fine for
modelers of all skill levels.
1 August 2016
Copyright ModelingMadness.com
If you would like your product reviewed fairly and fairly quickly, please contact the editor or see other details in the Note to Contributors.