| KIT #: | ? |
| PRICE: | $30.00 second hand |
| DECALS: | None |
| REVIEWER: | Mark Hiott |
| NOTES: |
Depicts the ship as it
appeared in Star Wars IV |
| HISTORY |
The Millennium
Falcon is a spacecraft in the fictional Star Wars universe commanded by
smuggler Han Solo and his Wookiee first mate, Chewbacca. The highly modified
YT-1300 light freighter first appears in Star Wars Episode IV: A New Hope
(1977), and subsequently in Star Wars Episode V: The Empire Strikes Back
(1980), Star Wars Episode VI: Return of the Jedi (1983) and in a cameo in
Star Wars Episode
| THE KIT |
I'm
not sure when this kit was first molded, but my copy was stamped 1988. It has
been released in several versions, including
 lighted and
a cutaway versions. Molded in light gray plastic, you can tell this was the
lighted version as the kit still includes the battery box. The detail is good,
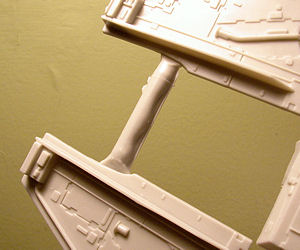
but from what I read, it's not quite accurate. There was some flash on my kit,
but nothing to serious. The biggest problem is the sprue attachments points,
they are quite large. The top and bottom sections are molded as single pieces
and both of mine were warped.
lighted and
a cutaway versions. Molded in light gray plastic, you can tell this was the
lighted version as the kit still includes the battery box. The detail is good,
but from what I read, it's not quite accurate. There was some flash on my kit,
but nothing to serious. The biggest problem is the sprue attachments points,
they are quite large. The top and bottom sections are molded as single pieces
and both of mine were warped.
 A sprue of
clear parts is included and it is here that the kit suffers from having been
lighted at one time. MPC includes a 2-part clear section for the aft engine and
a template in the instructions, but they don't tell you what to do with it.
A sprue of
clear parts is included and it is here that the kit suffers from having been
lighted at one time. MPC includes a 2-part clear section for the aft engine and
a template in the instructions, but they don't tell you what to do with it.
The
instructions are typical MPC and easy to follow. They include some color
callouts, but the majority of paint colors is left up to the modeler.
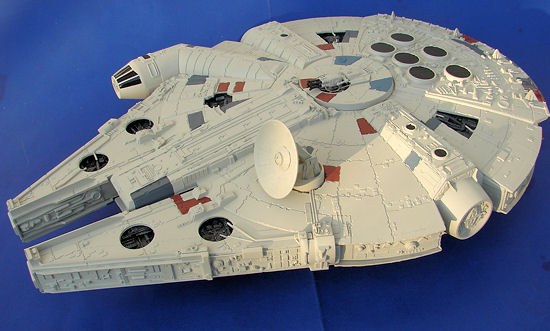
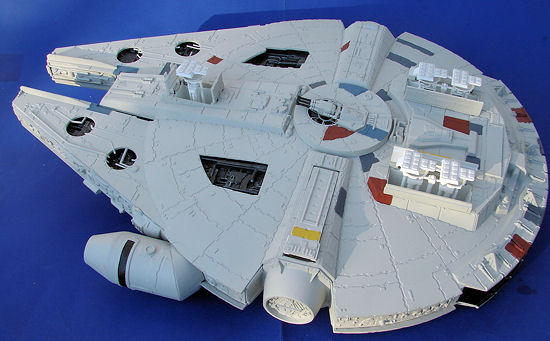
This version of
the model depicts the Falcon as she appeared in Star Wars IV-A
| CONSTRUCTION |
 Since I
wanted to paint the model as a whole as much as possible, I had to deviate from
the instructions just a bit. The first step was to add the bulkheads to the
lower section. The fit here was a bit dodgy and I had to do a bit of filling to
get a decent fit. I also installed the upper and lower gun plates, leaving the
blisters and guns until later. Once that was all dry, I painted everything. Next
I painted the body inserts and installed them into the upper and lower sections.
A good bond is needed here as once the sections are joined, if one comes loose,
you cannot reattach it and it will rattle around the inside for eternity. I then
painted and installed the engine exhaust, landing gear and boarding stairs. I
left the stairs free to move so that they will always touch the ground.
Since I
wanted to paint the model as a whole as much as possible, I had to deviate from
the instructions just a bit. The first step was to add the bulkheads to the
lower section. The fit here was a bit dodgy and I had to do a bit of filling to
get a decent fit. I also installed the upper and lower gun plates, leaving the
blisters and guns until later. Once that was all dry, I painted everything. Next
I painted the body inserts and installed them into the upper and lower sections.
A good bond is needed here as once the sections are joined, if one comes loose,
you cannot reattach it and it will rattle around the inside for eternity. I then
painted and installed the engine exhaust, landing gear and boarding stairs. I
left the stairs free to move so that they will always touch the ground.
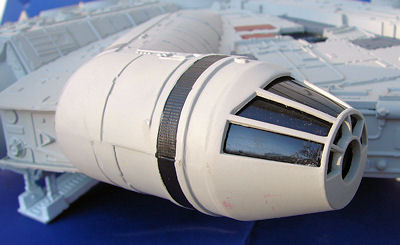
The
cockpit section posed a particular problem. As there was not really an interior
to speak of, I decided to paint the clear parts. However, they are intended to
been inserted into the nose section and then that attached to the main body. The
fit is very poor on the cockpit "tube" and as MPC molded the top of the tube on
the top body section, the i nstructions
would have you attach the lower part of the tube to the body after the top and
bottom are attached. Makes it kinda hard to repair the seams. I ended up gluing
the tube together, with the nose cone, before I attached the two sections
together. After filling, sanding and painting, I then inserted the clear part
from the inside and the attached the top section to the bottom.
nstructions
would have you attach the lower part of the tube to the body after the top and
bottom are attached. Makes it kinda hard to repair the seams. I ended up gluing
the tube together, with the nose cone, before I attached the two sections
together. After filling, sanding and painting, I then inserted the clear part
from the inside and the attached the top section to the bottom.
Gluing the top and bottom sections together required a lot of rubber-bands and
several clamps. The fit is poor, but there is not a lot you can do about the
seams without destroying all the detail. Installing the 2 side pods required
some trimming to get a good fit.
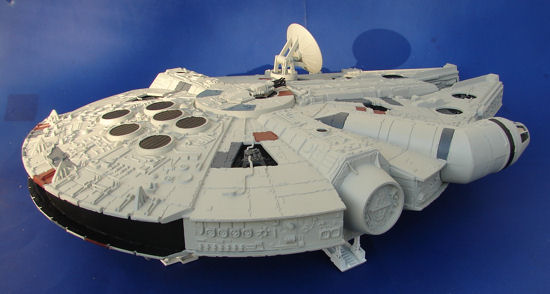
Installing the guns and their blisters, gear doors and the large radar dish
completed assembly.
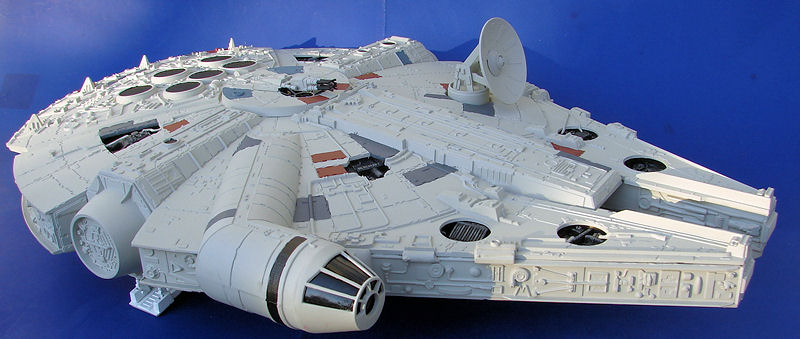
| COLORS & MARKINGS |
 Not much to
do here as the entire main body is painted gray. After looking on the 'Net at
various builds, I decided to go with MM Light Ghost Gray. I painted everything
except the landing gear. I chose to paint those flat white. The engine vents on
the rear deck were painted MM Flat Black. Using the Fine Molds as reference, I
painted various panels with MM Rust, Intermediate Blue and Gunship Gray.
Not much to
do here as the entire main body is painted gray. After looking on the 'Net at
various builds, I decided to go with MM Light Ghost Gray. I painted everything
except the landing gear. I chose to paint those flat white. The engine vents on
the rear deck were painted MM Flat Black. Using the Fine Molds as reference, I
painted various panels with MM Rust, Intermediate Blue and Gunship Gray.
As
this was a build for my daughters future husband, who is not a model
 builder
just a Star Wars nut, I chose not to apply any weathering to the model.
builder
just a Star Wars nut, I chose not to apply any weathering to the model.
| CONCLUSIONS |
Not
a particularly difficult build, it does have it's ups and downs. However, I'm
sure anyone with a few models under their belt can handle this. Anyone who is a
Star Wars fan should have one of these in their collection.
I'm
not real sure of my color choices, but seeing how it's a Sci-Fi model, I'm sure
the actual color is debatable.
| REFERENCES |
Fine
Molds instructions for color details
Wikipedia for the history
Photos off the 'Net
Mark Hiott
December 2012
If you would like your product reviewed fairly and fairly quickly, please contact the editor or see other details in the Note to Contributors.