Atomic City 1/12 Mercury Capsule
| KIT #: | |
| PRICE: | $ |
| DECALS: | Six options |
| REVIEWER: | Mark Hiott |
| NOTES: | Scratch built stand |
| HISTORY |
 Project
Mercury was the first human spaceflight program of the United States,
conducted by NASA from 1958 to 1963. Its primary goals were to orbit a
manned spacecraft around Earth, investigate human performance in space, and
safely recover the crew and spacecraft. The program achieved these
objectives through six manned flights between 1961 and 1963, with the first
American in space being Alan Shepard and the first American to orbit Earth
being John Glenn.
Project
Mercury was the first human spaceflight program of the United States,
conducted by NASA from 1958 to 1963. Its primary goals were to orbit a
manned spacecraft around Earth, investigate human performance in space, and
safely recover the crew and spacecraft. The program achieved these
objectives through six manned flights between 1961 and 1963, with the first
American in space being Alan Shepard and the first American to orbit Earth
being John Glenn.
| THE KIT |
Being a real space nut, when this kit first came out, I was amazed. That a company would produce a Mercury in this scale was incredible. The kit comes in a very large, top opening box. The capsule itself is molded in black, the interior in light gray and the escape system in red. There is also a small fret of clear parts. Oddly enough, the capsule hatch is molded in red. The astronaut is molded in a kind of soft vinyl. There are also some metal parts that are for the retro pack.
 The
decal sheets are quite large (there are 2) and contain markings for all 6 of
the Mercury flights. They are very detailed and include all the various
warning and stencils required. It also includes the ID stripes for the retro
pack. (more on that later)
The
decal sheets are quite large (there are 2) and contain markings for all 6 of
the Mercury flights. They are very detailed and include all the various
warning and stencils required. It also includes the ID stripes for the retro
pack. (more on that later)
The instructions are a large fold out style and include instructions on the various modifications needed for the different capsules. They are very detailed on where and how to add the decals... follow it carefully.
A couple notes here... the flight control handles are molded into the astronauts hands, so if you choose not to use him, you will need to scratch build the controls. Also the instrument panel does not conform to any actual Mercury capsule. To me it appears closest to Gordon Coopers "Faith 7", so that's the capsule I modeled.
| CONSTRUCTION |
 It's a fairly straight forward build. I assembled it in sections...
interior, escape tower, body and retro pack. The only addition to the kit
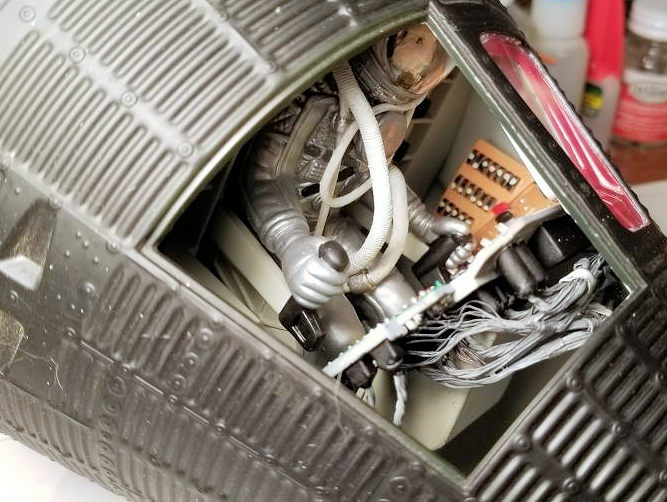
was the wiring behind the instrument panel. With the hatch off, the details
behind the panel are very visible. I found some large gauge wiring and
stripped the wire into individual strands. I then drilled holes in the panel
where I thought there should be wires. I bent them in the shape that looked
good and then painted the dark gray. The wires were then bundled with Tamiya
tape.
It's a fairly straight forward build. I assembled it in sections...
interior, escape tower, body and retro pack. The only addition to the kit
was the wiring behind the instrument panel. With the hatch off, the details
behind the panel are very visible. I found some large gauge wiring and
stripped the wire into individual strands. I then drilled holes in the panel
where I thought there should be wires. I bent them in the shape that looked
good and then painted the dark gray. The wires were then bundled with Tamiya
tape.
Once all the subassemblies were finished, I glue the whole thing together. It's actually made to come apart and show off the various parts, but unless you intend to go all out with the details, I'd just glue it together.
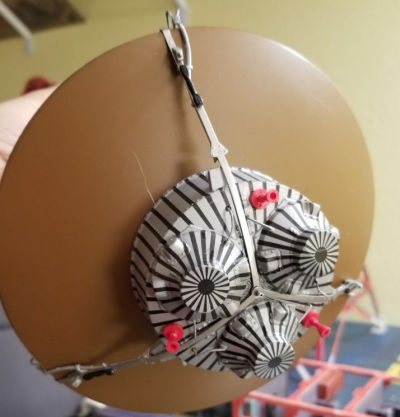
The only trouble I had was with the retro pack. For the life of me, I could not get the metal mounting straps to fit properly. I ended up using a medal rod in the center.
| COLORS & MARKINGS |
Painting is not that difficult. The interior is painted gray. The instrument panel is painted in several colors to indicate various systems. The astronaut is painted silver, and as it's vinyl, you will need to use acrylic paint on him.
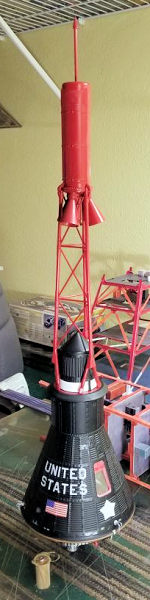
T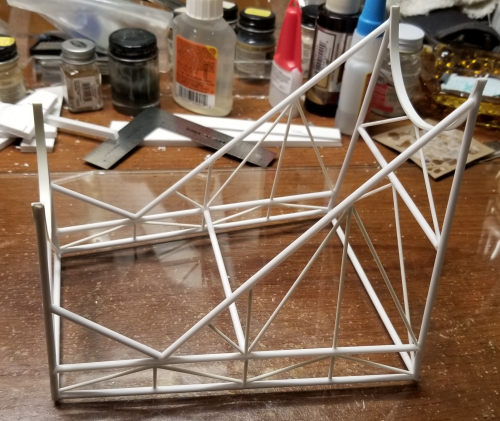 he
capsule is painted flat black and the escape tower is red. Paint the
retro pack silver. There is some debate as to what color the heatshield
really was, but it was defiantly a shade of brown. I ended up using a
dark tan.
he
capsule is painted flat black and the escape tower is red. Paint the
retro pack silver. There is some debate as to what color the heatshield
really was, but it was defiantly a shade of brown. I ended up using a
dark tan.
As far as the decals for the retro pack go, just follow the instructions. Apply the decals to the base first. Then apply the decals to each of the engine pods doing your best to line them up with the decals on the base. (not all of them will) Take care and they will come out nice. I found the other decals rather thick and no matter what I did, I could not get them to completely snuggle down over the corrugated skin of the capsule.
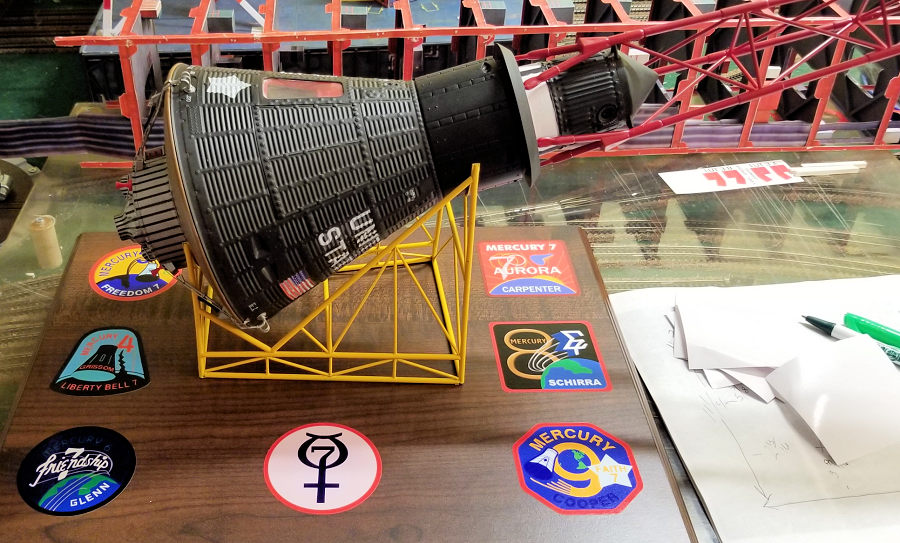
I didn't care for displaying it standing on the retro pack, so I built a simple display stand. I found some pictures on the net and tried to get it someway close. I mocked it up in card first. After several modifications, I built it out of various sizes of Everygreen plastic. Once I made sure it fit properly, it was then painted yellow. I found the Project Mercury stickers on Etsy and mounted them on a base to display the capsule. The base carries all 6 Mercury mission patches plus the "Project Mercury" patch. I think it came out quite nice.
| CONCLUSIONS |
I think anyone who is interested in real space should build one of these kits. It's a simple build without any real issues.
| REFERENCES |
The internet
8 September 2025 Copyright ModelingMadness.com. All rights reserved. No
reproduction in part or in whole without express permission from the editor.
If you would like your product reviewed fairly and fairly quickly, please contact the editor or see other details in the Note to Contributors.