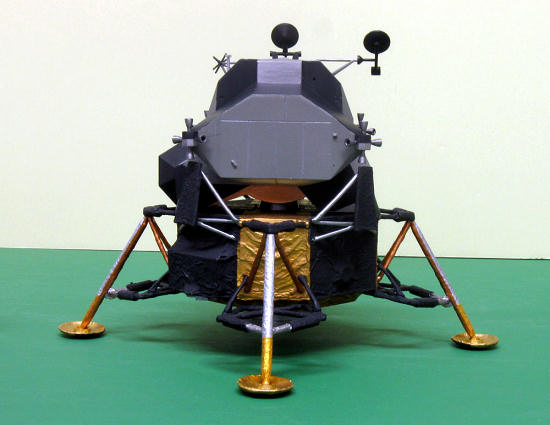
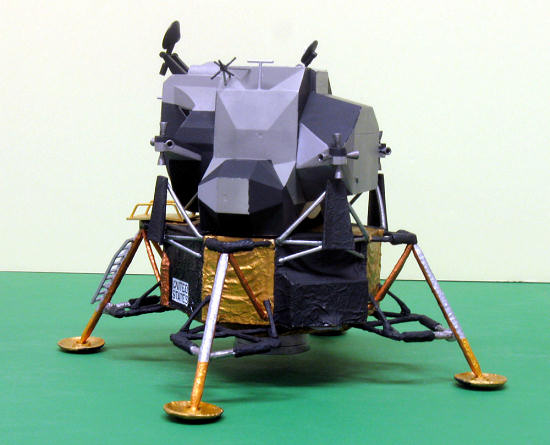
Dragon 1/48 scale Apollo 11
Lunar Lander “Eagle”
|
KIT #: |
11008 |
|
PRICE: |
$46.00 SRP
|
|
DECALS: |
One option |
|
REVIEWER: |
Bill
Michaels |
|
NOTES: |
First release, includes pre-painted gold parts |

 The
history of Apollo program is well documented, so there’s no need to repeat it
here. (There’s a pretty good
summary on Wikipedia.) Instead, I’ll just provide a couple of factoids…
The
history of Apollo program is well documented, so there’s no need to repeat it
here. (There’s a pretty good
summary on Wikipedia.) Instead, I’ll just provide a couple of factoids…
The LM-5 was the fifth (Duh!) Lunar
Module of the Apollo program, and the first one to land on the moon.
All of the Apollo spacecraft were given names by their crews—so the
Apollo 11 mission consisted of the “Columbia”
(the Command Module) and the “Eagle”, the Lunar Module that is the subject of
this kit. The Lunar Modules were
built by Grumman Aircraft Engineering.
Originally, the spacecraft was
called the Lunar Excursion Module, or LEM.
Fairly early in the program, the name was changed to Lunar Module, or LM,
though it was still called “Lem”, because it was easier to say than “L-M”.
Apollo 11 was the first landing on the moon,
and Apollo 17 was the last. The LMs
used for Apollo missions 15, 16, and 17 were the “J class” LMs, and are
different from the earlier craft.
So, this kit could be used to build the LMs from Apollo 11 through 14.
Scott’s
preview of the kit, published here on MM on
November 1, 2011,
covers the basics of the kit.
I do have some additional comments on the kit
itself—things that weren’t apparent until I started to build it.
First off, the kit’s instructions:
Printed on a single sheet of paper, they provide basic instructions
on the assembly of the model, but have some oddities. The front side includes a
picture of the subject, the paint chart, and an illustration of the sprues. The
sprue diagram has a key that indicates that some parts are “not for use”, but
none of the parts are so identified.
But the kit clearly includes extra parts—several are left over after the
build. I can only surmise that
there will be other versions of th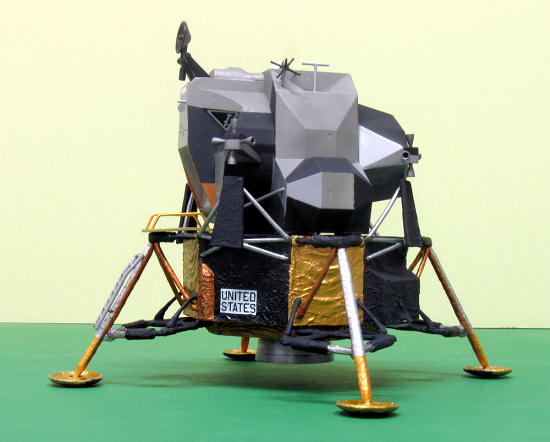 e
LM in the future— for example a couple of the parts look like they are for a
“Lunar Approach” version, with the landing legs folded.
(Dragon has already released LMs in both configurations in 1/72.)
e
LM in the future— for example a couple of the parts look like they are for a
“Lunar Approach” version, with the landing legs folded.
(Dragon has already released LMs in both configurations in 1/72.)
The back side of the sheet has the
3 step assembly sequence. Assembly is fairly simple, and the upper and lower
stages don’t have to be joined until the model is complete—so you can work on
them in parallel.
But the instructions are lacking in
places. The legs are keyed to
certain locations, and the instructions only give the part numbers for two of
them. They use the standard style
of left/right, but completely forget that the model has four corners, not two.
Also, I found a couple of the parts were labeled with the wrong number on
the instruction sheet. Combining
this with the presence of un-identified extra parts means you may have a couple
of puzzles to solve as you build the model. (But nothing too challenging, I
think!)
My kit was the “First Release”, in
which some of the parts on the Descent Stage are pre-painted in a gold color.
The painted parts look good, with a nice even finish.
However, I think that the pre-painted parts aren’t worth the trouble.
The problem is that in the course of assembly, you’re going to sand off
some paint while cleaning up the molding seams. I searched high and low, looking
for a color match in hobby and hardware stores, to no avail. So, in the end, I
ended up having to repaint all the gold parts anyways.
Speaking of cleaning up, nearly all
the parts had mold lines that needed to be cleaned up.
I spent a lot more time sanding and scraping than I expected I’d be
doing— all the leg parts and braces especially needed attention.
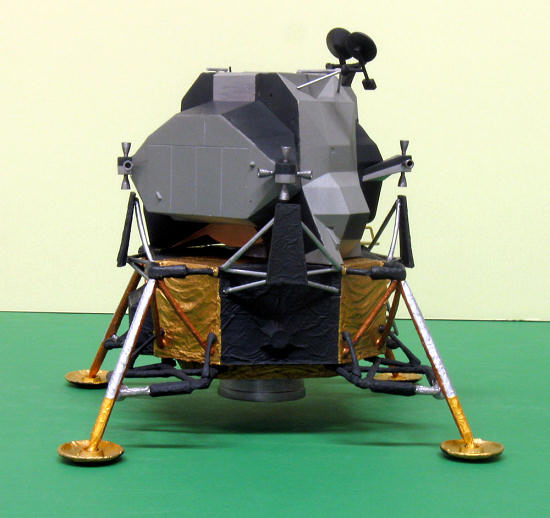
There are two basic parts of the
model—the Descent Stage and the Ascent Stage. You can build them in parallel,
and then join them at the end.
Working on the two stages in parallel allows construction to move at a pretty
quick pace.
Assembly of the Ascent Stage goes
reasonably well. The complex shapes
are made up from several parts that fit better than I expected. Only a couple of
the corners and seams needed a couple of coats of Mr.Surfacer 500 to fill them.
In no time at all I was
 ready
to start masking.
ready
to start masking.
The instructions would have you add
some rather fragile antennas to the top of the craft as the first step.
I’d strongly recommend leaving all the little detail parts off until
after the shell is painted—it will be much easier to mask and paint the multiple
colors on the various panels if there are no details in the way.
In fact, I left the rear section off until after painting, which made
masking easier.
Construction of the Descent Stage looks simple,
but presents a few challenges of its own.
First, there’s the hassle of dealing with the pre-painted parts. By the
time I was finished cleaning up parts, every single pre-painted part needed to
be re-painted.
The Descent Stage has a lot of
colors—not just gold. Looking at my
reference, I decided it would be easier to paint the body and the legs
separately, before assembly. That
worked out well, as most of the other colors (besides the gold base coat) were
brush painted, and touch-up after assembly was easy.
There’s one area that doesn’t live up to the
standards of the rest of the kit—the frames for the little blast shields for the
Ascent Stage’s maneuvering thrusters.
The tube structure parts are a little clunky, and you have to bend them
to get them to fit in their mounting holes.
Doing this throws off the alignment, so they end up a little out of
place. Short of scratch
building a replacement, there’s not much you can do about it, so I decided to
just live with it.
The only color information is a
comprehensive set of profiles on the bottom of the box. They call out three main
colors—silver, black, and gold; and a few detail ones.
Based on the research I did, I don’t
think Dragon’s color callouts are very accurate— it looks like there were 13
different colors on the LM.
The Color and Coatings Reference I
found provided a great resource for painting my model.
I printed out the pages, and referred to them frequently. I used Tamiya
colors, primarily. Painting the
upper stage involves a lot of masking and handling, so I started
 with a
coat of Tamiya primer from a rattle can.
with a
coat of Tamiya primer from a rattle can.
There are three main colors on the Ascent
Stage— the color guide I used describes them as two metallics and flat black.
The metallic colors are described as a “beige tinted aluminum” and a
“greenish aluminum”. For the green, I
mixed some Nakajima Cockpit Green with gun metal metallic.
Beige and platinum were mixed to make the other metallic.
For the black, I used Nato Black, as it wasn’t as harsh as a true flat
black.
Expect to spend some time
masking—it took several sessions to get all the panels painted.
I used the greenish aluminum as a base coat, and then added the other
colors.
Painting the Descent Stage:
As I already mentioned, I did a lot of painting as I went along.
I never really found a Gold paint that matched the color used by Dragon.
In the end, I used a Pollyscale enamel that I found in the local model RR
shop. For the other metallics, I
used Citadel paints —they are great for brush painting.
They have two shades of gold, three silvers, and nice bronze that gives a
nice dark copper color.
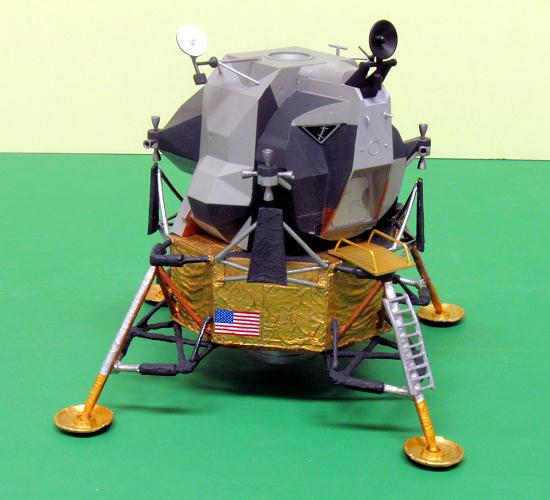
The kit instructions tell you the
lower leg braces and legs should be gold (they’re pre-painted), but they should
be painted black. Only about 20% of
the legs should be the gold color—there are actually two other colors that are
more prevalent.
The small decal sheet has two sets
of flag and “United
States”
markings, but only one set is needed.
It also includes window decals.
The kit doesn’t include clear windows, which I think is fine, as there is
no interior. I painted the windows
black, and then
 applied
a coat of future. The window decals
fit well, and a topcoat of future finished them off.
applied
a coat of future. The window decals
fit well, and a topcoat of future finished them off.
The decal placement guide is on the
bottom of the box and doesn’t identify all the decals. There were a couple of
little window decals leftover that I didn’t know what to do with.
It wasn’t until after the model was finished (and the photos taken) that
I realized they were for the little molded depressions on top of the Ascent
Stage. (These windows were for the
crew to use when reuniting with the command module after the landing.)
The decals reacted well to
Micro-Set/Sol products— they settled in nicely on the raised foil detail on the
lower stage. Once they were dried, I top
coated the panels with the decals with future, which enhanced the look of the
metallic sections.
With the decaling and painting
finished, I finally joined the two stages. (Using part B-1, which isn’t
mentioned in the instructions.)
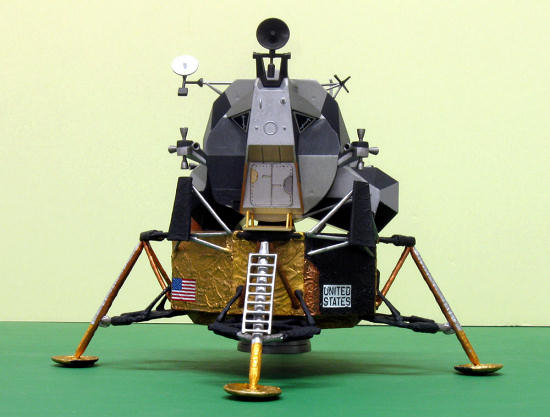
The final step was to then attach and paint the fine antennas to the top
of the model, and then step back and admire the finished model!
 Recommended.
The kit isn’t perfect- it does have
a few drawbacks as described above. But
it is nicer than the old Monogram kit, and would make a nice base for a
super-detailing effort if that’s your thing.
But it also makes a pretty decent model built out of the box.
The LM is bigger than I expected.
When I took it to our club meeting, I set it next to the other 1/48 scale
models that folks had brought in. A
couple of people saw it towering over the fighters and a Sherman, and assumed my
model was 1/32 scale!
Overall, I think the model strikes a nice
balance between detail and parts count, all in a package that is reasonably
priced. I feel that it was worth
the money and time spent on it. I really enjoyed this build- it was a fun
diversion from my usual aircraft and armor kits.
Review kit courtesy of my wallet.
Note that while the retail price is $46, the kit can be found for less.
I paid $35 for mine, using my club discount at the local shop.
Special thanks to Pip Moss of the
IPMS Patriot Chapter in
Bedford,
Massachusetts
for taking all the great pictures.
There is a lot of great information
on the Apollo spacecraft available on the web.
Here are two sites that I found to be really helpful when building my
model:
LM Color and Coatings Guide:
http://pfinspace.com/lmdata/coatings.gif
Vincent Meen’s Space Models Page—
his 1/24 scale LM-5 is a real inspiration:
http://spacemodels.nuxit.net/LEM-24/Completed%20model/index.htm
Bill Michaels
January 2012
If you would like your product reviewed fairly and fairly quickly, please contact the editor or see other details in the Note to
Contributors.
Back to the Main Page
Back to the Review
Index Page