Bandai 1/48 Star Wars: X-Wing (Moving Edition)
| KIT #: | 0196419 |
| PRICE: | 9800 yen SRP |
| DECALS: | One option |
| REVIEWER: | Donald Zhou |
| NOTES: | Advantages: Well detailed, lighting kit and motor included, It is nearly “Perfect Grade” Disadvantages: Electronics little brittle, you have to think it through if you want to color this thing |
| HISTORY |
…A long time ago, in a galaxy far far away…
Thus begin probably the most profitable and the most popular Sci-Fi film franchise ever! Now, Star Wars is not just a great sci-fi film, but it is also very widely known for its eclectic collection of vehicles, some of which had entered sci-fi stardom. Vehicles like the Millennium Falcon, TIE fighter, and the Star Destroyer (Imperial Star Destroyer. Colloquially known throughout the War verse as an Imp Star D) etc became the go to vehicles in sci-fi lore in general. One of the most well-known, however, has to be the X-Wing.
The Incom T-65 X-Wing became the symbol of the Alliance. It was supposed to be built for the Galactic Empire for general use. But the original design team had other ideas. When the Empire wizened up and tried to fully take over the Incom Corporation, the entire design team defected and the Rebellion instead set up the manufacturing in secrecy to produce the X-Wing instead. Eventually, again ironically, the Empire opted for the cheaper TIE Fighters. Despite the annexation, Incom became synonymous with the Rebellion, much to the chagrin of its Board.
The X-Wing is a totally different concept to the TIE. While the TIE is cheap, easy to produce, had very little in the way of armaments (just two laser cannons), no shields and no hyperdrive, the X-Wing has them all. It is armed with four Tiam & Bak TK9 laser cannons, one on each wing tip, two on top, two on the bottom. These cannons can be programmed to fire in unison, or sequentially. Usually, due to a cooldown and recharge period, the fire control computer is programed to fire the cannons sequentially one at the time after the other, automatically calculated and triangulated onto the targets positon, adjusting for the target’s speed and direction. The cannons are only fired in unison in extremis situations. It is also armed with two Krupx MG7A proton (say PROton, not PHOton! Photon torpedoes are the much larger anti-matter torpedoes used in Star Trek) torpedo launchers located just beneath the cockpit, each launcher is armed with up to 5 round clip of torpedoes although at the time of Yavin, the cash-strapped rebellion can only afford to arm each X-Wing with 2 torpedoes, one in each launcher. In the end, the fighter gained massive fame when Luke Skywalker, using the Force, was able to jam both torpedoes down the Death Star exhaust port, destroying it completely with all hands except Vader. The craft offers a single cockpit, hosting a single pilot with a droid socket outfitted to the R2 series of astromech droids. The pilot do all the piloting and fighting duties. The droid act as a co-pilot, usually responsible for navigation, damage control and shield modulation. The craft is also equipped with a hyperdrive, allowing for quick “hit-and-fade” style missions where the craft suddenly appears, doing quick strike on say, a hapless Imperial convoy, then quickly fade back into hyperspace. It is also equipped with a shielding device that allows the pilot (with the astromech droid doing the hard work) to modify the shield to guard the entire craft, or concentrate the shields on a specific area, such as the craft’s “six-o’clock”.
The X-Wing soon became the go-to craft for any Rebellion pilots. The Death Star kill notwithstanding, it also did escort duty when the Rebel base at Echo Base was found, escorting transport ships out of the danger zone. It soon supplemented and eventually outright replaced the obsolescence Y-Wing. It has enough speed and more than enough maneuverability to tangle with the Empire’s TIE/Ln fighters and in the right hands, could go toe to toe with the faster TIE Interceptor and emerge victorious. The pilots appreciated the fighter’s shielding systems, which allows it to survive a few blasts from the TIE’s cannons (which led to a major complaint from Imperial pilots that they may get a bead on a X-Wing, they may even get a few shots in, but in the end, still watch as the X-Wing escape due to its shielding), giving the pilot a chance to escape. Meanwhile, with its powerful Tiam & Bak laser cannons, one shot is usually more than enough to shred a defenseless TIE.
The craft found absolute favor with the famous Rogue Squadron, which uses it for any missions except those very specific ones that requires a more specialized craft. Otherwise, they just tend to use the X-Wing for all sorts of missions due to its “jack-of-all-trades” nature. The craft eventually achieved even more massive fame, when Wedge Antilles, the other sole survivor of the original Death Star attack mission, was able to penetrate the Death Star II defenses, and fire his own protons at the stations massive reactor’s power regulator, helping the Rebellion destroy the massive Imperial construct. Some 40 years later, an improved version, the T-75 is still in service with the Resistance….Although I much prefer the now “Legends” (FEH!!!!) version that the X-Wing, even though still in service, was replaced by the like of Freitek (Made up of the original defected and escaped X-Wing design team) E-Wing fighters.
| THE KIT |
 Yeah, yeah! I broke down
and bought this kit……Simply put, as a huge Star Wars and Trek nerd, I always
wanted the Millennium Falcon, X-Wing and the Star Destroyer. When I was young, I
used to have the MPC/Ertl X-Wing, MF and Star Destroyer. Now all three have
their accuracy faults, were ill-fitting, and absolutely a nightmare to build! I
eventually also got their 1/48th scale TIE fighter two pack, which still survive
sans the display stand……
Yeah, yeah! I broke down
and bought this kit……Simply put, as a huge Star Wars and Trek nerd, I always
wanted the Millennium Falcon, X-Wing and the Star Destroyer. When I was young, I
used to have the MPC/Ertl X-Wing, MF and Star Destroyer. Now all three have
their accuracy faults, were ill-fitting, and absolutely a nightmare to build! I
eventually also got their 1/48th scale TIE fighter two pack, which still survive
sans the display stand……
Now the original Ertl X-Wing, although good, was NOT 1/48 scale. It’s more like 1/40 scale instead with some parts close to 1/38…..The wing does move and it comes with a clear display stand so you can display it “in-flight” or landing foot-pads to display it landed. However, if you choose the “landed” mode, then the craft’s wing cannot be moved. After losing the thing over the years, I always wanted to have another crack at another X-Wing. Thing went haywire when I bought the Perfect Grade Millennium Falcon. I wanted to buy the Revel/Fine Molds 1/48th X-Wing….But when the copyright thing went brouhaha, I held off. Glad I did.
So, what’s the difference between this and all others? Well, the kit itself is actually pretty damn easy and not a lot of parts. The most part intensive are in the wings since you need to build up four of them. The rest is actually is pretty easy. So why so expensive? Well, other than the fact that the evil emperor….**AHEM** Disney need their copyright royalties (hey, Disney supposed to coughed up 13 billion to THE other Emperor George Lucas for the ownership rights to Star Wars), the mess of a copyright who, what , where, when problem (Bandai is now supposed to only have Star Wars rights in Asia, Revel in Europe and…U.S. is in limbo), the biggest reason is that this is a “Moving Edition”. No, it does not mean the plane actually flies (I wish), but it means that the kit contains a unique display stand containing a bunch of electronics (And a battery casing) and a special motor doodongle, with a lighting harness that will light up the completed model’s four engines exhausts, cockpit main display, and the photon tubes. Three buttons on the display stand will operate this. The first will simply turn the unit on and off (The lights will stay on for three minutes and will go to dark standby mode if left untouched). The second operate the wings, making it able to split into the craft’s famous “X” shape or fold it back to “flight” mode. The second will operate the proton torpedo light, which cause the tubes to flash red before slowly fading away while accompanied by a “proton shooting” noise. This entire motor unit/lighting harness is a single unit and is designed to completely reside in the back of the craft itself, with snap-on attachments for all four wings. Other gimmicks include both a sitting pilot (so that if you attach the craft to the display stand for “in-flight” mode, it does not look empty), a half-bodied R2-D2 for the socket, and a complete landing pad set so that you can display the thing in “landed” mode too. Now, these attachment are all snap tight. The kit does give you closed landing pad bay doors too so you can swap them in and out if so wished. In this case, two canopies are also included. One completely closed, the other designed so that you can display it open.
Construction begins by simply taking out the display stand and the motor/lighting unit. The box is huge even though the kit itself does not offer a lot of parts. This is because, as can be imagined, the motor itself is somewhat brittle by its lonesome so a huge cardboard protector unit wrap and protect it and the display stand, which is broken down into two to save space (after unpacking, an included screw is used to assemble the display stand “neck” onto the base), tightly so nothing breaks during transport. All the sprues are squeezed to the right. The motor is inserted onto the top of the display stand, to see if everything works (you need three AA sized battery that you need to source yourself). After testing, the motor is then taken down (be sure the wing attachments are in the “in-flight” folded down mode. You do not want to knock them loose while building the fuselage) and construction can truly begin.
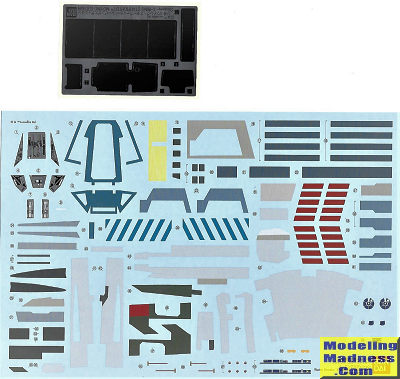
Construction begin with the cockpit and proton lighting unit. A protector unit is needed for both. And notice a black colored sticker sheet is needed. These are applied in strategic places throughout the kit, like the proton launch tubes to trap and conduct the light better. Be sure to follow the instruction carefully here.
The cockpit is build up next. Several decals goes into it. Like all Bandai kits, the cockpit is prepainted. I will probably repaint it. Now, the decals, it comes in either stickers or decals. Young-ons will probably use stickers. Decals for me are more than fine. Again, a light trap is built around the instrument panel light. And then this is trapped beneath the coaming. In fact, conducting stickers are used in both the proton and instrument lighting just be sure to be careful and not trap the lighting wires in between something.
Several side panels are added next. Again, light conducting stickers are used for the inside of the proton firing tubes.
The fuselage is completed in the next few steps. Again, like all Bandai kits, several colored panels are separate. I will be cementing the kit. However, this is why I’m glad for the click on nature of these kits. I could forgo the color panels for now. And can pry the kit parts loose once the main colors are sprayed on to add the color panels. This way, I can forgo masking the kit also. A selection has to be made for the canopy. Again, both the closed and openable canopies are offered. After the fuselage is completed, insert the plane onto the display stand and open the “S-foil” to the “attack” position (aka, spread the wings to the “X” position!) so the wings can be assembled.
 All the wings assemblies
are the same. It starts in the inner wing with a backstop. Then the wings
details are added. Again, I’ll be putting the red inserts on later. The wings
Tiam & Bak laser cannons, sans the long barrels are now added. Then the wings
themselves are now inserted onto the motor assembly wing inserts. You do not
need to cement them. They look like to be on a one way trip. Once that click is
heard, the wings are held in place. Just make sure you do not trap the engine
light harness in the wing themselves.
All the wings assemblies
are the same. It starts in the inner wing with a backstop. Then the wings
details are added. Again, I’ll be putting the red inserts on later. The wings
Tiam & Bak laser cannons, sans the long barrels are now added. Then the wings
themselves are now inserted onto the motor assembly wing inserts. You do not
need to cement them. They look like to be on a one way trip. Once that click is
heard, the wings are held in place. Just make sure you do not trap the engine
light harness in the wing themselves.
The engines are now assembled. Again, be careful with the light harness. Each harness has a light conducting sticker placed on it and also, make sure the wires don’t get stuck somewhere.
The final step adds the four laser barrels. These are saved last since they are pretty long and assembling them early will insure they will snap off their mounting.
The last page shows how to switch the craft from in-flight mode on the display stand to “landed” mode with deployed landing pads. This is easy. Just make sure to switch the wings to “in-flight” mode as trying to slam the main footpads while the wings is in “attack” mode will ensure something will break in the process! Again, everything is snap on so you can switch it around anytime you like.
| CONCLUSIONS |
And that is that. Just wish this kit would be a little cheaper. The asking price is $100. I caught this on sale at the local Hobbytown for $88. But then again, until Disney stop being the Evil Emperor and just god dang sort this copyright, who is who, and what is what out, the price probably will not go down any lower. But the price is well spend since this kit is good enough to be almost “Perfect Grade”…..I just wish they include say Wedge Antilles and his R2 unit in the kit but that would be nitpicking at its finest! I’m itching to start this kit but is trying desperately to hold off until I finish a few more projects on the “waiting to be finished” line…But that itch is stronger and stronger! This kit is just begging to be built since I’ve forever wanted another X-Wing to replace the one I lost eon ago………Now, I’ll just need that stupid Imp Star D to complete my Star Wars collection…Along with the Snow Speeder, AT-AT (Sigh Dragon, you have to F up and mess up that 1/35 scale Walker), TIE Advanced, TIE Interceptor etc etc etc…It doesn’t stop does it?
February 2019
Copyright ModelingMadness.com.
If you would like your product reviewed fairly and fairly quickly, please contact the editor or see other details in the Note to Contributors.
Back to the Main Page Back to the Review Index Page Back to the Previews Index Page