Polar Lights 1/1000 USS Enterprise
| KIT #: | 400 |
| PRICE: | $12.99 MSRP |
| DECALS: | all options |
| REVIEWER: | Dan Lee |
| NOTES: | Snap Kit |
| HISTORY |
According to Star Trek “history”, the starship USS Enterprise was one of the original twelve starships of the Constitution Heavy Cruiser class commissioned into the United Federation of Planets Star Fleet. It’s primary role is exploration, but it also has the secondary role of warship defending the interests and territory of the UFP. The Enterprise was equipped with several phaser banks (energy weapons) as well as several photon torpedo tubes (anti-matter equipped missiles) and energy shields for protection.
 Its main means of
propulsion are two warp engines that warp space and allow it to travel
faster than light (up to Warp 7 or 343 times the speed of light.) The
engines are powered by matter/anti-matter reactors which take the energy
from the matter/anti-matter reaction and channel it through banks of
dilithium crystals to create space warp. It has impulse engines which
allow the Enterprise to travel sub light when required.
Its main means of
propulsion are two warp engines that warp space and allow it to travel
faster than light (up to Warp 7 or 343 times the speed of light.) The
engines are powered by matter/anti-matter reactors which take the energy
from the matter/anti-matter reaction and channel it through banks of
dilithium crystals to create space warp. It has impulse engines which
allow the Enterprise to travel sub light when required.
The Enterprise has a crew of some 430 men, women and aliens. It is equipped with many science labs and recreation facilities as well as massive computer facilities. It can not land on the surface and remain in orbit, but it has a matter transport system to allow personnel to transfer from ship to surface as well as the more conventional shuttles located in the hanger deck at the rear of the secondary hull.
The Enterprise is considered Star Fleet’s most famous starship and considered the pride of Starfleet. It was the only one of the original twelve Constitutions to come back from four consecutive five year missions.
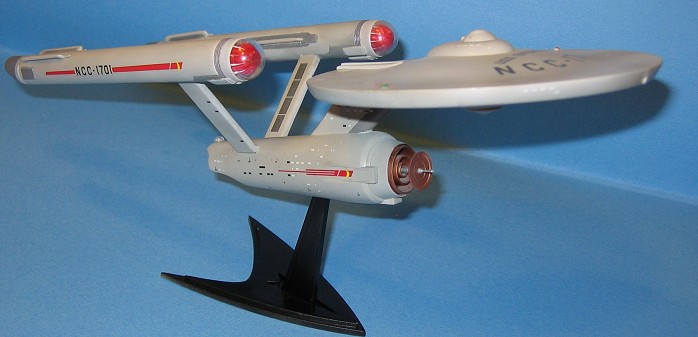
The Polar Lights Enterprise is modeled after the one commanded by Captain James T. Kirk, her famous captain of questionable hair, noted girdle wearer, unbelievably bad singer of Kaleidoscope eyes and galactic womanzier, and his first officer, the ever so logical (except when singing) half human/half Vulcan, Spock.
| THE KIT |
The Polar Lights 1/1000 Scale USS Enterprise comes with 50 grey and clear parts including two COMPLETE sets of engine nacelles and various versions of the bridge and sensor dish so that you can build all the versions of the Enterprise. (One of the oddities of Star Trek was that the Enterprise tended to look different from shot to shot, the reason why was because Star Trek had a limited budget and had to reuse old footage including those from the two pilots that used different models of the Enterprise.) The decal sheet is great because it not only has the markings for all the Enterprises, but it also comes with additional decals if you want to build any of the Enterprise’s 11 sister ships and the Imperial Enterprise from the Episode Mirror Mirror (ie: the episode in which “evil” Spock wore a goatee.)
| CONSTRUCTION |
This kit is one of the best SnaP Together kits I have ever had the pleasure of building.
As a glue together kit? Well… It was a several month exercise of filling and sanding that can drive a man insane (maniacal laughter.)
 The parts fit together well
as a SnaP Together Kit (STK for short.) This STK only took some 20 minutes
to put together and it has a great fit, for a STK which means it still has
gaps (most of them <1mm.) So, my initial alleged thought was that all it
needed a little bit of filling and sanding after I glued (!) everything
together. Should be a piece of cake, I thought. Right? Anyone?
The parts fit together well
as a SnaP Together Kit (STK for short.) This STK only took some 20 minutes
to put together and it has a great fit, for a STK which means it still has
gaps (most of them <1mm.) So, my initial alleged thought was that all it
needed a little bit of filling and sanding after I glued (!) everything
together. Should be a piece of cake, I thought. Right? Anyone?
I soon discovered that this was an unbelievably stupid way of doing things and it is something I will NEVER attempt again (I hope.) So the lesson is not to get caught up in the enthusiam of assembly when trying to make a STK into a decent model. Build and glue the subassemblies, not the whole damned thing—something that most of the people here already know but I forgot in my enthusiasm for this kit.
To give you an idea of how the price I had to pay for my stupidity, I spent somewhere in the neighbourhood of 20 hours filling and sanding the assembled kit!! There were gaps in very hard to reach places (particularly where the saucer meets the secondary hull and where the engine nacelles attach to the secondary hull.) I used every filler I own (green putty, Tamiya putty, Mr Surfacer and CA glue) and nothing worked well. In the process I broke the deflector dish and both warp engines off due to my ham hands and clumsy sanding. Seconds after gluing back the starboard engine nacelle on for the third time, I exploded in frustration (caused by my own stupidity), grabbed a hammer and pounded the $20 CDN kit into dust (this wasn’t the first still born model I’ve had and it won’t be the last, but it was the first one where I took more pleasure in destroying it than building it.)
After I pulled myself out of my funk a couple of days later, I went back to the hobby store to give it another try (hey, I am a fan of the original series and a glutton for punishment.) I picked up another kit and went right back at it. This time, I remembered the Five Ps (actually six for those who can deal with colorful language)—Prior Planning Prevents Poor Performance—and attacked the kit yet again.
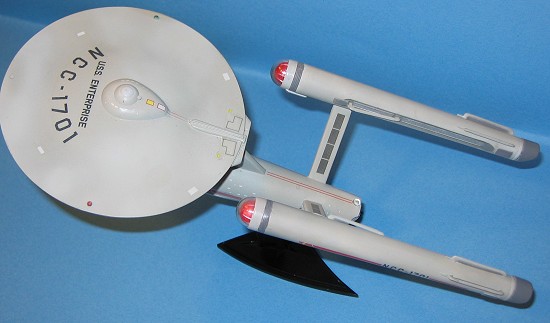
The first thing I did was assemble the primary hull. The parts assemble well as I said earlier. I used Krystal Kleer to attach the bridge, sensor sections and running lights to attach to the saucer pieces. The two saucer parts fit together without much trouble, but there was a 1mm+ gap between the top and bottom sections. I took copious amounts of CA glue and filled the gap. Once I put the accelerator on, I whipped out my coarse sanding stick and proceeded to sand and sand and sand… It took several applications of thin CA and Mr Surfacer 500 and several hours with various grades of sandpaper to get it all nice and smooth and round. A couple of days later, I started on the components of the secondary hull.
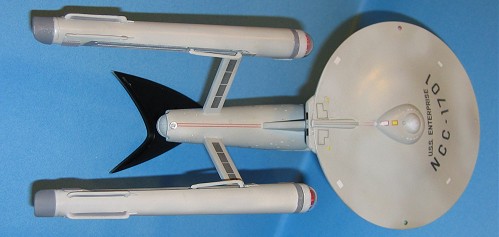
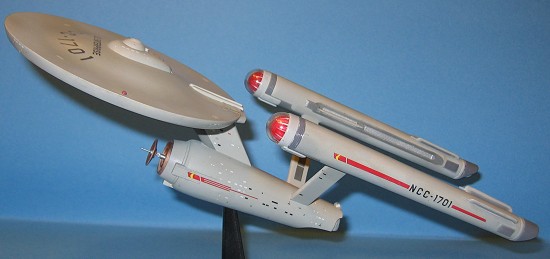 One of the tricky things
about this kit is that the engines and the struts have to be built all at
once. This means that you can not build the engines separately from the
struts or you will find it incredibly difficult to attach them later. The
struts are a U shaped piece separate from the secondary hull that had to be
assembled first. Then the interior half of each engine has to be
delicately placed at the top of each arm of the U. This takes some
patience and dexterity otherwise you’re looking at a pair of busted engines
(of course, this is where the second set of nacelles comes in handy if you
don’t care about “accuracy”.) Anyway, once they were attached, I placed
several large drops of CA glue to reinforce the joint. The attachment
points are too delicate for the rough manhandling caused by sanding (as I
discovered in the first attempted model.) Once that was done, I put in the
clear domes at the front of the engines and glued the engine halves
together.
One of the tricky things
about this kit is that the engines and the struts have to be built all at
once. This means that you can not build the engines separately from the
struts or you will find it incredibly difficult to attach them later. The
struts are a U shaped piece separate from the secondary hull that had to be
assembled first. Then the interior half of each engine has to be
delicately placed at the top of each arm of the U. This takes some
patience and dexterity otherwise you’re looking at a pair of busted engines
(of course, this is where the second set of nacelles comes in handy if you
don’t care about “accuracy”.) Anyway, once they were attached, I placed
several large drops of CA glue to reinforce the joint. The attachment
points are too delicate for the rough manhandling caused by sanding (as I
discovered in the first attempted model.) Once that was done, I put in the
clear domes at the front of the engines and glued the engine halves
together.
This is where things get really difficult. There is a notch at the base of each strut where the engine mounts that needs to be filled in. It is a pain to not only fill it, but also to sand it so as NOT to damage the engine. I learned my lesson the first time so I took small amounts of CA glue and filled it in layer by layer. It took a couple of days to do, but I didn’t break anything and it looks okay.
The gaps between the top half of the strut and the bottom half of the strut were easily filled and sanded (for a change.)
The engines are a lot more difficult because you have to be careful not to fill and/or sand away the detail from the rings at the front of the engines. Also because we’re dealing with a round surface, one must be extremely CAREFUL not to sand it flat. This is where a Flexifile would come in handy.
Now the secondary hull. This is an amalgam of curves and angles which can be a real nightmare to do. There are several trouble spots:
1) The shuttle bay. The shuttle bay doors HAVE to be inserted when the two halves of the secondary hull are put together or you won’t have any easy way of inserting it later. Plus this is one place where the two secondary hull halves don’t fit well together so you have to do some sanding before you put the kit together.
2) The stand attachment point. If you want to put the USS Enterprise on the stand, you must avoid putting filler there. This means that careful planning and good dexterity are required.
3) The deflector dish assembly. If you’re smart then you paint the dish mount first before assembly. Otherwise, it will be a huge and tedious effort in masking later on.
4) The attachment point for the rear light atop the shuttle bay. You must be careful not to sand this off (which is what I did in the first go around.)
5) The very tight junction of the neck and the main portion of the secondary hull just above the deflector dish. There is a large and obvious gap to be filled in.
6) The join where the engine mounts attach to the secondary hull. There is a 1mm+ gap around this join. This is a huge, immense pain as it takes much time and effort to smooth it out because you have to watch out for the hull curvature, the narrow gap between the struts and the mounting pin for the rear hull light. I found that this was the most difficult area to sand. It took me three days of hard tedious work to get this right.
 Before you glue the two
halves together, you have to add the Shuttle bay doors at the rear and then
add the deflector dish mount at the front or you will have an incredibly
difficult time attaching them.
Before you glue the two
halves together, you have to add the Shuttle bay doors at the rear and then
add the deflector dish mount at the front or you will have an incredibly
difficult time attaching them.
Then it is back to dealing with each of the six trouble areas. Three weekends later, I finally had something that didn’t have any inappropriate gaps.
Finally, we can put the primary and secondary hulls together! This is much easier than assembling the actual sub assemblies. One slightly tricky spot is attaching the saucer to the secondary hull. This takes some gentle force. Strong enough to push them together, but not enough to crush the primary hull flat. For once something went right the first time and I got it in with only a minute of effort. I ran some extra thin Tamiya glue around the joint and made sure that the saucer and hull were aligned.
| COLORS & MARKINGS |
I did an initial coat of Tamiya Flat white as a primer/base coat. I even coated all the clear parts with a light coat of white because the “actual” Enterprise had those “canopy” parts as opaque not clear. After clearing up any splotches and resanded some spots, I put down several light coats of Gunze Light Gull Grey H325 instead of the Ghost Grey (some purists migh have issues with that, I just prefer using Gull Grey because it is a similar shade to what actually appeared on the TV.) For some reason (probably due to a dirty airbrush) the Light Gull Grey came out in different shades. I was ready to douse the Enterprise with either lighter fluid or ELO when a friend of mine pointed out that it looked good and worn (which it “should” be at the end of its five year mission.) For once, my stupidity worked in my favor.
I masked off various areas and painted according to the instructions various shades of dark grey, Gunze H307 and H317. Masking the Enterprise took a long time (three hours of hard work) because of the odd curves and angles.
As mentioned earlier, I didn’t paint the Deflector Dish mount copper before installation. I ended up taping the area around the dish (it took me an hour of work) and then I airbrushed it with Tamiya copper. I used a brush for touch ups and after it dried I glued on the dish (already painted as per instructions.)
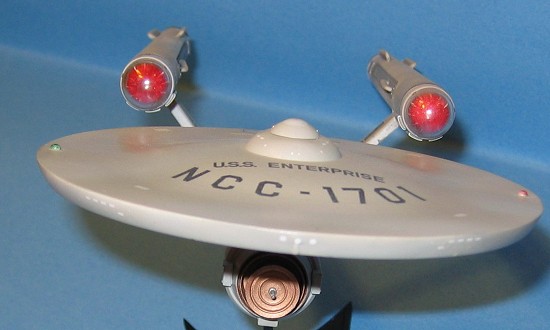
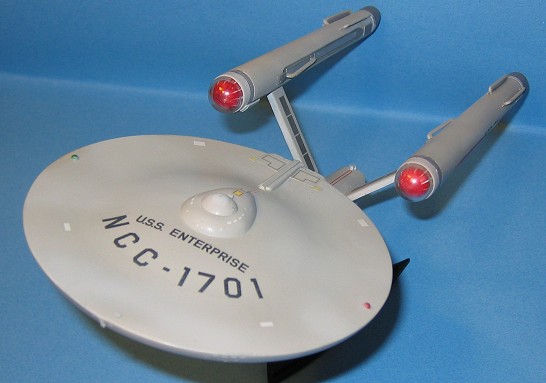 The clear domes at the
front of the warp engines were airbrushed flat white and then hand painted
Model Masters Acryl Stop Sign Red—the ridges on the domes were left white.
The clear dome engine covers were masked and then painted with several
light coats of Gunze Ghost Grey H325.
The clear domes at the
front of the warp engines were airbrushed flat white and then hand painted
Model Masters Acryl Stop Sign Red—the ridges on the domes were left white.
The clear dome engine covers were masked and then painted with several
light coats of Gunze Ghost Grey H325.
The identification lights on the saucer were hand painted silver and then clear red /green.
Decals
Polar Lights has given builders the option of using decals or super thick stickers. I chose the decals. Polar Lights has very glossy and fairly thick decals. As I mentioned earlier, I opted for the “series” Enterprise and used the various decals and stencils. At this point, I got very lazy and didn’t use an initial gloss coat because I had used semi-gloss paint. I have found that Gunze Semi gloss provides a reasonably smooth surface that decals stick to so you don’t have to worry about putting down a gloss coat for decals as long as you are careful.
However, any time I saved was wasted when I covered the decals with Tamiya Clear Coat. I think I got a bad batch of Tamiya Clear coat because it didn’t go on smooth (I used my usual thinner to clear coat ratios with this new bottle and I got a slight orange peel effect.) When it dried I had to run my scotchbrite pad over it to smooth it out. This time, I doubled the amount of rubbing alcohol I mixed with Tamiya Clear and shot several thin coats. This worked out slightly better and produced a smoother surface. However, I managed to wreck the portside impulse engine hatch on top of the saucer via sanding. I was forced to used the super thick stickers instead. It took several Clear coats to smooth them out and two coats of Gunze Flat Coat to flatten out the gloss.
| FINAL CONSTRUCTION |
After all that work, painting and installing the small parts was a breeze. I used Krystal Klear to attach the clear front warp engine covers and the rear light on top of the shuttle bay. Once everything was painted, glued and attached, I used two thin coats of Gunze Flat Clear to tone down the gloss and I was ready to FINALLY put it on the shelf.
| CONCLUSIONS |
 If you are looking for a STK
for kids then is a great one to introduce them to the joys of the hobby
without all the hassle (and the mental anguish that goes along with
screwing up) of painting and gluing and sanding.
If you are looking for a STK
for kids then is a great one to introduce them to the joys of the hobby
without all the hassle (and the mental anguish that goes along with
screwing up) of painting and gluing and sanding.
However, if you want to build a “realistic” replica of the Enterprise out of this kit then this kit is going to take lots of hard work like many other SF kits. The amount of time and effort and skills required is on the level of a tough/bad short run airplane kit. Finishing it is very satisfying at the end if you do it well. Of course this is moot if you happen to hate Star Trek…
Overall, I am very happy with my effort even though there are some flaws with it and despite my destruction of the first Enterprise kit. Will I do another kit? Maybe when I have my prefrontal lobotomy and undergo anger management.
October 2005
Copyright ModelingMadness.com
If you would like your product reviewed fairly and fairly quickly, please contact the editor or see other details in the Note to Contributors.