AMT Imperial AT-AT
| KIT #: | 38271 |
| PRICE: | $15.00 MSRP |
| DECALS: | None |
| REVIEWER: | Dan Lee |
| NOTES: |
| INTRODUCTION |
Star Wars is one of the most influential movie series of all time. It changed the way movies were handled and put special affects on the map. Unfortunately, it also led to the rise of many brainless, plotless, special effects laden blockbusters and the over-mechandizing of everything related to the movies.
Thus it shouldn’t be a surprise with the “final” Star Wars movie being released recently that we have the return of the AMT-Ertl Star Wars models from plastic model obscurity. Among them are models not seen since the release of the original movies many moon ago.
 One of these is
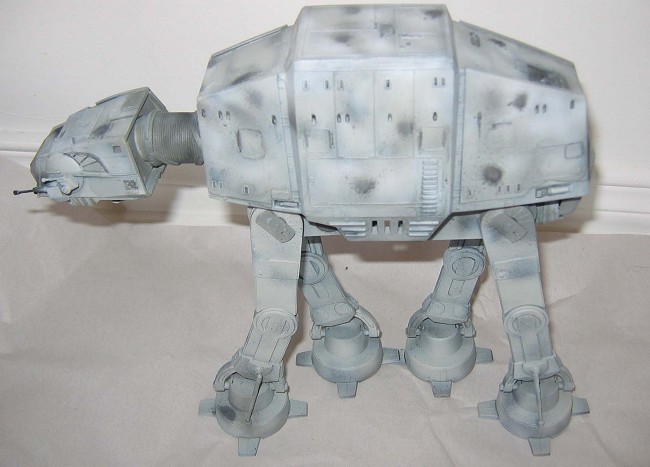
the Rebel stomping AT-AT or in English, the All Terrain Assault Transport
aka the Snow Walker. It first appeared in the Empire Strikes Back as the
backbone of the Imperial Assault on the Rebel Base on the Ice Planet Hoth
and then it briefly appeared in the Return of the Jedi. The whole thing is
designed to intimidate with its predator like appearance and huge size—I
remember as a 10 year old staring in awe and feeling a little more than
helpless as these metal monsters stomped towards the Rebel’s base and
shrugging off laser fire like rain water.
One of these is
the Rebel stomping AT-AT or in English, the All Terrain Assault Transport
aka the Snow Walker. It first appeared in the Empire Strikes Back as the
backbone of the Imperial Assault on the Rebel Base on the Ice Planet Hoth
and then it briefly appeared in the Return of the Jedi. The whole thing is
designed to intimidate with its predator like appearance and huge size—I
remember as a 10 year old staring in awe and feeling a little more than
helpless as these metal monsters stomped towards the Rebel’s base and
shrugging off laser fire like rain water.
The AT-ATs carried four heavy duty lasers on its “head” and enough armor/energy shields to make it impervious to Rebel energy weapons as well carry a compliment of Imperial Stormtroopers (a platoon perhaps?) One of its major vulnerabilities were its long legs which could be tripped up with a simple tow cable tied around their legs. Seriously, what is it with Imperial engineers or George Lucas? Why do they design weapon systems that have simple catastrophic flaws?
The “reality” is that these very tall AT-ATs would be laser and missile magnets (especially the legs.) Stealth and surprise would be virtually impossible and these things could only be used for frontal assaults. I suspect that the Empire’s AT-ATs would suffer heavy losses like the Tiger tank did at Kursk. Losses wouldn’t be a problem for the Empire considering his Storm troopers were expendable clones and the Emperor could literally squeeze more cash out of his subjects with the help of the very persuasive Darth Vader.
| CONSTRUCTION |
 Most of these
models suffer from the same problems that Science Fiction models have had
since the beginning of the hobby—poor fit and “accuracy.” However, the
AT-AT model doesn’t suffer as much as the Millennium Falcon or the X-Wing.
Even so, the construction was very easy. I just followed the instructions
and did not encounter any problems (even installing the rubber band in the
AT-AT’s neck.)
Most of these
models suffer from the same problems that Science Fiction models have had
since the beginning of the hobby—poor fit and “accuracy.” However, the
AT-AT model doesn’t suffer as much as the Millennium Falcon or the X-Wing.
Even so, the construction was very easy. I just followed the instructions
and did not encounter any problems (even installing the rubber band in the
AT-AT’s neck.)
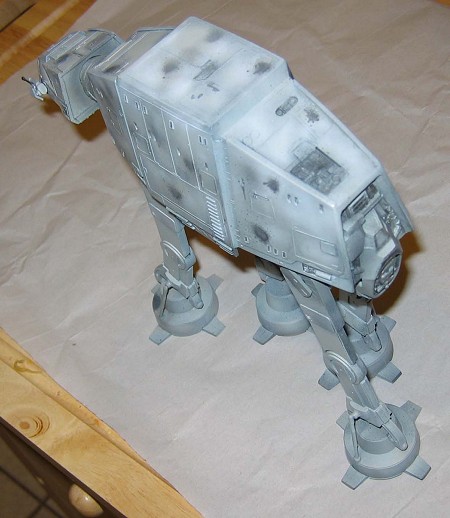
There were some very large gaps where the parts meet as expected, but they were easy to deal with. Anything that was visible was filled in with CA and sanded flat, but not table top smooth. Those gaps that were hidden were filled with CA and left alone to keep the raised detail. I took the view that the Empire built their equipment like the USSR did (didn’t care about rough workmanship as long as it worked) and kept the sanding of seams down to a minimum. The only exception was smoothing out the neck seams. I ended up just taking an X-acto knife to scrape the seams away while keeping the raised detail on the neck.
The worst gaps were on the legs which were filled with superglue. Again, I kept to my Soviet finishing standards and didn’t sand much.
The only parts I did do some work on were the laser guns. I cleaned the seams and sanded them smooth. I also hollowed out the barrels to make them look more “real.” I attached them to the head and I was done.
It only took me a whopping three hours of work to assemble.
| COLORS & MARKINGS |
 One thing I don’t
like about the instructions is the painting guide. Quite frankly, it
stinks. For instance, asking to paint the AT-AT in Light Grey just doesn’t
cut it considering that there are somewhere in the neighbourhood of 3000
varieties of light grey. Of course, the instructions were written over 20
years ago when light grey was simply light grey, but they could have at
least updated the instructions!
One thing I don’t
like about the instructions is the painting guide. Quite frankly, it
stinks. For instance, asking to paint the AT-AT in Light Grey just doesn’t
cut it considering that there are somewhere in the neighbourhood of 3000
varieties of light grey. Of course, the instructions were written over 20
years ago when light grey was simply light grey, but they could have at
least updated the instructions!
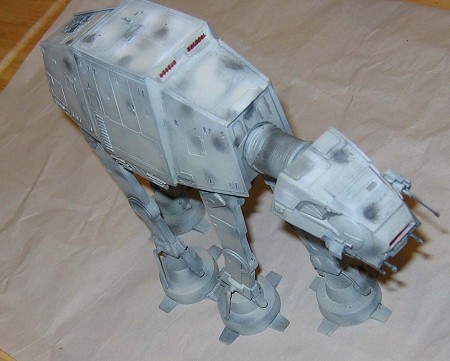
I first pre-shaded the AT-AT with Tamiya flat black loaded in my battered Aztec airbrush. The Light Grey I chose for the base was Gunze H325 Flat Gull Grey.
Then I let my imagination run wild. I envisioned that my AT-AT was a veteran of several battles against the Rebels and had seen more than its share of combat. I started using various shades of grey (light and dark) to give it a worn out appearance. In a fit of inspiration, I took thinned flat black and made laser hit marks. Of course, I went over the top till it looked like it was a polka-dotted metal dino. I though it looked pretty stupid, but there was a method to my madness. I took some various thinned shades of light grey and painted over many of them to make it even more battered.
Finally, I ran a wash of watercolor (raw umber and black) to high light the details and make the AT-AT even dirtier and worn out. Afterwards, I coated it with Gunze Flat.
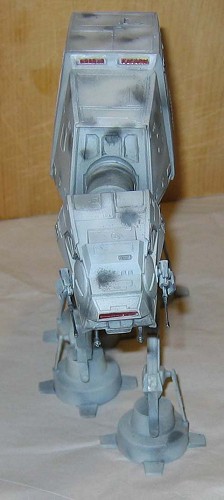
The finer details such as the windows and guns were painted by hand. The windows were covered with Tamiya Clear Red and the guns were painted gunmetal and dry brushed with silver to get some of the detail.
I had a lot of fun doing this. This is one of the things I enjoy about building SF models is that you can let yourself go wild when you paint unlike aircraft (particularly famous ones.)
| CONCLUSIONS |
This model took me three weeks (and six hours of work) to build and complete which is a speed record for me and enjoyed every minute of it.
This kit is a great one for kids to learn about modeling. It is simple and assembles quickly. And it is ridiculously easy to paint and invent your own schemes for the AT-AT.
July 2005
Copyright ModelingMadness.com
If you would like your product reviewed fairly and fairly quickly, please contact the editor or see other details in the Note to Contributors.