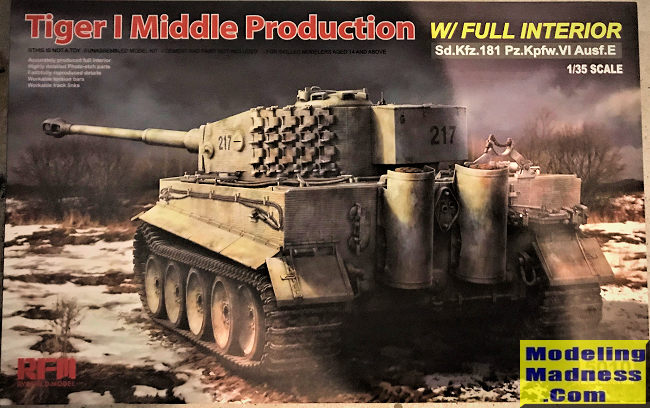
Rye Field Model 1/35 Tiger I (mid) w interior
| KIT #: | 5010 |
| PRICE: | $85.00 |
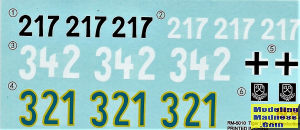
| DECALS: | Three options |
| REVIEWER: | Donald Zhou |
| NOTES: |
Advantages: Great details,
full interior for both turret and hull, workable tracks and wheels.
Disadvantages: A LOT of photo etch, a lot of small parts and no zimmerit
. |
| HISTORY |
The original design that eventually birthed the Tiger was VK 30.01 and 36.01. These designs were eventually evolved into what is the Tiger I. The name was given by Dr. Ferdinand Porsche and the Roman numerical “I” was given after the Tiger II (King Tiger) was produced. The weight of the tank was increased from the original 36 tons to 45, eventually ballooned well over 50 tons to a fully loaded 56 tons. Armor was stabilized at the front with 110mm at the mantlet and 100mm at the hull. Due to armor quality, and Tigers used the highest armor quality at the time, equivalent to 150mm at the mantlet! This makes the tank almost impervious to any allied tank gun at the time up front. Side armor was increased to 80mm at the side and 60mm at the rear, offering greater protection than the Panther and is the main reason for the tank super heavy weight. Main armament consists of a KwK 36 88mm cannon and two MG34 machine guns, one mounted co-axle with the main cannon, the other at the ball mounted hull position in front of the radio operator. Eventually, a third one was also mounted at top of the commander cupola to defend against aircraft.
Main engine was the Maybach 12-cylinder HL 210 P45 developing 485 kW (650 hp) at 3,000 rpm. Again, this engine is very reliable and require very little maintenance. However, it was never ever designed to power this 56 ton monster and proved unreliable instead, especially if maintenance wasn’t constantly pulled on it. All Initial and Early production of the Tigers used this engine. From the Mid Production version on, the Maybach HL 230 P45, a 23.095 liter (1409 cu.in.) engine developing 521 kW (700 hp) at 3,000 rpm was used instead. The biggest difference are the air filters. The earlier engine used three small filters on top of the engine while the later version used two large ones. This improved the situation a little but still, the tank was woefully underpowered. Initial and Early versions also had the Pfeifel air filtration system. This consisted of two air filters on the back of the tank and series of air tubes on the rear deck. However, by mid production variants, this system was eliminated. The tank also featured interleaved road wheels like the Panther and is far more involving and complex. This plus the super high quality of armor meant the tank was very hard to produce and over engineered. The complex interleaved road wheels tends to freeze and stuck in mud or Russian winter where ice can form between them. The track was so wide that for rail transport, the outer most road wheels must be removed and then a narrower “travel” tracks installed and for the price of a single Tiger, 2.5 Panthers or up to as much as 5 Panzer IV’s can be produced. All these reasons meant that only 1800-2200 Tiger I’s were ever produced before production ceased.
It’s really hard to quantify the Tiger despite its legendary proportions. This is especially true since the Tiger really wasn’t meant as a MBT or tank that can go really hard on the move. It has always been designed as a “breakthrough” tank. AKA, like the Mark I-V tanks of WW I, where it would go straight against an enemy’s front line, using its heavy armor and powerful gun to blast a hole through the defenses, then wreak havoc at the rear before smaller, faster tanks, such as the Panther and even the Panzer IV can take over to exploit the breakthrough. After that happens, the tank would back off to the breaker yards where it would spend the rest of the day getting its temperamental engine, running gears and the rest fixed or maintained. However, this only happened once and that was the Battle of Kursk, where the tank was rushed into battle. It performed quite well in its intended breakthrough role. However, after that, Germany was forever on the defensive until the bitter end and the tank weakness was fully shown. Despite massive successes like battle of Viller-Bocage etc that gain the tank a reputation that was really not worthy, the tanks effect on the entirety of the war was relatively minor, especially due to the small numbers of the tanks produced. In this person’s option, after Kursk, the tank should have stopped production (alongside such massive stupid heavy projects like the King Tiger, Jadttiger, Maus, Sturmtiger and maybe even the JagtPanther). The few remaining vehicles dispersed to major defensive positions, where its weaknesses was much less critical in this respect and the remaining money and resources spent on the Panther or even the Panzer IV instead!
| THE KIT |
 Yeah
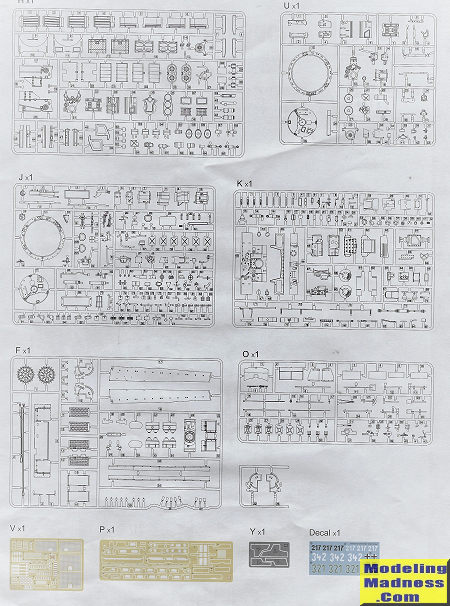
Yeah, here we go with another stupid kit that has over 1000 pieces! I keep
on buying them, I keep on complaining….But I still keep on buying them!
Someone send me to the looney bin and have a couple of shrinks check my
brain out to see what is wrong with it!
Yeah
Yeah, here we go with another stupid kit that has over 1000 pieces! I keep
on buying them, I keep on complaining….But I still keep on buying them!
Someone send me to the looney bin and have a couple of shrinks check my
brain out to see what is wrong with it!
 But
anyways, Rye Field Models had always been known for their Tiger kits, in
fact, it’s practically the first kit they produced as a company. Over the
years, they have ran a gamut of what is what in the Tiger I, from the
initial production variant to the Late one and even Michael Whitman’s “007”
Command variant that got him killed in. Then there are the interior
versions, both the early and mid-version have the interior kits with all the
detail differences between the two. So last year, when Amazon had this on
sale for like $80 and I had some $25 worth of points to spend….Guess what
happened…Sigh……
But
anyways, Rye Field Models had always been known for their Tiger kits, in
fact, it’s practically the first kit they produced as a company. Over the
years, they have ran a gamut of what is what in the Tiger I, from the
initial production variant to the Late one and even Michael Whitman’s “007”
Command variant that got him killed in. Then there are the interior
versions, both the early and mid-version have the interior kits with all the
detail differences between the two. So last year, when Amazon had this on
sale for like $80 and I had some $25 worth of points to spend….Guess what
happened…Sigh……
So, once I got the box, I was like, yep! Time to torture myself again! The box from the top look like your average joe armor kit box, but from the side, it’s deep as two or even three armor kits so yeah, be prepared for the long haul and mark down what goes what!
The instructions shows the markings from the three vehicles within, including famed Tiger ace Otto Carius and his Tiger 217 in black markings and white wash camo…Strangle, the elephant symbol at the front of his tank is missing. Luckily, I do have this marking from the Tamiya Tiger I Early version I built earlier so definitely will build Otto Carius 217 in the white marking, overall dark yellow camo instead.
The next few pages show all the relevant interior detail and painting. Only MIG colors are called out but it’s not hard to trace down the colors. The interior overall is light grey (to replicate the off-white color) over all, with details in a very weird light grey blue. I’ll use RLM Hellbleu 004 for this as it’s a very close approximation. The next page shows how and where to apply zimmerit coating. This is an anti-magnetic coating that was applied to virtually all German tracked vehicles from 1942-1944. Except the Initial, Early and some very early mid-production and some Late variants, a majority of Tigers, especially most of the Mid-Production variants carried this paste. To help you with this, a set of Zimmerit application tools are provided but I spent an extra $10 and bought a set of Tiger zimmerit coating stickers. These are well made and should work well in giving Otto Carius’s 217 its zimmerit coating and don’t worry if you goof and have to slice some of it off. Operational Tigers had their coatings sloughed off quickly. Some pictures had shown 217 with a majority of its zimmerit worn off already so you can slice and dice them up no problem!
Construction begin with strangely enough, the cannon. I decided to give the cannon an earlier slightly larger mid-production muzzle brake from my Dragon Tiger I Late variant. Here I goofed since I used the standard Mid-Production mantlet. There is a pic showing 217 somewhere, sometime along the line, had acquired the smooth faced Initial and Early production mantlet! Layman will not notice…I certainly didn’t but it shows how individual vehicles can quickly become literally “individuals” due to factory modernization, refurbishment and general “kit-bashing” out in the field where repair crews repaired and replaced lost and damaged parts with whatever salvaged parts they can get their hands on! Careful with the co-axle MG-34 assembly as there are quite a few small parts there. After that is done, a turret interior clam shell is made and then the cannon is trapped in the middle. Now, this clam shell I can tell you, does not fit well so I had to putty up the massive seam that resulted. Hope the rest of the kit fit better.
The lower turret basket is next. The jerry can holder is entirely made out of photo-etch. Yes, this kit has a LOT of photo-etch. They are quite easy to bend since they have what look like pre-cut fold lines on them but some of them are quite small so do becareful!
Also, keep on checking the color photo references to see what colors to paint as some of the supports and details are in gunmetal. Afterwards, the entire assembly is lowered into the one piece turret before the cannon, with the turret clamshell are inserted in to complete it.
The turret roof if next. Just be aware the MG-34 on top of the commander’s cupola is optional and not fitted to all versions of Tiger I Mid-Production variant. Yes, starting in late 1943, the Luftwaffe slowly started to concede air superiority to the Allies and thus, all German vehicles was given an extra MG-34 for anti-air work but this wasn’t retrofitted to all earlier vehicles. 217 in the dark yellow camo did not have an outside MG-34. After that is done, the roof is then attached to the top of the turret along with the rear escape ammo loading hatch. This hatch can be made to be movable and I will not cement the roof on so I can remove it to show the interior.
The turret mounted extra track jigs are next. Not all Tigers had these so check your references. I think 217 did not have turret mount track links so will keep these off.
Hull assembly begin with the torsion bar holder jigs. Just like the Sturmtiger kit, these are ALL in photo-etch so take your time
The drive sprocket holders are next followed with the front details including the seats, periscope holders, radios, and the transmission. It’s a pretty detailed assembly so take your time
The dividing bulkhead is next along with the engine to transmission drive rod assembly followed by all 74 ammo rounds in the middle of the ammo bay! This means you better go out and buy some brass paint before the rear bulkhead is added!
The rear engine compartment completes the interior with the fuel tanks, the radiators and the main Maybach engine. A lot going on so it’s best to mark and jog down what to do and paint first before the aft end exhaust and detailed assembly close up shop,
All the road wheels are now made. Since this is the mid-production variants, you need to make all 48 of them. Just be noted, as said in the Early version, some Tigers had the first front wheels removed so mud and ice won’t get trapped between them and the sprockets. 217 definitely had the front most (road wheel 1) outer most wheels removed so I’ll be doing that!
 The top
deck is now made. These has many photo-etch binders for the pioneer tools.
However, scanning through the parts tree, plastic versions are also
provided. Again, purest will say, “NO DETAIL!!!” I say, it also saves you
pain and headaches!
The top
deck is now made. These has many photo-etch binders for the pioneer tools.
However, scanning through the parts tree, plastic versions are also
provided. Again, purest will say, “NO DETAIL!!!” I say, it also saves you
pain and headaches!
The model concludes with the track assembly. Sigh, here go with all the pesky multi-piece assembly! I hate these thing but no choice, have to slog through it!
| CONCLUSIONS |
This kit is far more complex than the Tamiya offering! Even if you just build the exterior, it’s still much more complex, and I’m not just talking about the multi-piece tracks either!
Anyway, I got this last year, and the reason it stayed in the box this long is because 1. I got way too long of kits waiting on the “waiting to be finished” line and 2. Those tracks……The rest I can handle, but the tracks are putting me off, especially since I’m dragging on the Sturmtiger from the same company…The reason is again, those tracks! It’s a pain I tell you!
August 2020
Copyright ModelingMadness.com
If you would like your product reviewed fairly and fairly quickly, please contact the editor or see other details in the Note to Contributors.
Back to the Main Page Back to the Review Index Page Back to the Previews Index Page