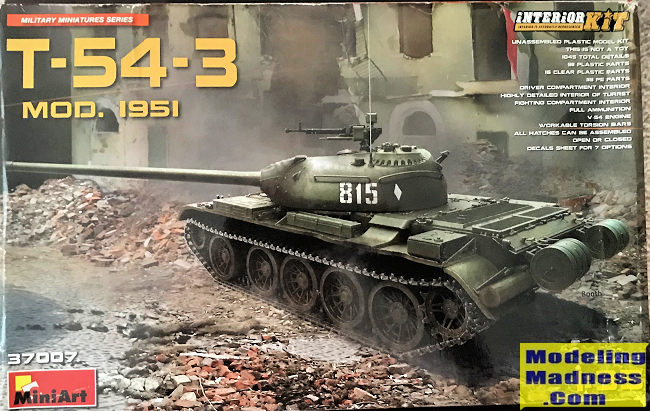
Miniart 1/35 T-54-3 Mod 1951
| KIT #: | 37007 |
| PRICE: | $45.00 |
| DECALS: | Seven options |
| REVIEWER: | Donald Zhou |
| NOTES: | Advantages: Great details, lots of marking and plenty of options with full interior. Disadvantages: Not completely full as transmission is totally missing. A LOT of small parts and due to multiple versions so many sprues are packed in its confusing what is what. |
| HISTORY |
First designed near the tail end of WW II and first produced at the end of 1945, by all accounts, the T-54 and the later T-55 is the most produced tank in history. Counting the numerous copy cats like the Chinese Type 59, perhaps as many as 200,000 examples were built between 1947 and 1980, when the tank finally ceased production. Although replaced in Russia by more modern T-62, then later T-72, it’s still used by up to 50 nations and areas worldwide due to its cheapness and wide availability.
Initially produced in 1945, however, it was quickly stopped due to the number of faults and errors in the initial production batch. In fact, by 1950, most of the production run in Russia still consisted of the T-34-85. The tank initially borrowed heavily from the T-44. In fact, all the way up to T-54-2 version, the tank turret is a slightly modified T-44 mounting a 100mm weapon. The T-44 was actually a superior tank to the T-34 but the Russians always had a mantra of “quantity has a quality all onto its own” and went with the vastly more numerous T-34 instead. The T-44 however, eventually became the initial developmental forerunner of the T-54. The major changes were the improved torsion bar suspension and the main armament, a 100mm main cannon. This necessitated a change to the lower hull, which had to be lengthened and widened to accommodate the enlarged turret mounting the far bigger weapon. The bow machine gunner was eliminated. Instead, the main ammo storage area was placed here. Despite the fact the new tank is in the same weight class as the T-34, it’s far more powerful with far better armor. The initial production version was the T-54-1, which was quickly modified into the T-54-2, with the change mainly coming from the turret. However, problems dogged the initial production run of the new tank. In fact, some 1490 various modifications were added to address all the various problems plaguing the initial batch.
The tank was not stabilized until 1951 with the introduction of the T-54-3 version. The biggest change was the turret. The new turret shape is far more in line with the now famous T-54/55 “pan and panhandle” turret shape. By the time the new tank had finally gain more modifications in 1954, becoming the T-54A, the tank had already achieved full production to start replacing the aging T-34.
The T-54 at the time was superior tank in many ways to the West’s M-47/48 and the Centurion. This was born out during the invasion of Hungry and Czechoslovakia. In fact, it was during the chaos of the Budapest demonstration put down, that several protesters got their hands on a T-54 and promptly drove it into the grounds of the British embassy that spurred the West to develop a counter. The British themselves quickly developed their famous 105mm Royal Ordinance L7 cannon after finding out the 85mm has no hope of penetrating the new Russian tank’s frontal armor at normal combat ranges. The U.S. would quickly adapt the new weapon and put it into a new tank, the M60 as the M68 105mm cannon.
Despite its advantages, heavy armor, low silhouette, and a powerful gun, the tank does have many disadvantages. The biggest was in order to keep down its weight and low silhouette, the tank interior space was extremely cramped with the worst being the lack of a turret basket, which affected crew performance. This also led to the fact that the main gun depression was only 5 degrees due to the low turret ceiling. This proved to be disastrous during the 1973 Yom Kippur War where Syrian’s T-55 tried to dislodge what turned out to be 3 Israelis Centurions on a hill. However, the hill proved too high, forcing the Syrians to either try to hit the Israelis at long ranges, where another of the tank’s disadvantage, poor optics (compared to Western devices) cannot hope to cope, or try to get close as possible so the gun can come into range. In the end, the Syrians can’t hit the Centurions at long range and was forced to simply charge at the Israelis. However, the Centurions, with far taller turret, thus far better depression, can easily hit the T-55’s as they come up. Many of the Syrians were hit in the tank’s belly, always one of the worst protected areas and since they can’t depress their guns low enough, couldn’t even fight back while being shot! Finally, since the Israelis rushed into the fray in a hurry without infantry support, Syrian infantry were able to finally knock them out and drive the rest away with AT-2 Saggers, but not before the field were left with over 20 smoldering hulks of whatever is left of the T-55.
The last major battle this tank took on was the First Gulf War. The T-55, and its Chinese copycat, the Type 59, made up a huge portion of the Iraqi Army. However, by 1990’s, the tank was hopelessly long in the tooth and the lack of any serious stabilization system, fire control, and night/all weather infer-red systems meant the tank was easy meat on the table for modern Western MBT such as the American M1A1 Abrams. Still, with over 50 nations/areas still using this tank, and as one commenter in a T-55 video said, if all of your opponents best weapons are some AK-47’s that’s it, and you got this….Then you are pretty much the king of the battlefield.
| THE KIT |
 What…is….it…..with….me and kits that fBEEP, sBEEP
that….has….over 1000 parts??!?!?!?!?!?!?!?!?!?!?!?!??!?!? Well, this was a
birthday gift, along with my Revel 1/32 ME-109G. I actually wanted the
Kittyhawk’s 1/35 AH-6J Little Bird. But the version I want, with six crew
members, was $75! Too much! So I got this instead. Evil Bay has a seller
selling this at $45 and since it says “full” interior kit. I
jumped…..Sigh….Here we go!!! Another kit with over 1000 parts in the stash!
What…is….it…..with….me and kits that fBEEP, sBEEP
that….has….over 1000 parts??!?!?!?!?!?!?!?!?!?!?!?!??!?!? Well, this was a
birthday gift, along with my Revel 1/32 ME-109G. I actually wanted the
Kittyhawk’s 1/35 AH-6J Little Bird. But the version I want, with six crew
members, was $75! Too much! So I got this instead. Evil Bay has a seller
selling this at $45 and since it says “full” interior kit. I
jumped…..Sigh….Here we go!!! Another kit with over 1000 parts in the stash!
 Anyway, Miniarts have been doing these T-54/55 kits for
quite a while now and this version is the T-54-3, mod 1951 version, the
first real T-54/55 version that had many of the previous problems cured, and
also the first version that had the classical T-54/55 turret shape. And the
shape is correct. Like the classic Tamiya T-55, the commander side front is
slightly bulged outward due to the fact the gunner sits in front of him. A
great and detailed DSKH machine gun is given and the all the accessories,
including a canvas tarp cover for the driver station to cover up the driver
top so the driver can pop his head out of the hatch and still not get beaten
down by say, rain is also included.
Anyway, Miniarts have been doing these T-54/55 kits for
quite a while now and this version is the T-54-3, mod 1951 version, the
first real T-54/55 version that had many of the previous problems cured, and
also the first version that had the classical T-54/55 turret shape. And the
shape is correct. Like the classic Tamiya T-55, the commander side front is
slightly bulged outward due to the fact the gunner sits in front of him. A
great and detailed DSKH machine gun is given and the all the accessories,
including a canvas tarp cover for the driver station to cover up the driver
top so the driver can pop his head out of the hatch and still not get beaten
down by say, rain is also included.
However, one quick peruse of the instruction instantly highlight the major weakness of this kit…Where is the transmission? A great and detailed engine is given, but the transmission is totally missing! This is a major booboo since the transmission top cover can be made to swing outward but there is nothing but empty space down there. Sigh, guess I need to troll the web for a third party transmission then.
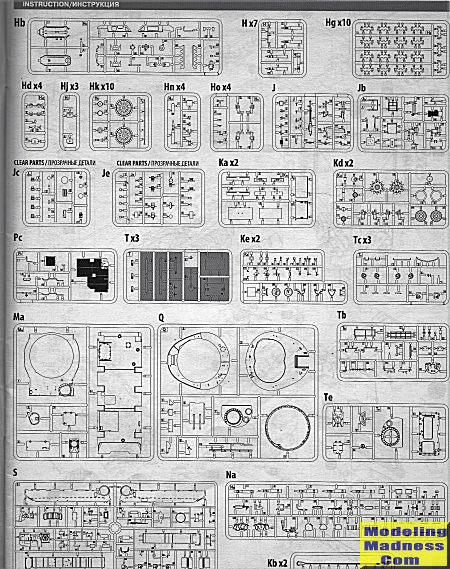
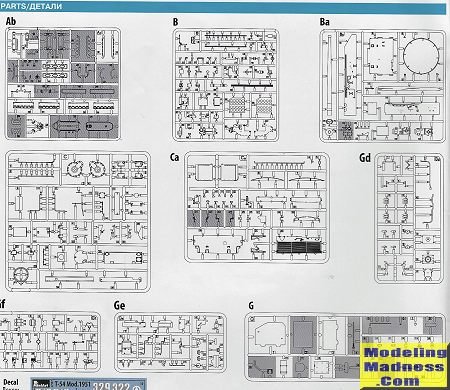
The second is the fact over 100 sprues are in the box. Yes, the first time I saw this, I just went…What the hell?...You see, Miniart is trying to make all the major T-54 and T-55 versions and with so many different variants that have all sort of details discrepancies, getting them all on a single sprue for a single version is very difficult so Miniart just broke all the details down to a lot and I do mean A LOT of sprues. Most of the sprues in the box are very small and contain only around 10 parts each. The only major large sprues deals with the engines and the driver compartment and the ammo storage beside him. The rest of the details are all broken down into around 6 dozen small sprues that contains the rest. This mean you better read the instruction carefully and try not be confused when trying to track down the parts in question!
And speaking of parts, Miniart offers far far more details than the Tamiya version, interior kit notwithstanding. For example, all the side sponson accessory and tool boxes latches are included, many in photo-etch so break out the photo-etch bending tool and superglue. The two rear end mini fuel drums are also there, with photo-etch straps. The DSKH roof mounted machine gun is far more detailed but also come with around half a dozen small and photo-etch parts so don’t get ham fisted. Tracks are individual links…Grr….I hate these things but no avoiding it. So, other than the missing transmission, the only needed are all the cables that are usually seen in these things.
Construction begin with the engine. A lot of parts goes in here so becareful. Strangely, the instruction will have you put on the engine mount on the engine itself and the magnetos and exhaust are not attached later. I’ll probably attach the magnetos and exhaust at this stage, then put the mount on the hull itself to save me the painting headache!
Lower hull is next, starting with all the torsion bar mounts, which are separate. Why couldn’t Miniarts mold these on is beyond me cause I heard you have to get this right or else the road wheels will be up in air. The suspension arms are inserted next. These should be workable.
The next major assembly is the floor boards with the driver station. The transmission throttle control has a nice photo-etch plate so do becareful! Notice at this point, the first of the 34 ammo are attached to the floor board. Sigh, better break out the brass paint and get them all in one go!
The main ammo storage rack and the side wall details are next, along with the driver seat. Some of the details are in different color so do becareful. It’s at this stage that you are asked to attach the magneto and exhaust system but as I said before, it’s just better to attach them during the engine construction and paint them all in one go.
The rear interior engine/crew compartment separation wall is now build and attached, along with the turret turning engine. Up next is the frontal glacis plate, with both interior and exterior detail. I might not cement this part so I can remove it to display the driver station.
The rear plate is assembled now. Photo-etch and very fine fuel drum holders are made so don’t snap them! All the road wheels are also assembled but I may save them after I finish the hull details.
The rear engine deck is now made. Again, the transmission itself is not offered so you may have to cement the transmission screens shut or get third party offers. Idlers and drive sprockets are now made along with sponson details. Again, the instructions will have you attach all the sponson details first, then attach the sponson to the hull. I will attach the sponson to the hull first, then the details later. Be aware there are a lot of photo etch so don’t cement your fingers together.
The hull is finally finished with the tracks and the unditching beam. Notice the fuel drum straps are in again, photo etch with a small latch. Do becareful and not feed the carpet monster.
Turret begin with the lower turret main turret controls and the gun breech. Now, the instructions will have you insert a shell in the breech. I’ll leave it open tank ye berry mooch! The co-axel machine gun is build up next with spare ammo tray, the machine gun itself and its holder. Again, some photo etch goes in here so becareful! Finally the lower turret is done with the aiming scope.
 The top of the turret contains
various accessories such as the radio, fittings, and ready to use ammo. It’s
here you notice the top of the turret has two separate pieces to hold the
hatches and the DSKH. This means that you after you finished assembling the
hatches, with their clear periscopes, you can cement the two halves together
and just insert it onto the top of the turret so you can remove this piece
to display the interior. Again, as I’ve said, the DSHK is a detailed
assembly with photo-etch sights, trigger and side support. It even has the
ammo and spent shell casings! The turret is finally finished with the long
cannon barrel, with the “pig snout” holder. Notice the photo-etch side
detailing. Again, as mentioned, the exterior canvas driver hood is included
and is assembled now. The model is finally done with a canvas tarp that can
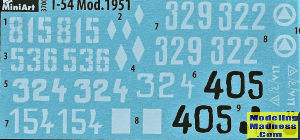
be attached to the rear of the turret, again, with photo-etch straps. 7
markings are offered, with 5 participating in the form of the Budapest
unrest/invasion.
The top of the turret contains
various accessories such as the radio, fittings, and ready to use ammo. It’s
here you notice the top of the turret has two separate pieces to hold the
hatches and the DSKH. This means that you after you finished assembling the
hatches, with their clear periscopes, you can cement the two halves together
and just insert it onto the top of the turret so you can remove this piece
to display the interior. Again, as I’ve said, the DSHK is a detailed
assembly with photo-etch sights, trigger and side support. It even has the
ammo and spent shell casings! The turret is finally finished with the long
cannon barrel, with the “pig snout” holder. Notice the photo-etch side
detailing. Again, as mentioned, the exterior canvas driver hood is included
and is assembled now. The model is finally done with a canvas tarp that can
be attached to the rear of the turret, again, with photo-etch straps. 7
markings are offered, with 5 participating in the form of the Budapest
unrest/invasion.
| CONCLUSIONS |
DAMN IT! Why do I torture myself?!?!?!?!? Sigh…Well, at least I can say this, this tank is much easier in assembly than my Takom 1/35 Panther kit due to the fact the Russians like to keep it simple STUPID! That tends to work to their advantage….Well ok, may not as well in others but at least in model form, it will be far easier. But still, with so many projects in the waiting to be finished line, it will be awhile before I’m even work up the courage with this thing! Especially since I just put my 3rd bae bae waifu 2B on the front burner and will get her finished whenever she arrives!
June 2020
Copyright ModelingMadness.com.
If you would like your product reviewed fairly and fairly quickly, please contact the editor or see other details in the Note to Contributors.
Back to the Main Page Back to the Previews Index Page Back to the Review Index Page