|
KIT: |
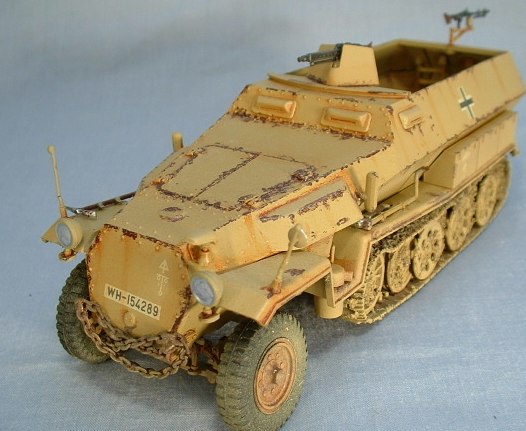
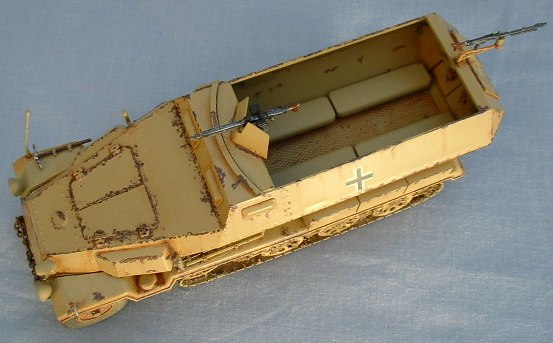
Tamiya 1/35 SdKfz 251/1 'Hanomag' |
|
KIT # |
35020 |
|
PRICE: |
$20.00 |
|
DECALS: |
See review |
|
REVIEWER: |
|
|
NOTES: |
Photos by Ramses Montes |
|
HISTORY |
 When German tank divisions were organized
in 1935,the Germans naturally started development plan for vehicles carrying
infantrymen to support tank forces. In 1938,the German Army decided to
develop an armored personnel carrier on the basis of the 3-ton half-track.
Design work was hastened on the model of existing armored cars and a prototype
was completed at the end of 1938. The type A employed a Maybach HL 42,
6-cylinder 4,171cc engine of 100 HP. The transmission permitted 4 speeds and 1
backward. Its top speed was 55 Km/h.
When German tank divisions were organized
in 1935,the Germans naturally started development plan for vehicles carrying
infantrymen to support tank forces. In 1938,the German Army decided to
develop an armored personnel carrier on the basis of the 3-ton half-track.
Design work was hastened on the model of existing armored cars and a prototype
was completed at the end of 1938. The type A employed a Maybach HL 42,
6-cylinder 4,171cc engine of 100 HP. The transmission permitted 4 speeds and 1
backward. Its top speed was 55 Km/h.
WW2 was a war of mechanized power, that is to say, a war of systemized power. It must not be overlooked that the part- although not the leading part- that the German armored personnel carriers played in and the influence they exerted on this total war were very great and also that most of personnel carriers used during the war were of half-track type.
|
THE KIT |
 When I saw the kit, I saw good quality plastic Tamiya, in
the surface of the model there wasn’t even a bit of flash to remove and that I
like. The model is injected plastic so I had to get out the evidence of the
holes with my sand paper. The decals were kind of thick but it had good
cutting edge.
When I saw the kit, I saw good quality plastic Tamiya, in
the surface of the model there wasn’t even a bit of flash to remove and that I
like. The model is injected plastic so I had to get out the evidence of the
holes with my sand paper. The decals were kind of thick but it had good
cutting edge.
Personally I liked the Tamiya decal sheet of this model because it brought the Swastika with it although it’s very controversial.
|
CONSTRUCTION |
First I started out with the interior of the model witch is the assembling of the water tank and the meter panel, then came the construction of the floor that consisted in assembling the dash board and the seats. Later came the fixing of the shafts witch a lot of flash had to be removed from the shafts to make it look smooth and round after fixing the shafts I fixed the floor to the lower part of the model, finally it started to look like something.
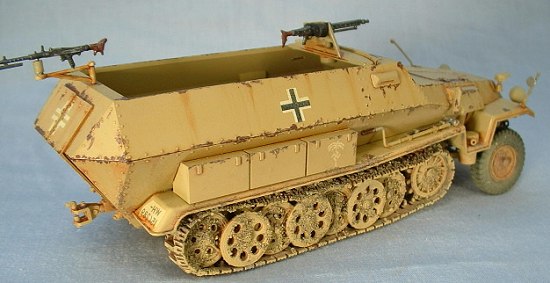
 Then I fixed the wheels and drive sprockets, when fixing
the wheels to the model I recommend doing it in groups. Then I proceeded to
the construction of the front axle witch I didn’t like because the wheels are
supposed to be free but I glued them steady.
Then I fixed the wheels and drive sprockets, when fixing
the wheels to the model I recommend doing it in groups. Then I proceeded to
the construction of the front axle witch I didn’t like because the wheels are
supposed to be free but I glued them steady.
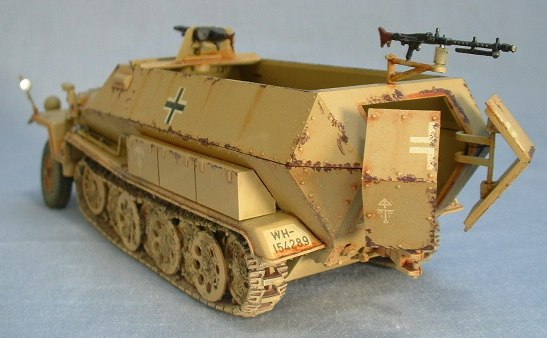
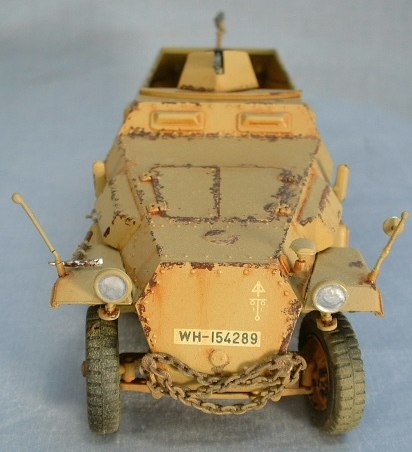
Then I proceeded to the rear of the model to the construction of the rear hatch and the construction of the machine gun support. Then came the construction of the fenders witch I recommend using gravity when placing together the headlights otherwise it will be messy. Now the model is ready to paint.
|
CAMOUFLAGE & MARKINGS |
To paint the model I used Tamiyas Dark yellow as overall paint then I applied some future floor wax to create a smooth surface for the decals to be applied later on.
After the decals were placed I sprayed another layer of future floor wax to seal the decals. Then I did some researching about weathering and I found out that with a little oil paint you get very good results.
|
CONCLUSIONS |
 When I saw the model done I said that’s a
nice model its worth the time spent in it and also the money spent in it I was
very satisfied at the end I recommend it to every Panzer lover scale modeler.
When I saw the model done I said that’s a
nice model its worth the time spent in it and also the money spent in it I was
very satisfied at the end I recommend it to every Panzer lover scale modeler.
|
REFERENCES |
If you would like your product reviewed fairly and quickly by a site that has 200,000 visitors a month, please contact me or see other details in the Note to Contributors.