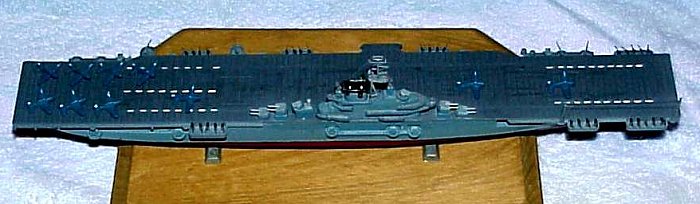
Revell 1/720 USS Essex
|
KIT # |
389 |
|
PRICE: |
$15.50 |
|
DECALS: |
yes |
|
REVIEW : |
Pete L'Heureaux |
|
NOTES: |
Built as USS Franklin |
|
HISTORY |
The Congress of the United States passed an Act on May 17, 1938, authorizing the Navy to increase the tonnage of its carriers to 40,000 tons. One of the resulting carriers that was built as an outcome of this Act was the USS Essex (CV-9). One year after war broke out in Europe, eight more Essex-class carriers were ordered for the Navy. One of these, the USS Ben Franklin, carried on the proud naval tradition of being the fifth naval vessel to be so named. A year to the day after Imperial Japan attacked Pearl Harbor and brought the US into World War II, the keel of the Franklin was laid, and she was launched on October 14, 1943 from the Newport news Drydock in Virginia, in a record time of ten months. She was outfitted in 66 days, with Capt. James M. Shoemaker as the ship’s first commanding officer.
The Franklin was home to two air groups, Numbers 13 and 5, with aircraft consisting of Avengers, Helldivers, Hellcats and Corsairs. The ship had a displacement of 27,100 tons with a length of 872 feet. Power came from four shaft turbines producing 150,000 horsepower, which could propel the ship to a top speed of 33 knots.
 Following a shakedown cruise to Trinidad in March, 1944, the Franklin was
outfitted for combat duty and made her way into the Pacific, joining Task Force
58. She participated in the Marianas campaign, the Carolines, Okinawa and
Formosa, Iwo Jima, and the Philippines. From the time of late October, 1944 to
March 19, 1945, "Big Ben" acquired the reputation as "the ship
that would not die." On October 30, 1944, the Franklin suffered
extensive damage when three kamikaze aircraft slipped through defensive fire
east of Samar Island to cause devastating explosions and fire to the flight and
hangar decks. More than 100 sailors perished.
Following a shakedown cruise to Trinidad in March, 1944, the Franklin was
outfitted for combat duty and made her way into the Pacific, joining Task Force
58. She participated in the Marianas campaign, the Carolines, Okinawa and
Formosa, Iwo Jima, and the Philippines. From the time of late October, 1944 to
March 19, 1945, "Big Ben" acquired the reputation as "the ship
that would not die." On October 30, 1944, the Franklin suffered
extensive damage when three kamikaze aircraft slipped through defensive fire
east of Samar Island to cause devastating explosions and fire to the flight and
hangar decks. More than 100 sailors perished.
Again on March 19, 1945, off Shikoku in the Japanese home island waters, 7 planes attacked the Franklin, with two bombs passing through the flight deck, one exploding on impact. This caused a huge conflagration among the gassed-up and armed aircraft on board, causing numerous explosions among the ammunition and armed bombs. The Franklin lost close to 1,000 personnel either killed or missing, and developed a 13 degree list. Limping out of the battle area under tow, the Franklin was repeatedly attacked with bombs and torpedoes, but all efforts by the Japanese to sink her were repulsed. In action in the Pacific, "Big Ben" earned a total of four battle stars and became one of the most highly decorated ships of World War II.
Personal History of EM2C James Francis Kane, USNR
My Uncle Jim was somewhat reluctant to share with me his memories of combat aboard the Franklin. However, I was able to ascertain that he was one of the ship’s electricians, assigned to the ship’s lighting group. During battle stations, he told me that his assigned station was on the flight deck, where he would make sure that certain of the ship’s circuits were disengaged to prevent the spread of fire if the ship came under attack. Also, during carrier landings at night, he would make sure that the special landing orientation lights were operational. Thus in his quiet, unassuming way, he provided service to this heroic vessel. I’m very proud to say he is my uncle, and I built the USS Franklin for him in honor of his service during WW II. He is a Ben Franklin plank owner, and attends yearly Franklin reunions.
|
THE KIT |
The Essex kit comes in four grey injection-molded sprues, which Revell-Germany thoughtfully illustrates in the instructions, for ease of parts location. They all come bagged together, though, which could lead to scratching of the parts if roughly handled. There was some flash present on some pieces, as well as big ejector pin marks located on the underside of the flight deck, but these were easily handled with x-acto knife and sanding wands. Instructions come in a ten-page booklet, and the kit included a small paper sheet of signal flags and the US flag, which I did not use.
|
CONSTRUCTION |
 I generally followed the instructions step-by-step and built the kit out of
box. Instruction steps consist of blow-ups of the pieces to be glued or
attached, and are easy to follow. The first step was to wash all parts in warm
water and dish detergent to remove the mold release oils. The parts were then
rinsed and allowed to air dry. Construction starts with the hull, which consists
of a one-piece bottom and two-piece upper hull. The upper hull pieces I glued
together using Testor’s cement with an interior overlay of super glue for
added support, as the pieces are structurally flimsy. Cutting pieces of sheet
styrene and gluing them on the inside of the upper hull pieces could have
rendered support, but I elected for the easy way out.
I generally followed the instructions step-by-step and built the kit out of
box. Instruction steps consist of blow-ups of the pieces to be glued or
attached, and are easy to follow. The first step was to wash all parts in warm
water and dish detergent to remove the mold release oils. The parts were then
rinsed and allowed to air dry. Construction starts with the hull, which consists
of a one-piece bottom and two-piece upper hull. The upper hull pieces I glued
together using Testor’s cement with an interior overlay of super glue for
added support, as the pieces are structurally flimsy. Cutting pieces of sheet
styrene and gluing them on the inside of the upper hull pieces could have
rendered support, but I elected for the easy way out.
When the upper hull was dry, I glued it into the lower hull, having to bend the upper hull in places in order to get it to snap fit into place into the lower hull. This left a very noticeable horizontal gap all the way around the juncture of lower and upper hulls, and I had to spend several hours filling and sanding to get rid of the the seam line. At this point, I drilled out the scupper holes on both sides of the ship, along with the anchor chain holes with my pin vise to add realism. I then glued in the hull guns fore and aft and on both sides, along with the hangar deck cranes. Following this, I allowed the assembly to dry thoroughly, then it was on to the paint shop.
|
PAINT & DECALS |
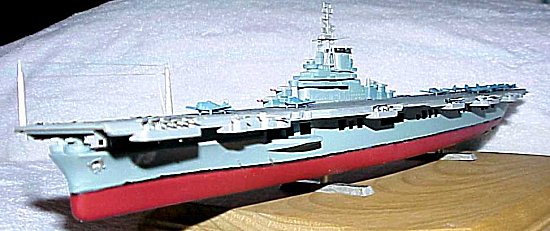
 All the kit’s parts were given two coats of Model Master enamel primer,
then the top hull was masked off. I mixed Testor’s Flat Red enamel with
several drops of Model Master Military Brown to give me the hull red color I
wanted, and airbrushed three coats on the bottom hull up to the waterline. This
gave a good depth and even finish to the paint. I then mixed up a 1:1 ratio of
Model Master US Navy Blue-Grey and Model Master Aircraft Grey for the upper hull
and flight deck "island", which I glued to the flight deck after the
paint had dried. The flight deck was simplicity itself. I masked off the main
area of the deck plus the island, and airbrushed the sides of the deck with
Model Master Aircraft Grey with a few drops of flat black added. When this had
dried, I masked off this area and airbrushed the rest of the flight deck in dark
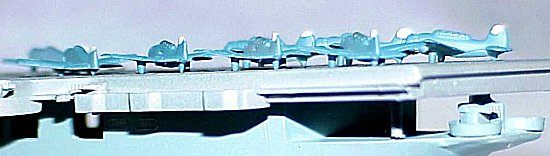
US Navy grey. All pieces were allowed to dry thoroughly. I then drybrushed the
decking ribs in steel, followed by drybrushing skid marks in flat black in
anticipation of attaching the aircraft that came with the kit.
All the kit’s parts were given two coats of Model Master enamel primer,
then the top hull was masked off. I mixed Testor’s Flat Red enamel with
several drops of Model Master Military Brown to give me the hull red color I
wanted, and airbrushed three coats on the bottom hull up to the waterline. This
gave a good depth and even finish to the paint. I then mixed up a 1:1 ratio of
Model Master US Navy Blue-Grey and Model Master Aircraft Grey for the upper hull
and flight deck "island", which I glued to the flight deck after the
paint had dried. The flight deck was simplicity itself. I masked off the main
area of the deck plus the island, and airbrushed the sides of the deck with
Model Master Aircraft Grey with a few drops of flat black added. When this had
dried, I masked off this area and airbrushed the rest of the flight deck in dark
US Navy grey. All pieces were allowed to dry thoroughly. I then drybrushed the
decking ribs in steel, followed by drybrushing skid marks in flat black in
anticipation of attaching the aircraft that came with the kit.
|
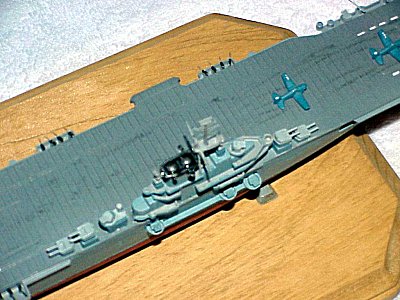
CONSTRUCTION CONTINUES |
The flight deck was dry-fitted to the hull, and required a bit of manipulation to snap in. There were locator tabs on the underside of the flight deck for alignment, which was a great help to me. After checking fit, the flight deck was glued in using a combination of Testor’s cement and super glue. The deck guns were glued in next. I had to widen some locator holes with my pin vise in order to get some of the guns to seat properly, and in the process of gluing, I lost a few of the guns (and three planes!) which flew off my tweezers, never to be found again. A common modeler’s lament when working in such a small scale! Lucky for me my uncle didn’t notice.

|
CONCLUSIONS |
Although I flubbed a bit on the waterline black line (should have used a black decal) and the inaccurate placement of hull numbers, this as a labor of love all the way, and my first attempt at a ship since I was a boy. I can heartily recommend this kit to all modelers looking for an inexpensive way to depict Essex-class carriers. It makes me want to try my hand at other capital ships, but I think I’ll try out Tamiya’s and Hasegawa’s lines for a bit more detail, plus I’ll make sure my historical background is checked before construction. I’d like to thank Len Roberto and T. Garth Connelly for their advice and support in this project.
|
REFERENCES |
USS Franklin (CV-13): Original Documents 1943-1946. Turner Publication Co. Paducah, Kentucky, 1994.
USS Franklin (CV-13): The Ship that Wouldn’t Die. Turner Publication Co. Paducah, Kentucky, 1989.
http://www.shipscamoflage.com.Copyright ModelingMadness.com
If you would like your product reviewed fairly and quickly, please contact the editor or see other details in the Note to Contributors.
Back to Reviews Page 2018