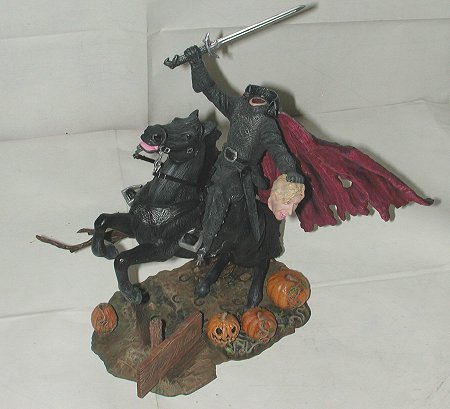
Polar Lights Headless Horseman
|
KIT # |
5022 |
|
PRICE: |
$18.95 |
|
DECALS: |
N/A |
|
REVIEWER: |
|
|
NOTES: |
|
BACKGROUND |
Whenever I start getting bored with aircraft or armor subjects it is always a
nice change of pace for me to do a good figure kit. Whether it is a military
figure or my personal favorite...monsters/horror figures. I've built some of the
old Aurora kits I've had since I was a kid and some of you have probably seen
them at contests. However, this is the first Polar Lights original kit I have
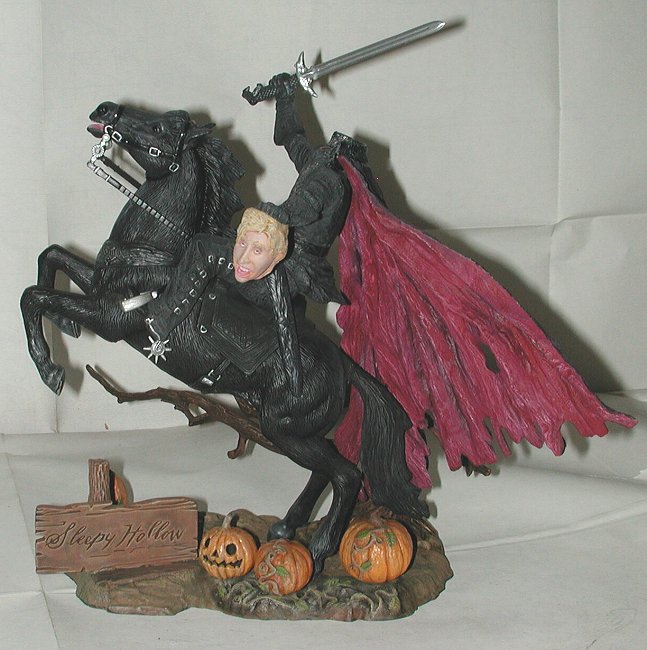
done. I chose the Sleepy Hollow Headless Horseman because it looked relatively
easy though, as the old saying goes, "nothing is ever as easy as it looks."
|
THE KIT |
The first thing one notices upon opening the box is that Polar Lights uses ABS
plastic rather than styrene for their original molds. This means that I would
have to use a "hot" glue for most of the assembly. I use the Ambroid Pro Weld on
many of the kits I build so I had a bottle on hand. Regular styrene glue and/or
super glues will work on some of the smaller parts but I do not recommend them
for the major assemblies.
The molding itself was crisp and clean with no flash at all. A few parts had some visible mold seams but they were quickly disposed of with an Exacto knife. Other seams were well concealed and easy to remedy due to their location. Also, before I began assembly, I noticed that Polar Lights gives the builder an option for the Horseman's right hand. You can choose the sword, an axe, or an empty hand in which a jack-o-lantern fits.
The kit instructions are an Aurora throw-back with an exploded view of the kit and written steps off to one side. Nostalgia I would guess.
|
CONSTRUCTION |
 I sat down if front of the
tube one evening and put together all the major sub-assemblies. I glued the
Horseman's torso together, the arms and legs were then assembled but I left them
off the torso for the time being. I also left off the optional right hand, cape
and collar, the scabbard, severed neck, and spurs as I would paint these parts
before attaching.
I sat down if front of the
tube one evening and put together all the major sub-assemblies. I glued the
Horseman's torso together, the arms and legs were then assembled but I left them
off the torso for the time being. I also left off the optional right hand, cape
and collar, the scabbard, severed neck, and spurs as I would paint these parts
before attaching.
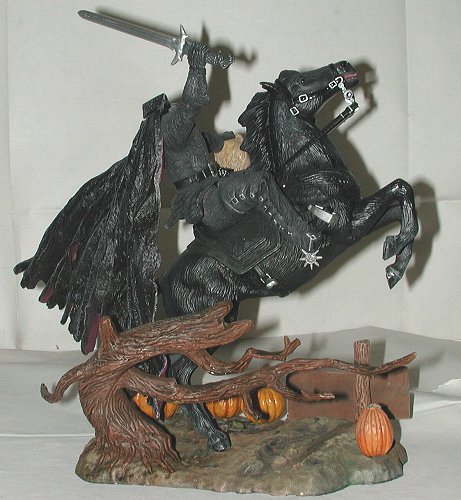
The horse was then assembled with the two major horse halves going together, the inner halves of the horse's legs, the horse's chest plate and belly. Some filler putty was required around where the belly was glued and some around the front legs where they meet with the chest plate. Then the horse's tail was glued together and attached to the horse. Some putty is needed for this joint as the tail does not blend well with the horse's behind. I left off the stirrups and reins for painting before attaching.
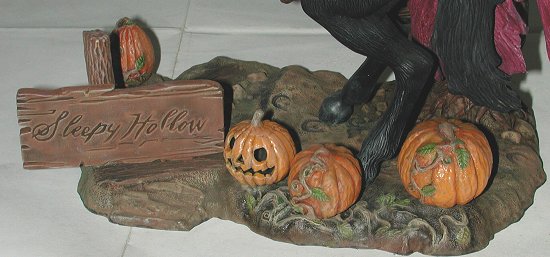
One glaring mistake I noticed while assembly...the base for the model has horseshoe imprints on it however no horseshoes are provided for the horse. Since the horse is posed rearing up on it's hind legs, the bottoms of the front hooves are exposed. So, I made some horseshoes out of epoxy putty. For the base itself I assembled the tree and pumpkins and kept them separate for painting. Some degree of sanding was needed on most of these sub-assemblies but I would describe it as minor.
After some minor sanding and checking the fit of the Horseman's arms and legs,
they were attached to the torso. The severed head was kept separate.
|
PAINT & DECALS |
When the painting process began, it presented a unique problem that I did not anticipate. For those of who have not seen the movie (and even for those who have) the Horseman and cape, the horse and saddle and all of the attachments are black. In order to do this I would have to work in different shades of black - or dark grey if you will.
 For this I used a combination
of enamels, oils and acrylics. The Horseman was first airbrushed with a grimy
black. Aircraft tire black is a good match. The horse was done in Model Master
aircraft interior black, the saddle was painted MM flat black. The Horseman's
cape, collar and scabbard were sprayed with MM semi-gloss black. After drying
for about 3 days, the above mentioned were given a wash with black oils and set
aside to dry.
For this I used a combination
of enamels, oils and acrylics. The Horseman was first airbrushed with a grimy
black. Aircraft tire black is a good match. The horse was done in Model Master
aircraft interior black, the saddle was painted MM flat black. The Horseman's
cape, collar and scabbard were sprayed with MM semi-gloss black. After drying
for about 3 days, the above mentioned were given a wash with black oils and set
aside to dry.
In the meantime, I painted the pumpkins and jack-o-lanterns with Gunze Orange Yellow (H24). After they dried I did some shading and highlighting with oils. The vines and leaves on the pumpkins were also done with oils. After the outer cape was dried I sprayed the cape lining with MM insignia red. I let it dry for a couple of days then applied some dark red shadowing where appropriate and then some pink on the raised areas for highlight.
Afterwards I used the same technique on the Horseman and horse using black oils in the recessed areas and a very, very light grey on the raised areas for highlight. The silver adjustments on the horses reins and harness and the buckles on the Horsemen's chaps were done with a silver paint pen.
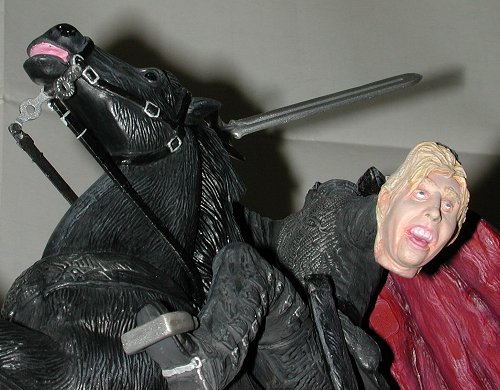 The severed head and the
severed neck portion of the Horseman were next. I mixed all my own colors out of
oils IAW (In Accordance With) Shep Paine's technique as outlined in his book
"How to Build Dioramas." Note that I chose to do a blonde headed victim rather
than brown hair as called for by the instructions. After the severed head was
dry I then gave the face portion a very light dry brush of a blueish grey to
simulate the loss of blood. The sword was sprayed MM Chrome Silver and the
stirrups and spurs were done with steel metalizer.
The severed head and the
severed neck portion of the Horseman were next. I mixed all my own colors out of
oils IAW (In Accordance With) Shep Paine's technique as outlined in his book
"How to Build Dioramas." Note that I chose to do a blonde headed victim rather
than brown hair as called for by the instructions. After the severed head was
dry I then gave the face portion a very light dry brush of a blueish grey to
simulate the loss of blood. The sword was sprayed MM Chrome Silver and the
stirrups and spurs were done with steel metalizer.
The last thing to paint was the base. I began by spraying the base an overall
medium dark brown. After it dried I gave it an oil wash of raw umber and dark
green in an irregular pattern. After that was dry I went over the entire base
with a dry brush of light tan oil mixture. I then went back and painted the
pumpkin vines using oils.
That left the tree to finish.
The tree supplied in the kit is a rather weak representation of the tree in the
movie where the Horseman's body was buried. This tree had an elaborate root
system that extended out of the ground completely surrounding the trunk of the
tree. However, this was totally omitted by the manufacturer. Using epoxy putty I
made some of these roots although not the the extent that was shown in the film.
The tree and roots were then painted with MM military brown. Afterwards I gave
the tree an an oil wash with a very thin solution of paynes grey. After that
dried I gave the tree another oil wash with a not so thinned mixture of raw
umber and then it was highlighted with a dry brush of light tan.
|
CONSTRUCTION CONTINUES |
 All that was left was the
final assembly of the parts that were set aside. Everything went on in a
straight foward manner. One potential problem was when I attached the collar and
cape to the Horseman. Whether you attach the cape to the collar first or attach
only the collar first to the Horseman and then the cape, the cape itself is
somewhat weighty. Even with the Pro Weld I had to hold the cape in it's position
for about 10 minutes to be sure the glue had set.
All that was left was the
final assembly of the parts that were set aside. Everything went on in a
straight foward manner. One potential problem was when I attached the collar and
cape to the Horseman. Whether you attach the cape to the collar first or attach
only the collar first to the Horseman and then the cape, the cape itself is
somewhat weighty. Even with the Pro Weld I had to hold the cape in it's position
for about 10 minutes to be sure the glue had set.
|
CONCLUSIONS |
All in all I was pleased with the way this kit went together. The kit's
shortcomings were few and minor. As with many of horror figures I do, I will
expand on this kit's base sometime in the future by adding some additional
groundwork. I can highly recommend this kit to the beginner as well to the
seasoned modeler. In short it was fun. I look forward to my next Polar Lights
kit.
Kevin Krueger
Copyright ModelingMadness.com
If you would like your product reviewed fairly and quickly, please contact me or see other details in the Note to Contributors.