Italeri 1/72 Berlin House
| KIT #: | 6086 |
| PRICE: | $50.00 AUD MSRP |
| DECALS: | None |
| REVIEWER: | Peter Hobbins |
| NOTES: | Model includes additional floor (kit 6089), purchased separately |
| HISTORY |
There’s
not a lot to say here – 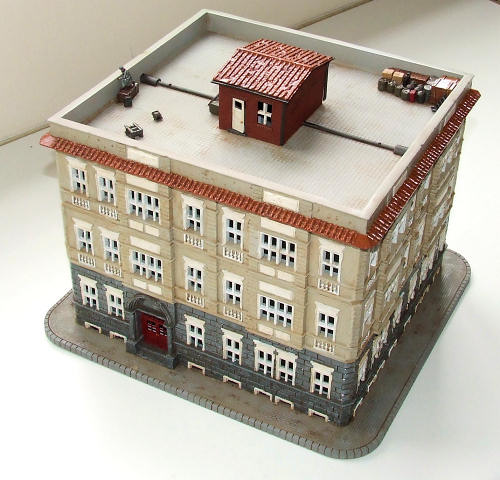 f
the grander north American cities of the pre-skyscraper era, or even – at a
stretch – colonial buildings as found in the
f
the grander north American cities of the pre-skyscraper era, or even – at a
stretch – colonial buildings as found in the
| THE KIT |
In
essence this is quite a simple kit, but the thickness of the plastic makes for a
very heavy box. Keep that in mind if ordering yours for airmail delivery! The
base kit comprises 51 pieces, including three flat floor bases (which dictate
the size of the box), two identical sprues for the ground floor walls (including
internal walls and staircases), and another two sprues for the next floor up
(again with internal walls and staircases). There’s a further pair of sprues to
provide the rooftop balcony and the hut that sits atop the central stairwell.
All are moulded in very thick grey plastic which thankfully cuts quite well. The
extension kit contains simply a floor piece and the two sprues appropriate for
one of the upper storeys – in theory you could add as many of these as you wish,
although structurally stone-walled buildings tend not to exceed five or six
storeys.
The kit is accompanied by an 8-page fold-out instruction booklet that is noticeably taller than A4 or foolscap size. The construction steps are clearly laid out, but apart from the box-top illustration there is no painting guide. No decals are supplied: this might seem obvious, but it would have been nice if even a small sheet was included with a selection of house numbers, street signs or even optional propaganda posters or late-war graffiti slogans to decorate the lower walls. Matchbox managed this with the mini-dioramas that accompanied their armour kits over three decades ago!
| CONSTRUCTION |
Although
large, the relatively small parts count and generally straightforward
construction make the kit itself fairly simple to put together. Each storey
consists of a floor (etched with a square tile pattern); a central box and
staircase comprising the stairwell; four internal walls; and four exterior
walls. True to Italeri’s usual engineering standards, these fit together fine
but require a bit of fiddling and patience. If you intend to use this kit for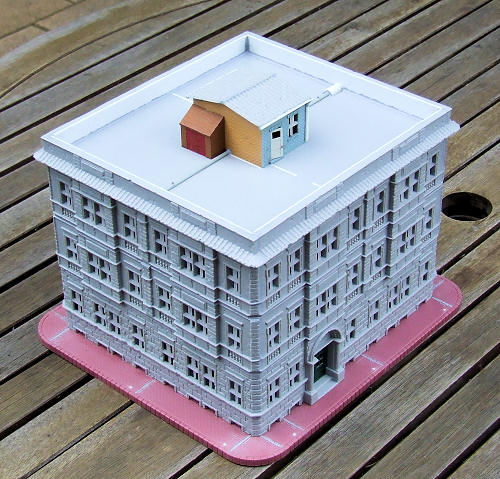 wargaming – that is, to leave each storey sitting loosely on top of the one
below rather than gluing them in place – then you need to pay extra attention to
keeping everything square. This applies not only to the storey that you are
building, but also making sure that the floor above sits flush after clicking
into the alignment slots provided by Italeri. Getting the stairwells to fit is
probably the hardest part; as I was making my building with the roof securely
glued on, I left out the staircases except for those leading to the top storey,
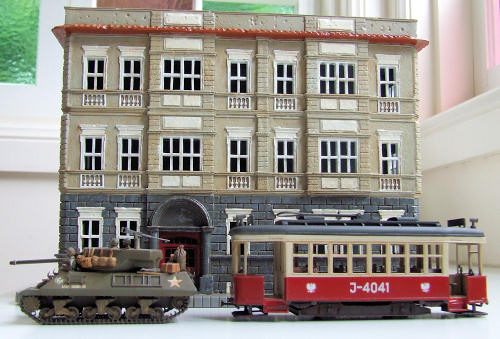
which are visible once the building is completed. It’s quite a large model when
assembled, with a floor footprint of approximately 21 x 23 cm (8¼
x 9 inches) and a height (including the extra storey and rooftop hut) of
about 21 cm (8¼ inches).
wargaming – that is, to leave each storey sitting loosely on top of the one
below rather than gluing them in place – then you need to pay extra attention to
keeping everything square. This applies not only to the storey that you are
building, but also making sure that the floor above sits flush after clicking
into the alignment slots provided by Italeri. Getting the stairwells to fit is
probably the hardest part; as I was making my building with the roof securely
glued on, I left out the staircases except for those leading to the top storey,
which are visible once the building is completed. It’s quite a large model when
assembled, with a floor footprint of approximately 21 x 23 cm (8¼
x 9 inches) and a height (including the extra storey and rooftop hut) of
about 21 cm (8¼ inches).
The
above are the bald facts of construction, and if you are a wargamer seeking a
simple, sturdy city building to add to your table, this kit is probably the
business. If, however, you are a scale modeller considering the
 is probably
a boon for wargamers who can easily add the odd sniper (or bathing nude!) for
easy play. If using the house in a diorama, however, it’s an enormous problem –
there are 64 such openings in the basic building, which grew to 98 when I added
the optional extra storey. An obvious solution would have been for Italeri to
include clear pieces with window framing moulded on. Failing that, delivering
the window frames as optional inserts would at least have allowed the modeller
to make their own decision as to whether or not to include them. In the end, I
had to visit my local hardware store. What I found were little white plastic
crosses that are sold in bags of 100 and used as spacers when laying a
full-sized tiled floor. I cut one to size for the building windows, then used it
as a template for the other 97 (allowing for a few mistakes). My sprue cutters
worked overtime trimming each of these inserts both to size, then further
shaping them to vaguely represent the characteristic overhang that you find on
sliding window frames. Naturally, all 98 had to be inserted and glued in
squarely place with superglue, then coated with Gunze Mr Surfacer so that they
would take paint. Another avoidable chore.
is probably
a boon for wargamers who can easily add the odd sniper (or bathing nude!) for
easy play. If using the house in a diorama, however, it’s an enormous problem –
there are 64 such openings in the basic building, which grew to 98 when I added
the optional extra storey. An obvious solution would have been for Italeri to
include clear pieces with window framing moulded on. Failing that, delivering
the window frames as optional inserts would at least have allowed the modeller
to make their own decision as to whether or not to include them. In the end, I
had to visit my local hardware store. What I found were little white plastic
crosses that are sold in bags of 100 and used as spacers when laying a
full-sized tiled floor. I cut one to size for the building windows, then used it
as a template for the other 97 (allowing for a few mistakes). My sprue cutters
worked overtime trimming each of these inserts both to size, then further
shaping them to vaguely represent the characteristic overhang that you find on
sliding window frames. Naturally, all 98 had to be inserted and glued in
squarely place with superglue, then coated with Gunze Mr Surfacer so that they
would take paint. Another avoidable chore.
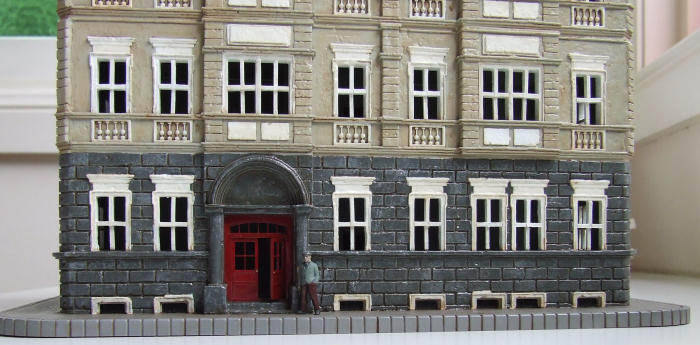
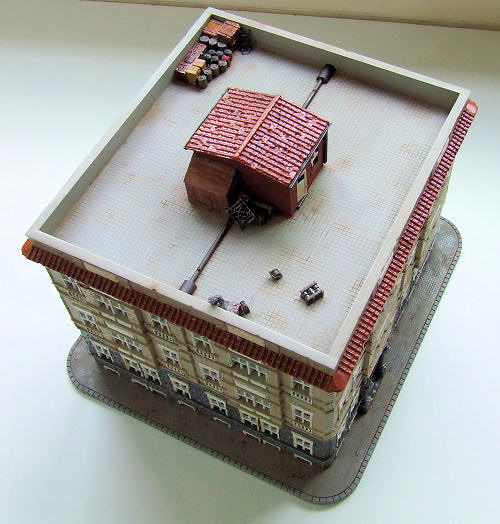
My other concern during construction was the very simplistic hut that sits on top of the building. At best is could be described as four concrete slabs with a terracotta tile roof. I think it’s just a lazy afterthought by Italeri – there is little to suggest that this box represents any genuine architectural feature. I ditched the walls and replaced them with brick structures sourced from the second-hand buildings bin at my local model railway shop. These were trimmed so that I could still use the much more convincing terracotta roof, albeit at a steeper angle. For interest I added a little wooden lean-to on the side and some guttering to the roof – there is also no plumbing included anywhere in the kit. I think these steps made for a much more convincing addition to the very visible top of my Berlin house; you could alternatively add a trapdoor arrangement or some other means of rooftop access. At the other end of my building I sourced some paved footpath sections – again, model railway fixtures – and assembled them to match the dimensions of the house. These were glued to the bottom of the structure to raise the house off street level, but I won’t berate Italeri for not including this feature.
| COLORS & MARKINGS |
One can
of course paint this building in almost any scheme. I had to spray the interior
walls and floors before gluing each storey on top of the one below. For this I
chose a neutral tan colour but you could go mad with different shades for each
room, or even scale wallpaper. After assembly, a lot can be seen inside if you
look, but there is also a lot of shadow so don’t bother with too much subtlety
for the interior scheme. In the end I also didn’t bother masking the window
cavities, as any overspray simply didn’t show up.
It was
only after painting was complete that I added some extra items to the rooftop,
including various boxes and scrap materials, as are often ditched out of sight
in apartment blocks. I also included one figure for a sense of scale, then
blended these elements in with a final oil wash. Once the house is incorporated
into a larger diorama I will complete the process including a flat overspray and
further weathering with pigments.
| CONCLUSIONS |
February 2010
If you would like your product reviewed fairly and quickly, please contact me or see other details in the Note to Contributors.