| KIT #: | PS 2016 |
| PRICE: | ~$25.00 |
| DECALS: | None |
| REVIEWER: | Martin McClendon |
| NOTES: | An enjoyable change of pace |
| HISTORY |
 The result
of astounding technological innovations, NASA’s Apollo moon program put the
first humans on Earth’s natural satellite in 1969. Much like the modern-day
Artemis program, it was a peak moment in human history taking place during a
time of turmoil and conflict, which pointed the way to the ideals of global
cooperation and progress.
The result
of astounding technological innovations, NASA’s Apollo moon program put the
first humans on Earth’s natural satellite in 1969. Much like the modern-day
Artemis program, it was a peak moment in human history taking place during a
time of turmoil and conflict, which pointed the way to the ideals of global
cooperation and progress.
| THE KIT |
I received this kit as a thoughtful birthday gift from my cousin. While it is very different from the plastic models I usually build, the subject matter is right up my alley, as both my cousin and I were fascinated by space flight and science fiction, inspired by our grandfather who was a pilot, and who always had copies of “Air Progress” and “Aviation Week” sitting around his apartment.
Metal Earth makes a growing line of kits of various subjects, all of which are presented as a slim packet of etched metal sheets. The builder then cuts out the parts and forms them into the shapes required, joining the pieces using tiny tabs and slots. It is a throwback to the stamped tin toys of yesteryear, some of which could be very complicated and detailed, and also reminded me of the perforated paper construction books my parents would often buy me at the supermarket when I was a kid, portraying a wild west town, fire station, etc.
The company makes a dizzying variety of subjects, everything from the Statue of Liberty to a triceratops, divided into several levels of difficulty. This model is labeled as “challenging.” Their early models were just shiny metal, but now most of them come pre-painted on the sheets, and the presentation is really quite stunning considering the medium. Of course certain liberties are taken in the design to make them work as small stamped metal models, but for many of the kits, including this Astronaut, the outline is very faithfully rendered.
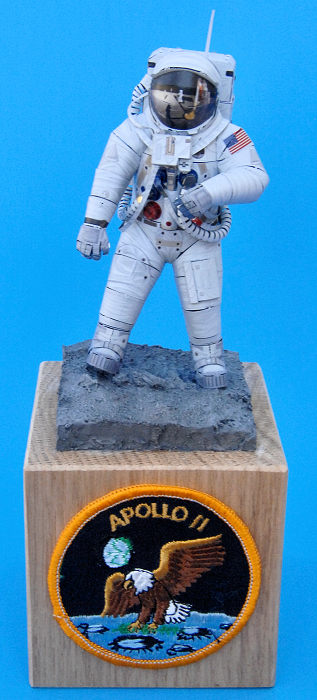
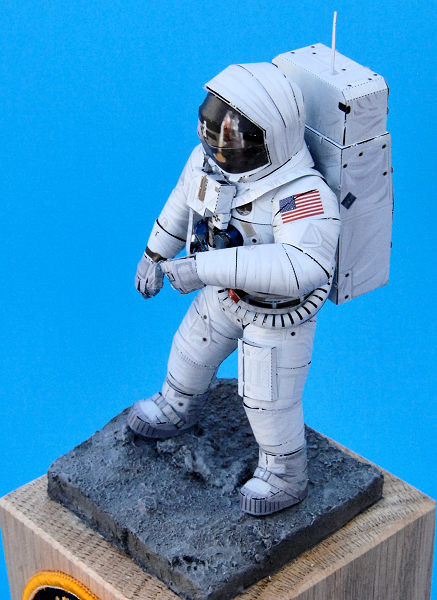
 No scale is
listed for this kit, but it stands just over five inches tall to the tip of the
backpack antenna when done. It is based on the iconic photo that Neil Armstrong
took of Buzz Aldrin during the Apollo 11 mission, portraying the spacesuit which
was itself a technological marvel of its day. The pre-painted pieces are very
nicely done and the colors seem authentic. The reflection in Aldrin’s helmet of
the moon and of Armstrong is printed onto the helmet visor in very subtle and
convincing colors.
No scale is
listed for this kit, but it stands just over five inches tall to the tip of the
backpack antenna when done. It is based on the iconic photo that Neil Armstrong
took of Buzz Aldrin during the Apollo 11 mission, portraying the spacesuit which
was itself a technological marvel of its day. The pre-painted pieces are very
nicely done and the colors seem authentic. The reflection in Aldrin’s helmet of
the moon and of Armstrong is printed onto the helmet visor in very subtle and
convincing colors.
| CONSTRUCTION |
Metal Earth provides a multi-page instruction sheet that is very well organized and pretty easy to follow. The metal parts are held on the sheets by very small metal bridges which are easy to remove from the sheets using a sprue cutter. Small needle-nosed pliers are also very helpful to bend the tiny tabs. Each piece is etched with surface textures and then painted at the factory. Many pieces have grooves to make them easier to bend or form as required. Just be careful when removing and working with the pieces to make sure you don’t scratch the paint.
The tiny tabs and slots
work well but do take some patience and fine-motor skills. My cousin also bought
me a nifty magnifier with a light on a stand, which came in handy several times.
The suit’s tiny hose fittings and the fingers on the gloves were particularly
challenging in this regard. I took the extra step of bending many of the tabs
toward the inside of each piece to help conceal the joints. The oxygen hoses are
designed as segmented pieces which are formed along a central spine, presenting
the suggestion of a tube wh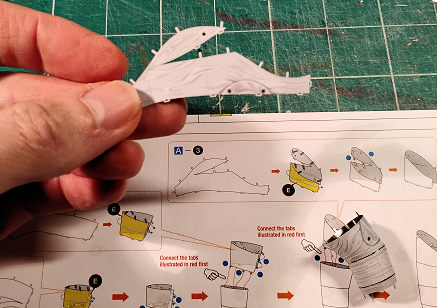 en
finished. I found that using the small-diameter metal handle of a hobby file to
curve each flat section around gave the best results at creating the tubular
shape while allowing the hose to twist around as designed.
en
finished. I found that using the small-diameter metal handle of a hobby file to
curve each flat section around gave the best results at creating the tubular
shape while allowing the hose to twist around as designed.
It is remarkable how the pieces flow together to create complicated shapes like elbows etc. Again, some patience is required in gently molding the subassemblies to fit into their tabs, but the kit is very well designed and everything eventually fits. Just watch out here, because obviously the kit is made of thin metal pieces which can be sharp.
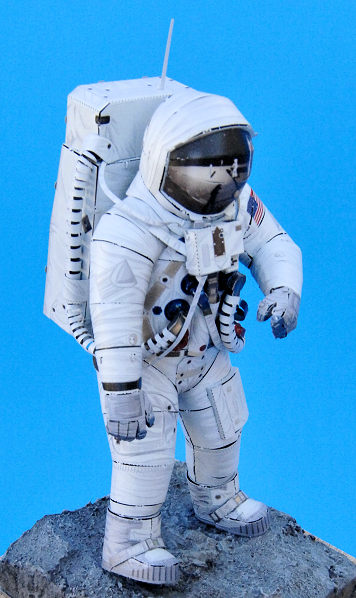 Although the
figure comes with a base, I decided to create a more realistic “moonscape” using
styrofoam and modeling compound. I used some scrap oak to create a pedestal, and
glued an Apollo 11 mission patch to the front. The figure was attached to the
painted moon surface with CA gel glue.
Although the
figure comes with a base, I decided to create a more realistic “moonscape” using
styrofoam and modeling compound. I used some scrap oak to create a pedestal, and
glued an Apollo 11 mission patch to the front. The figure was attached to the
painted moon surface with CA gel glue.
| COLORS & MARKINGS |
No paint or decals required, but if you were so inclined, you could easily dress up this model to become a showpiece. A little filler on the joints, and maybe replacements for the oxygen hoses with miniature tubing, a drybrushing of grey paint for moon dust, could make it indistinguishable from a plastic or resin figure.
| CONCLUSIONS |
No fumes, no sanding dust, and a build time of maybe four hours for the figure (more to prepare the custom base). If you are looking for a change of pace, or maybe a kit to introduce a younger person to the art of modeling, I would highly recommend browsing Metal Earth’s selection. They are widely available at stores and online.
Martin
McClendon
1 June 2026
Copyright ModelingMadness.com. All rights reserved. No reproduction in
any form without express permission from the editor.
If you would like your product reviewed fairly and fairly quickly, please
contact
the editor or see other details in the
Note to
Contributors. Back to the Main Page
Back to the Review
Index Page
Back to the Previews Index Page