
Monogram King Kong
| KIT #: | 1623 |
| PRICE: | $15.00 in 1992 |
| DECALS: | Huh? |
| REVIEWER: | Shawn Payne |
| NOTES: |
King Kong captured not only the
girl but the fancy of moviegoers when the landmark black-and-white feature film
premiered at
| THE KIT |
This kit was a release from Monogram as a Luminators Neon Monster kit. It was molded in pink clear plastic that was to glow under a black light. The parts -- for the most part – were still attached to the sprues, though a few of the larger parts had become loose. My copy of the kit was missing some of the parts to complete the base. I don’t know if this was intentional or if these parts just did not make it into the box at the time of packaging.
There was little to no flash or other molding defects with the model, and no decals provided -- as was typical for these kits. The instruction sheet just showed the assembly and didn’t include a painting guide because the model was not to be painted in order to allow the effect of the neon pink plastic to glow under the black light.
| CONSTRUCTION |
 I
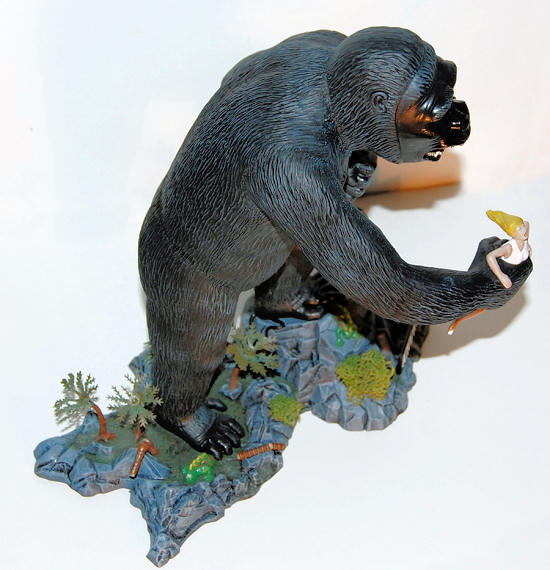
started with King Kong first. I assembled the large ape as the instructions
suggested with few difficulties. Not much cleanup was necessary to get the parts
to fit properly. However, I did notice that the glue was taking a little longer
to dry and hold tight as the plastic had a slight rubbery texture to it. This
came into play when sanding seam lines.
I
started with King Kong first. I assembled the large ape as the instructions
suggested with few difficulties. Not much cleanup was necessary to get the parts
to fit properly. However, I did notice that the glue was taking a little longer
to dry and hold tight as the plastic had a slight rubbery texture to it. This
came into play when sanding seam lines.
Once together, I puttied the seams and then attempted to sand and scrape the putty to blend into the contours of his body. This is where I ran into my biggest trouble with the kit -- partly because of the need to keep his “fur” intact by sanding the putty in a way to allow the contours of the fur to carry over and look natural. Then came the problem of this plastic not reacting well to either the sandpaper or the hobby knife. The knife wanted to skip and tear as it was pulled along the seams, and the sandpaper was tearing at the plastic instead of smoothing it.
I had to resort to the Dremel tool with a coarse milling bit to reshape the plastic and putty along the seams to get a result I could accept. Because I knew the body of King Kong was going to be flat black, I was not too worried about the unevenness of the seams.
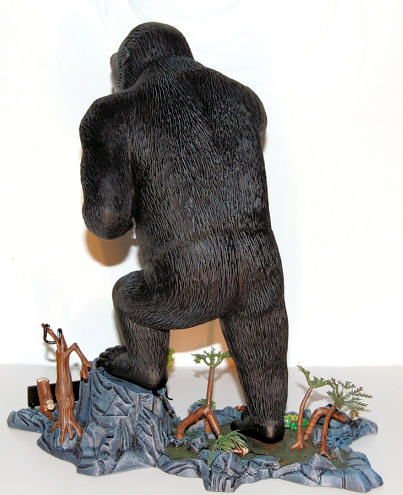
Comparatively, the base was fairly easy. Little construction was needed; only a few tree trunks to put together. But because of the tree tops missing from the kit, I had to find other ways of making the trees look consistent. I found some plastic aquarium plants that I could use for the palms of the trees. And where the kit called for some large-clustered leaves to be placed, I utilized some model railroad foliage.
| COLORS & MARKINGS |
 King Kong was painted first. I used Testors Model
Master and Testors paints for all of the painting with this kit. I primed Kong
with flat black, then airbrushed gloss black to his face, chest and feet. I
remembered a trick I read about to get a real flat black paint mixture. I had
read that if you thinned the paint with Ronsonol Lighter Fuel, it would make the
paint look really flat.
So I did just that and added the lighter fuel to the
flat black paint and airbrushed the body with this mixture. I used a freehand
technique with this step without masking off Kong’s face, chest or feet. Once I
had his body painted the way I liked it, it was time to start the dry brushing.
I first dry brushed on euro grey over all of his fur and eyebrows. Then I went
back over the same areas with a light dry brushing of intermediate blue. This
produced a desired effect and I moved on to his eyes and mouth.
King Kong was painted first. I used Testors Model
Master and Testors paints for all of the painting with this kit. I primed Kong
with flat black, then airbrushed gloss black to his face, chest and feet. I
remembered a trick I read about to get a real flat black paint mixture. I had
read that if you thinned the paint with Ronsonol Lighter Fuel, it would make the
paint look really flat.
So I did just that and added the lighter fuel to the
flat black paint and airbrushed the body with this mixture. I used a freehand
technique with this step without masking off Kong’s face, chest or feet. Once I
had his body painted the way I liked it, it was time to start the dry brushing.
I first dry brushed on euro grey over all of his fur and eyebrows. Then I went
back over the same areas with a light dry brushing of intermediate blue. This
produced a desired effect and I moved on to his eyes and mouth.
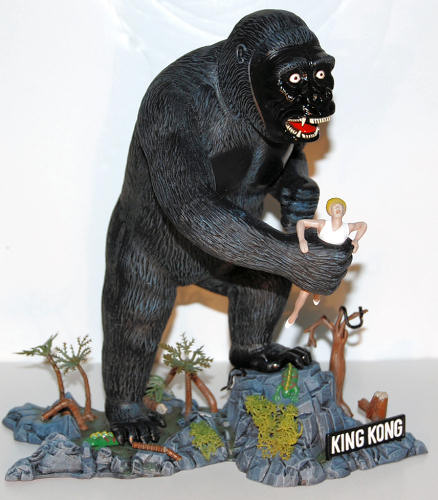
The eyes: The most important part of a figure kit I believe started with a base coat of flat white. Then a coat of gloss white was added. I thinned a mix of red and white to achieve the pink I wanted, and with a thin brush I allowed the pink to run into the seams around his eyes. Giving this time to dry, I moved to the yellowing of the eyes. The photos do not illustrate this well, but the effect looks good. I mixed Testors bottled gloss coat with bright yellow then brushed it on over the whole eye. This helped knock down the bright white of the eyes. Then I painted the irises brown and the pupils black to finish off the detailing.
The mouth: This process started with gloss red for the tongue and the roof of the mouth. A mixture of red and black gave me a reddish-brown color to work with for the inside of his mouth. The roof and gums were painted with this mixture. Next came the teeth. I used ivory to paint the teeth and gave them a wash of a black ink and dish soap-and-water mixture to define the areas between the teeth. Kong is now done.
The Base: After the primer grey dried, I painted the base panzer grey. Then came a heavy wash with the black ink mixed with dish soap and water. I applied this wash to every crease and crevasse on the base. I did not bother to clean up the wash as I felt the dry brushing would do this for me. I did a very heavy dry brushing of the base rock areas with medium grey. I went over that with a light dry brushing of intermediate blue. This cooled down the rocks and tied the mountainous King Kong to the base.
 For the ground areas I started with a heavy dry
brushing of military brown and over that a medium dry brushing of medium green.
Then I added an even lighter dry brushing with pale green. The molded-in leaves
on the base were painted forest green, given an ink wash and then a light dry
brushing of pale green.
For the ground areas I started with a heavy dry
brushing of military brown and over that a medium dry brushing of medium green.
Then I added an even lighter dry brushing with pale green. The molded-in leaves
on the base were painted forest green, given an ink wash and then a light dry
brushing of pale green.
Now on to the trees. I used flat brown for the base color and then painted the open ends and the broken open areas of the trees with sand. I then applied the ink wash and dry brushed the trunks with dark tan. The leaves were painted OD green on top and pale green on the undersides with a little overspray of pale green to the tops of the leaves.
Snakes and Lizards: The snakes were painted
semi-gloss black and the underbellies white. The lizards were painted with gloss
green. The markings were done in bright yellow and gloss red. I gave the lizards
an overspray with OD green to blend and tone down the look.
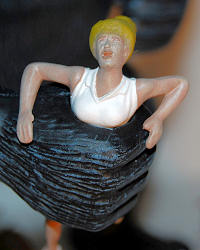
The female started with a coat of flat white. Then flat tan was used for the base of the flesh tones with a dry brushing of sand to even it all out. I used armor sand for the base color for her hair and dry brushed flat yellow to get the effect I wanted. A little trick I used on her for this kit was to cut her in half during the construction so I could place her in Kong’s hand once all the painting was completed.
| CONCLUSIONS |
 King Kong makes another fine addition to my figures
collection and is a fun kit to build and paint. These fits were meant for
modelers of all ages and are a lot of fun to do. Just take your time and play
around with your paints and you just can’t go wrong.
King Kong makes another fine addition to my figures
collection and is a fun kit to build and paint. These fits were meant for
modelers of all ages and are a lot of fun to do. Just take your time and play
around with your paints and you just can’t go wrong.
| REFERENCES |
If you would like your product reviewed fairly and quickly , please contact the editor or see other details in the Note to Contributors.