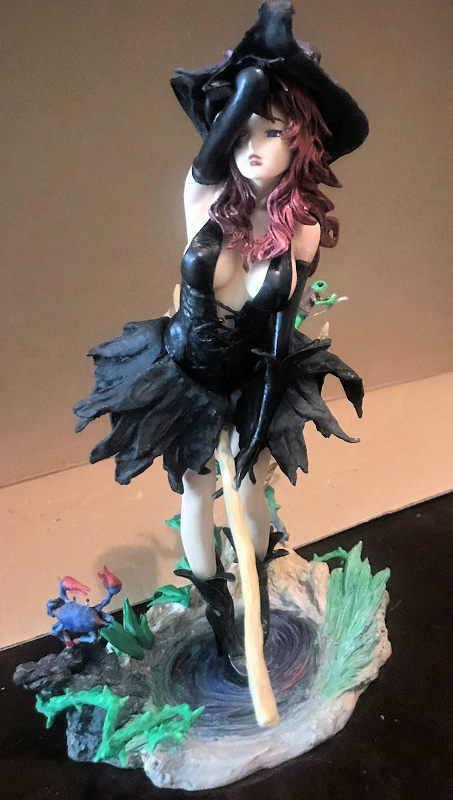
Not much is known about this. E2046 didn’t provide a history either……All I know is she’s a very very very sexy witch with a broom in between her legs and a frog and a crab familiars…That’s it.
| THE KIT |
 Yeah,
was trolling E2046 web site when they had one of their many sales and this
figure popped up. It caught my eye instantly, not only because of her sexy
witch outfit, but also her display base and familiars, a frog and crab. The
only thing is her scale. Based on her height, she measures out to 1/8th
scale. Yes, the height given on the site is taller but remember that
includes her witch hat, which makes her taller than usual. The kit arrives
in around two dozen pieces, which not only includes her, but also her
outfit, her familiars, the broom and display base with various thorn vines,
grasses, reeds, and a small hill. No instructions were given but should be
easy to figure it all out.
Yeah,
was trolling E2046 web site when they had one of their many sales and this
figure popped up. It caught my eye instantly, not only because of her sexy
witch outfit, but also her display base and familiars, a frog and crab. The
only thing is her scale. Based on her height, she measures out to 1/8th
scale. Yes, the height given on the site is taller but remember that
includes her witch hat, which makes her taller than usual. The kit arrives
in around two dozen pieces, which not only includes her, but also her
outfit, her familiars, the broom and display base with various thorn vines,
grasses, reeds, and a small hill. No instructions were given but should be
easy to figure it all out.
| CONSTRUCTION |
Main construction is minimum. Again, resin figures, especially this one with colors all over the place, means you have to keep all the parts separate or else you will have a hell of a time later when it comes to painting. The first thing I did as with any resin, is to give it good warm, soapy wash, then dry them all out with a dry towel. The only thing I superglued was the main body, the legs and lower arm. The upper arms was not cemented since I found out quickly you can’t get her upper skirt straps onto her shoulders otherwise. Speaking of straps, I decided to cut out the rounded portion of her straps so I can get the upper skirt onto her shoulders after painting. Otherwise, it will be a hassle to tape it up. Unfortunately, I went too hard while snipping the strap off and broke the dress at the chest straps…Guess those straps made the outfit a little weak at that part. Had to superglue it back together. I also had to use a hairdryer to heat up the upper portion of her strap since they will not lie on her shoulders otherwise. Anyways, other than that, main construction is done with the figure. Now the base.
The base construction, again, was kept mostly off until the final assembly. I did cement on two of the thorns but kept the one lower on the ground off to get it out of the way. The tree I assembled together, so was the hill so I can putty up the seams. The fit is nice but as with these things, no matter how good the fit, a slight seam will always be shown. Unfortunately, had a little boo boo when ham fisted me dropped the base to the carpet, broke off the vines and had to completely reconstruct them…Grr….that took a while but eventually got it done. Painting time!
| COLORS & MARKINGS |
 Now, there
are two sets of eye decals provided so I’m gonna use those. Just a hint, these
decals are a complete sheet, which means you have to cut them to shape and never
EVER use Mr. Marks Softer as that EATS these decals! Anyways…Also, you can leave
her in her birthday suit but then the figure will be incredibly boring so I
decided to glue on her entire outfit, which offers a lot of painting
opportunities.
Now, there
are two sets of eye decals provided so I’m gonna use those. Just a hint, these
decals are a complete sheet, which means you have to cut them to shape and never
EVER use Mr. Marks Softer as that EATS these decals! Anyways…Also, you can leave
her in her birthday suit but then the figure will be incredibly boring so I
decided to glue on her entire outfit, which offers a lot of painting
opportunities.
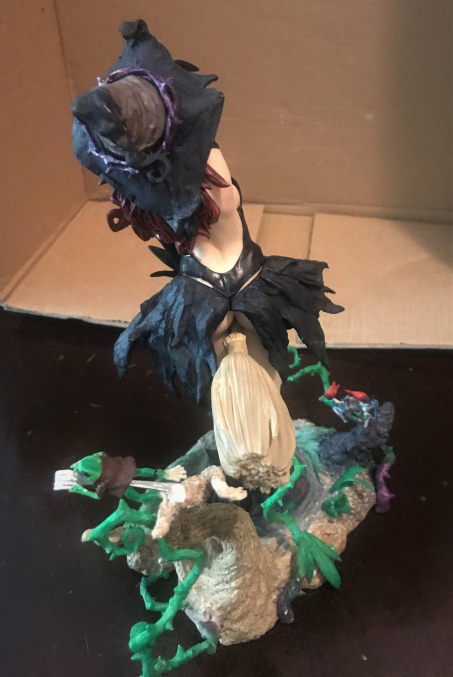
Painting begin with a spray of Testor’s Flesh base on every relevant part, which are a lot. Then I shaded and shadowed her face and the region where her skin might be shown through her dress. This was quick since her skirt and in some ways, her hair cover most of her body. Her boots I sprayed with Tamiya Rubber Black, dress Semi-Gloss Black. Then I took some flat black first to the wavy part of her skirt and gave it a good two washes to dull the color. Then taking Apple Barrel arts and crafts “Pewter Grey”, which is a very dark grey, bordering on black and wash the skirt with that twice to give it a used and dirty look. Same with her hat. I painted the thorn around her hat as deep purple and light violet.
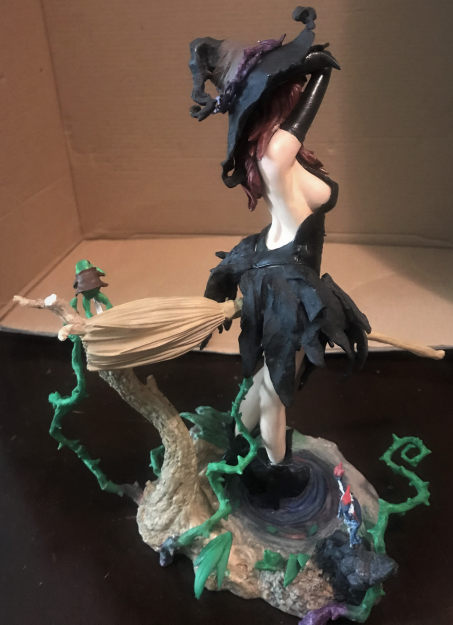
Her base. I started with black around the whirlpool, then added various blue, red, yellow and green to it to mark it. The surrounding area first started with pewter grey, then Pavement (also Apple Barrel), Testor’s Gunship Grey and Dark Ghost Grey. The weeds and reeds, Tamiya Dark Yellow, followed by various tan, Light Mocha and Flat Earth, this was done to the tree also along with the broom. The grass were painted with various shades of green alongside the thorn vines. The small mount hill was painted with various dark shades of grey for a multi-hued witch’s brew of a base. Now, the two familiars.
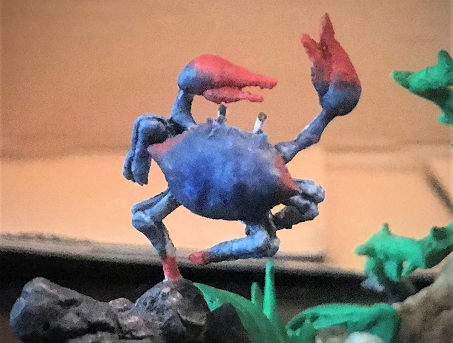
The frog, strangely, is wearing a jacket and is flying on a fork of all things. I painted him mostly green, except his belly, which I painted in Light Ivory. The jacket I painted in Tamiya’s Red Brown, with a golden bell. I then attached the frog to the fork, painted Chrome Silver and attached to the tree where he belonged. The crab can be various colors but I painted it to look like a Maryland blue crab with top dark blue body, light ivory belly and red claws. This was attached to the small mount hill where he’s happily dancing away.
| FINAL CONSTRUCTION |
 There
are a lot left. First the figure. Her boots, which I painted in gloss black,
were out on first. The majority of the time was spent getting her dress
correctly. The top and bottom was separate and there is also a dress
attachment insert, which you need to put on her waist first to hold
everything together since especially, her skirt is very heavy. The bottom
skirt is in left and right pieces, I attached those first, then dappled
superglue into the seam to work the skirt so I can adjust it for the correct
angle, especially make sure there is enough room for the broom to go through
her legs. It’s here that I broke the broom the first time…….After the skirt
is set, time for the upper body strap. Make sure the strap, with the lower
belly covering, is against the dress attachment insert. Unfortunately, the
left side of her belly strap just will not hit the attachment insert,
forcing me to putty it up and then repaint. I had to again, use hairdryer to
knock one of the shoulder strap down on her shoulder, then permanently
superglue that shut. Don’t worry about making a mess since her hair do a
good job covering it up.
There
are a lot left. First the figure. Her boots, which I painted in gloss black,
were out on first. The majority of the time was spent getting her dress
correctly. The top and bottom was separate and there is also a dress
attachment insert, which you need to put on her waist first to hold
everything together since especially, her skirt is very heavy. The bottom
skirt is in left and right pieces, I attached those first, then dappled
superglue into the seam to work the skirt so I can adjust it for the correct
angle, especially make sure there is enough room for the broom to go through
her legs. It’s here that I broke the broom the first time…….After the skirt
is set, time for the upper body strap. Make sure the strap, with the lower
belly covering, is against the dress attachment insert. Unfortunately, the
left side of her belly strap just will not hit the attachment insert,
forcing me to putty it up and then repaint. I had to again, use hairdryer to
knock one of the shoulder strap down on her shoulder, then permanently
superglue that shut. Don’t worry about making a mess since her hair do a
good job covering it up.
Next is her head, after the eye decal takes hold, I put it on her shoulders. There was a very minor seam but again, her hair covered that up extremely well. Now her hair. This was in multiple pieces since it’s so wavy and the fact one of her hand goes on top there. I carefully assembled them onto her head and patched up the seam on the bottom and repainted that. No worries about the seam on the top since her hat will fix that! After her hair is dried, I cemented on her upper portion of her witch gloves, carefully, position her right so it can hold onto the broom…..Which broke it the second time…..And her left so it can hold onto her hair correctly, covering the seams there. Finally, her hat. It’s in three pieces because the top and bottom have to be separate in order to allow you to insert in the ring of thorn. I again, painted it like her skirt except the thorn. I inserted the ring of thorn in first, then cemented the top to the bottom before carefully placing it on her head, covering her left hand. Figure done! Now to get her onto her stand!
 Had some
helluva time with the stand! Namely, I the right foot just will not go into the
hole, forcing me to use force with a hairdryer! Now, you are wondering, why
didn’t you assemble the broom to get it on at the same time…Well, guess, just
guess what happened when I tried that?!?!?!? If you guessed, “KRISH!!!” the
broom broke the third time, you’d be right! With a sigh, I put it aside for
later. I finally got it to go after sanding down the plug and pulling the leg
slightly to the right, then I superglued on the broom, now in two halves before
trying to get on the frog and crab and the vine close to the ground. So yeah, as
I was working, I slapped one of the vine in half. Really sighing now, I grabbed
my five minute epoxy to really glue it shut
when….”KKKIIRRRRRRIIISSSHHHHHHHH!!!!!!!” the broom broke the FOURTH time! Really
cursing and cussing now, I also applied some epoxy to her crouch to permanently
cement the broom in, hence why it’s so crooked in the pics…Like, by the time, I
gave two shazznettles then!!! It’s only after things calmed down a bit that I
went in to her crouch, picked off the excess epoxy and repainted her neither
region……But yeah…Finally, figure DONE!
Had some
helluva time with the stand! Namely, I the right foot just will not go into the
hole, forcing me to use force with a hairdryer! Now, you are wondering, why
didn’t you assemble the broom to get it on at the same time…Well, guess, just
guess what happened when I tried that?!?!?!? If you guessed, “KRISH!!!” the
broom broke the third time, you’d be right! With a sigh, I put it aside for
later. I finally got it to go after sanding down the plug and pulling the leg
slightly to the right, then I superglued on the broom, now in two halves before
trying to get on the frog and crab and the vine close to the ground. So yeah, as
I was working, I slapped one of the vine in half. Really sighing now, I grabbed
my five minute epoxy to really glue it shut
when….”KKKIIRRRRRRIIISSSHHHHHHHH!!!!!!!” the broom broke the FOURTH time! Really
cursing and cussing now, I also applied some epoxy to her crouch to permanently
cement the broom in, hence why it’s so crooked in the pics…Like, by the time, I
gave two shazznettles then!!! It’s only after things calmed down a bit that I
went in to her crouch, picked off the excess epoxy and repainted her neither
region……But yeah…Finally, figure DONE!
| CONCLUSIONS |