Eureka XXL 1/35 Wooden Well
| KIT #: | ED 3505 |
| PRICE: | $10.20 |
| DECALS: | None |
| REVIEWER: | Drew Pratt |
| NOTES: | Resin |
| HISTORY |
Our hobby has become a true multi media past time. There was a time when
the variety of aftermarket resin and metal sets were not as plentiful as it is
today. Now a quick search online and viola an astounding selection of everything
from pop machines to people! My goal with this article is to help those out
there who have not worked
 with
resin and would like to expand their skills. Resin is a poured, epoxy material
that can be cast in rubber or silicone molds by smaller outfits. Usually resin
kits of either aircraft, military stuff, or figures, represent items that for
various reasons would not be a great mainstream seller for a plastic kit
company. The level of detail that can be captured in resin is quite good, and
the soft, flexible molds can capture detail and undercutting that cannot be done
in plastic.
with
resin and would like to expand their skills. Resin is a poured, epoxy material
that can be cast in rubber or silicone molds by smaller outfits. Usually resin
kits of either aircraft, military stuff, or figures, represent items that for
various reasons would not be a great mainstream seller for a plastic kit
company. The level of detail that can be captured in resin is quite good, and
the soft, flexible molds can capture detail and undercutting that cannot be done
in plastic.
| THE KIT |
What we have here is an accessory set that would fit a very wide time-frame and locations. Made up of 10 pieces that include;
A 1 piece well,
2 roof supports,
2 roof pieces,
A rope spool,
A barrel with lid,
A bathtub and a bucket. Everything is nicely cast in gray resin. Also included are 2 lengths of
wire, one small diameter and one larger diameter and a short run of chain.
| CONSTRUCTION |
 It
is a good idea with any kit to wash the parts first. Simple green or Dawn dish
soap have been my go to agents. This removes mold release agents, also with some
resins as they cure release catalyst residue. I have a small plastic bin for
this, do not want make the mistake of washing parts in the tub the missus keeps
in the sink again. Unlike plastic kits resin parts are generally molded with
casting blocks or part of a thin sheet or wafer. Removing them is not difficult,
just different. This is where you get to practice your razor saw skills. You
maybe wondering, “What about my clippers?” Well, resin can be quite brittle so
check on a scrap piece that your clippers will not shatter the resin before
using them.
It
is a good idea with any kit to wash the parts first. Simple green or Dawn dish
soap have been my go to agents. This removes mold release agents, also with some
resins as they cure release catalyst residue. I have a small plastic bin for
this, do not want make the mistake of washing parts in the tub the missus keeps
in the sink again. Unlike plastic kits resin parts are generally molded with
casting blocks or part of a thin sheet or wafer. Removing them is not difficult,
just different. This is where you get to practice your razor saw skills. You
maybe wondering, “What about my clippers?” Well, resin can be quite brittle so
check on a scrap piece that your clippers will not shatter the resin before
using them.
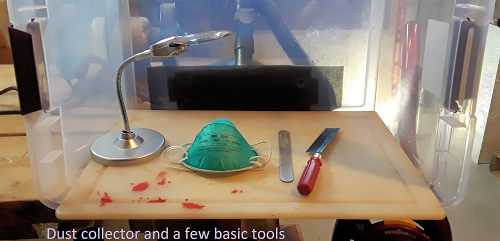
Now before we start cutting or sanding resin, a word of caution. Resin
dust is an irritant and potentially toxic so wear at least a good dust mask if
not a cartridge respirator. (Editor's Note: you can also reduce dust issues by
wet sanding.) I have put together a small dust collection booth to contain the
dust in my work area. Comes in handy when dealing with putty sand repeat! Now
that we have clean and trimmed parts ready to assemble we need a way to bond
everything. However regular plastic cements do not work with resin. Resin is a
hard, somewhat brittle material that must be cemented with cyanoacrylate glue
(AKA “Super glue”) or epoxy. Science moment!
 Cyanoacrylates
are a family of strong fast-acting adhesives with industrial, medical, and
household uses. They are various esters of cyanoacrylic acid. The acryl groups
in the resin rapidly polymerises in the presence of water to form long, strong
chains. Small parts CA glue is fine, for larger parts that require extra hold or
need rods or pins added then epoxy is called for. As you build more resin kits
you will find kits where you need to drill and pin the parts together with rods
or wire. Also epoxy can help fill seams. For this build I will be using mostly
epoxy for strength. This kit is as simple as A. B. C. (A.) Join a roof support
to the well. (B.) While joining the other roof support to the well, (C.) Trap
the rope spool. Being the strange individual I am, I drilled the crank location
deeper in the rope spool for a stronger assembly. Added bonus I can crank my
rope spool! All that is left is to add the roof! Before you do that however you
may find it easier to paint everything before adding the roof.
Cyanoacrylates
are a family of strong fast-acting adhesives with industrial, medical, and
household uses. They are various esters of cyanoacrylic acid. The acryl groups
in the resin rapidly polymerises in the presence of water to form long, strong
chains. Small parts CA glue is fine, for larger parts that require extra hold or
need rods or pins added then epoxy is called for. As you build more resin kits
you will find kits where you need to drill and pin the parts together with rods
or wire. Also epoxy can help fill seams. For this build I will be using mostly
epoxy for strength. This kit is as simple as A. B. C. (A.) Join a roof support
to the well. (B.) While joining the other roof support to the well, (C.) Trap
the rope spool. Being the strange individual I am, I drilled the crank location
deeper in the rope spool for a stronger assembly. Added bonus I can crank my
rope spool! All that is left is to add the roof! Before you do that however you
may find it easier to paint everything before adding the roof.
| COLORS & MARKINGS |
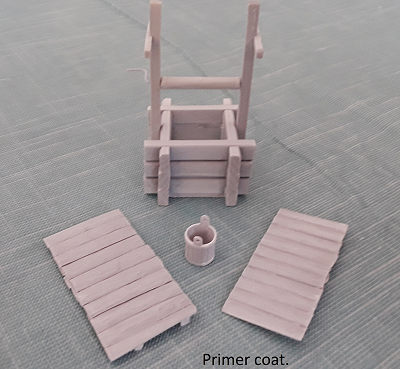 Depending
on the manufacturer, resin castings can vary from the clean complete casting of
this set all the way to some that are vaguely parts amid pinholes and incomplete
castings. Why is this in the paint section? To highlight the need for primer,
specifically a surfacing primer. I will be priming the assemblies with Tamiya
fine white primer and color coat will be Testors square bottle acrylics. This is
a good kit to practice creating wood tones. I will be using various browns and
tans with the metal bits picked out in black with a graphite powder rub. One of
the nice things about resin is that it takes paint well when properly prepared.
Also most resin can handle lacquer paint!
Depending
on the manufacturer, resin castings can vary from the clean complete casting of
this set all the way to some that are vaguely parts amid pinholes and incomplete
castings. Why is this in the paint section? To highlight the need for primer,
specifically a surfacing primer. I will be priming the assemblies with Tamiya
fine white primer and color coat will be Testors square bottle acrylics. This is
a good kit to practice creating wood tones. I will be using various browns and
tans with the metal bits picked out in black with a graphite powder rub. One of
the nice things about resin is that it takes paint well when properly prepared.
Also most resin can handle lacquer paint!
| CONCLUSIONS |
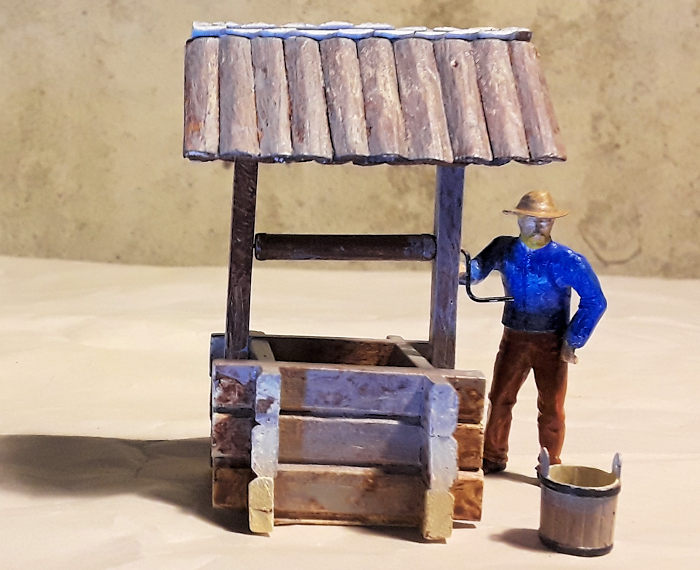
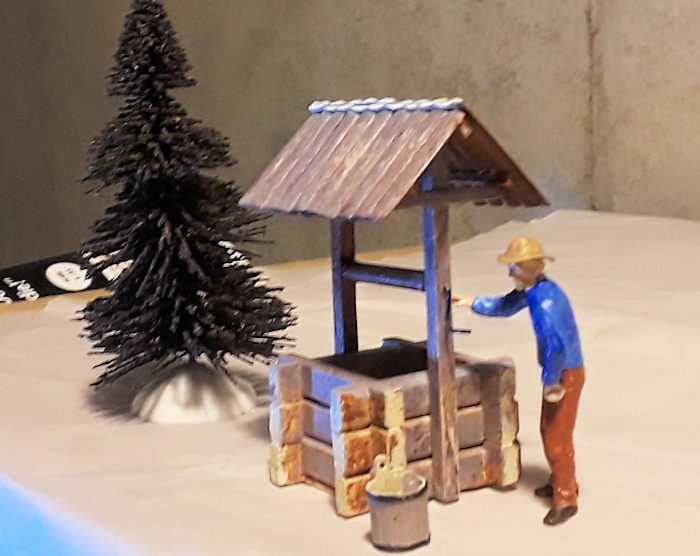
So there you have it, a basic primer to resin! Jump in and give it a go and you will be rewarded with a few new skills and a whole new world of modeling. Not sure where I will be using this, so pardon the paint job. You may have noticed I have not included the tub or barrel, when they get put to use I will take care of them. The figure is in process and just there for scale.
7 May 2019
Copyright ModelingMadness.com
Kit courtesy of my meager funds.
If you would like your product reviewed fairly and fairly quickly, please contact the editor or see other details in the Note to Contributors.