| KIT #: | JS-083 |
| PRICE: | $ |
| DECALS: | Two options |
| REVIEWER: | Nicolai Plesberg |
| NOTES: | Kit actually slightly oversized for 1/72 scale |
| HISTORY |
With the advent of the highly successful MiG-15 in the Korean skies, the Mikoyan
Gurevich OKB had produced an excellent jetfighter. It was most Western designs,
at least those with straight wings, vastly superior with its swept wings,
licence-built British jet engine (the Nene turbojet) and a bit of Russian
ingenuity. The MiG simply swept the Korean skies free of any UN aircraft with
the exception of the F-86 Sabre which turned out to be superior in the end.
However, the MiG-15, and the improved MiG-15bis, had a seri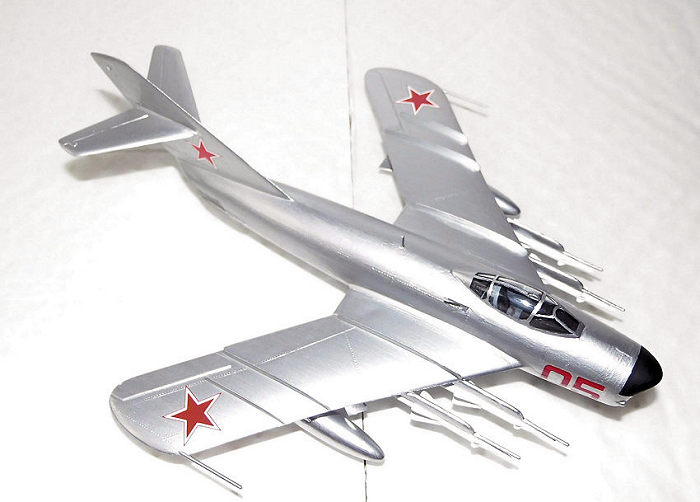 ous
flaw. In really tight high altitude turns it could get into an uncontrollable
spin, due to poor elevator control, which was very difficult to get out of – if
not impossible.
ous
flaw. In really tight high altitude turns it could get into an uncontrollable
spin, due to poor elevator control, which was very difficult to get out of – if
not impossible.
In fact the MiG-15 was unstable at high speeds so Mikoyan and Gurevich sat down and began improving their design. The fuselage forward of the rear frame of the engine plenum chamber was retained virtually unchanged, but the rear fuselage was lengthened to permit a finer taper aft. The vertical tail was retained with small detail changes, but the horizontal tail planes were given an increased sweep angle to give better stability at higher speeds. The biggest change was, however, the wings which were completely redesigned with increased sweep angles and a kink about halfway out with reduced sweep angle to secure stability. They were also of thinner cross section to reduce air resistance, again to promote higher speeds.
The new design was given the designation MiG-17 and entered service with the V-VS (Soviet Air Force) in late 1952 as the Fresco-A (NATO reporting name). It also retained the engine and armament of the MiG-15bis, the Klimov VK-1A and the 37 / 23mm cannon armament. Despite Mikoyan’s and Gurevich’s efforts the new design remained subsonic at level flight, but Mach 1 could be passed in a shallow dive. The all-weather variant, the MiG-17P, Fresco-B, had a fixed-scan S-band AI radar, the Izumrud (Emerald) with the ranging scanner housed in a lip extension above the intake and the scan dish housed in a radome placed on the intake splitter plate. The nose section on this variant was marginally lengthened to make room for the additional cockpit instrumentation.
The two
variants were only built in relatively small numbers being replaced by the
MiG-17F (Fresco-C) and MiG-17PF (Fresco-D) respectively. These two variants had
the more powerful VK-1F turbojet with afterburning; the rear fuselage was cut
back to make room for the larger jet orifice and the afterburner. The airbrakes
on each side were also enlarged and the retracting hydraulic jacks were
repositioned to the fuselage centre. Furthermore the Fresco-D had the 37mm
cannon replaced with another 23mm cannon, the canopy was s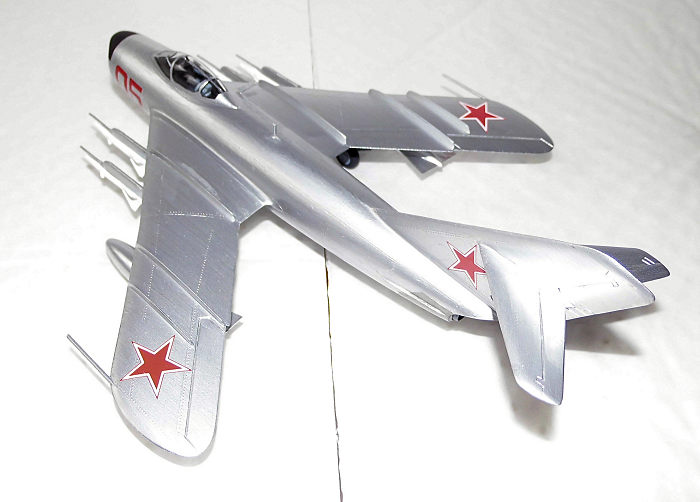 lightly
redesigned, and it had an improved Izumrud radar compared to the Fresco-B. The
last variant to enter service was the MiG-17PFU, Fresco-E, which was similar to
the Fresco-D, but had the cannon armament replaced by four beam riding K-5 (NATO
reporting name: AA-1 Alkali) radar guided air-to-air missiles carried on
launchers placed ahead of the main gear bays.
lightly
redesigned, and it had an improved Izumrud radar compared to the Fresco-B. The
last variant to enter service was the MiG-17PFU, Fresco-E, which was similar to
the Fresco-D, but had the cannon armament replaced by four beam riding K-5 (NATO
reporting name: AA-1 Alkali) radar guided air-to-air missiles carried on
launchers placed ahead of the main gear bays.
Interestingly, the Fresco-C was the most built variant of the MiG-17; four out of five MiG-17s built was the MiG-17F. A total of over 11000 MiG-17s were built with production in Poland, Czechoslovakia and China as well as in the Soviet Union. More than 40 air forces around the world have used or are still using this old warrior, and the MiG-17 has participated in several armed conflicts, especially in the Middle East and Asia; the most prominent one may well be of that in Vietnam, where the North Vietnamese used it against US aircraft with moderate success.
| THE KIT |
This kit
first appeared in 1972 and was praised as a masterpiece (reviews from that time
I’ve read stated this claim), but later when the official data of the real plane
(span, length and height) became known, did it turn o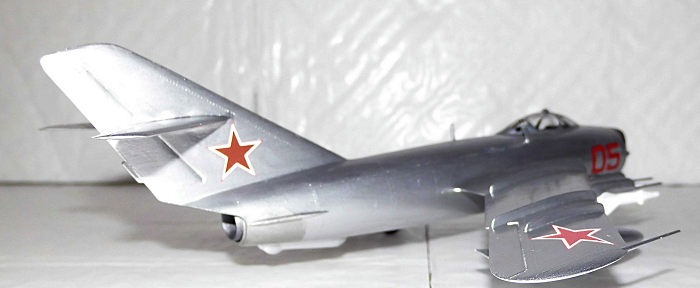 ut
that Hasegawa had made it a tad too large; at least if the scale should have
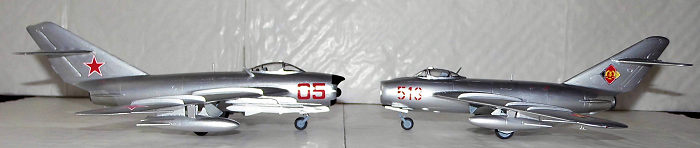
fitted. It actually scales more out at 1/68, but it is only apparent, when
compared to a newer kit such as that from Dragon (photo at
bottom of page). It is crucially for the accuracy of a model kit that the
correct dimensional data of the real subject is used before cutting metal, or
else the result will reflect the bad research done by the kit manufacturer.
Besides the scale issue, the kit reflects the early 70s standard of kit
manufacturing with petite raised panel lines, simplified interior, acceptable
gear plus two drop tanks and of course the armament, which comes as separate
parts. The decals looked okay, but time will tell, how they’d behave, when
soaked in water.
ut
that Hasegawa had made it a tad too large; at least if the scale should have
fitted. It actually scales more out at 1/68, but it is only apparent, when
compared to a newer kit such as that from Dragon (photo at
bottom of page). It is crucially for the accuracy of a model kit that the
correct dimensional data of the real subject is used before cutting metal, or
else the result will reflect the bad research done by the kit manufacturer.
Besides the scale issue, the kit reflects the early 70s standard of kit
manufacturing with petite raised panel lines, simplified interior, acceptable
gear plus two drop tanks and of course the armament, which comes as separate
parts. The decals looked okay, but time will tell, how they’d behave, when
soaked in water.
| CONSTRUCTION |
Construction began with the detachment of the larger parts and interior from the sprues and cleaning them up, including preparing them for paint. As the interior just consist of a bathtub with a look-a-like seat, I scratched an instrument panel including the radar scope as well as the control column. I used my long ago finished 1/72 Kovozávody Prostĕjov MiG-17PF as an inspiration, since I figured the cockpit layout of the two variants was very similar. Interior plus main gear bays and inner side of gear doors were painted grey (Vallejo 905), some details in the cockpit painted flat black and seat belts from Tamiya tape attached and painted suitable colors.
When all
was to my satisfaction, I glued the interior to the right fuselage half, some
fiddling was necessary to get a perfect fit, but I eventually got it in place.
Nose weight was then measured and glued into the nose. Then the fuselage halves
were joined, as were the wings. The fine raised surface detailing on the
fuselage means t hat
eventual filling must be done with the utmost care, or else the detailing will
be eliminated. For that very reason I decided to “gluefill” the entire seam with
my Faller Expert glue bottle, as the seam as such don’t need filler; just a
small amount of liquid glue should be enough, unless of course the sprue
attachment points have not been properly dealt with! When sanded down I saw the
result; a completely smooth seam without any signs of cracks or other
imperfections at all, and the raised surface detailing mostly intact! A cadeau
to Hasegawa from me, as this is a perfect example of how to design the parts!
The intake piece plus the exhaust piece were next glued to the fuselage. The
intake piece did need a small amount of filler to blend into the fuselage as
well as taking care of slight sink marks.
hat
eventual filling must be done with the utmost care, or else the detailing will
be eliminated. For that very reason I decided to “gluefill” the entire seam with
my Faller Expert glue bottle, as the seam as such don’t need filler; just a
small amount of liquid glue should be enough, unless of course the sprue
attachment points have not been properly dealt with! When sanded down I saw the
result; a completely smooth seam without any signs of cracks or other
imperfections at all, and the raised surface detailing mostly intact! A cadeau
to Hasegawa from me, as this is a perfect example of how to design the parts!
The intake piece plus the exhaust piece were next glued to the fuselage. The
intake piece did need a small amount of filler to blend into the fuselage as
well as taking care of slight sink marks.
The cockpit was finished up; scratching a gun sight, painting it and gluing a reflector plate in place. Canopy was cleaned then glued to the cockpit opening using ordinary plastic glue as the edge was well defined (is not always the case!). The wings were then glued to the fuselage. The one visible error that I had to correct was the outline of the fin tip as well as the horizontal tail planes, as they don’t really look good enough in my eyes. So I glued plastic bits to the edges to be able to alter the outline by sanding and filling the edges, until they conformed to my perception of the Fresco’s shapes. The wing / fuselage seams did only need some glue filling; the canopy as well, but here I used clear gloss varnish to avoid any mishaps with the clear plastic. The drop tanks were also glued together and seam treated when dry. The pylons plus the supports for the drop tanks were glued in place and before setting, the drop tanks themselves were used to ensure correct alignment of these parts. The finished tail planes were then glued to the fin. Gear parts were separated from the sprues, cleaned up and painted grey, as were wheel hubs and nose gear bay. Oleos went silver and tires went tire black (Vallejo 862). The seam between the tail planes and the fin required some filler (not as nice as the fuselage / wing seams!) and sanding, but nice invisible seams were eventually the result. I then washed the entire airframe, mounted the gear and it was off to the paint shop.
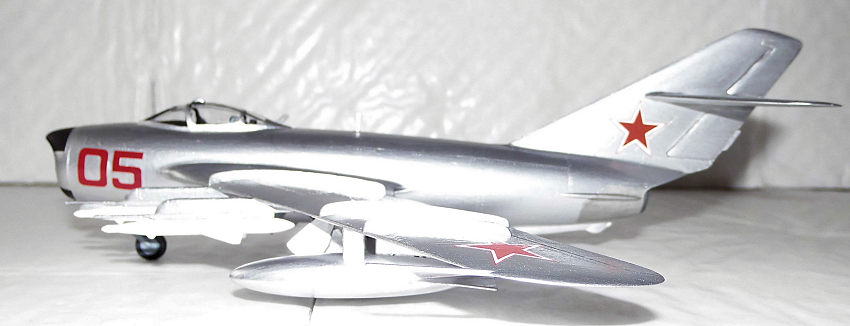
| COLORS & MARKINGS |
I first
painted the canopy frames plus the intake / radar areas with flat black. Then I
actually glued the few antennas, this puppy have on its back, in place with CA
glue. Masking tape was then applied to the areas that should stay black and then
painted the entire airframe silver plus the drop tanks and the outer side of
gear doors. Two coats were sufficient and masking tape was removed. I decided to
pick out the air brakes in steel, as it seems to have been the case in real
life. After that the usual procedure of touch ups came into action, but i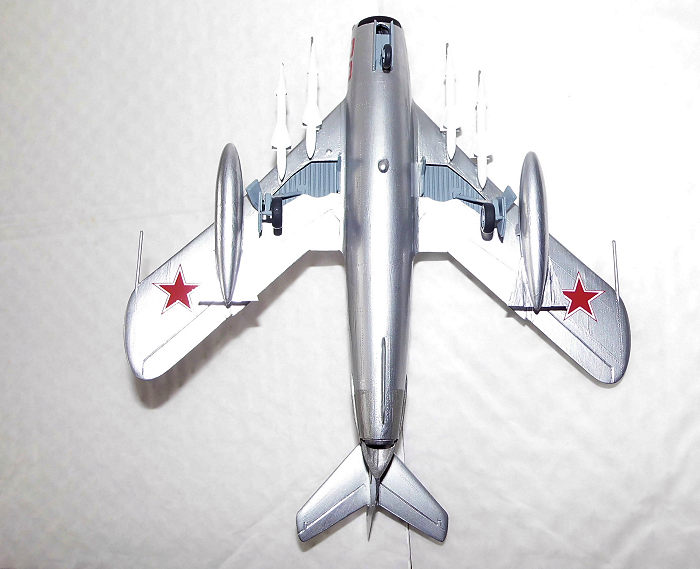 t
was relatively quickly done. I finished with a coat of clear gloss (except the
flat black areas around the nose) to prepare for the decals.
t
was relatively quickly done. I finished with a coat of clear gloss (except the
flat black areas around the nose) to prepare for the decals.
After having studied several pictures of natural metal MiG-17s, I decided only to use the red “05” from the kit sheet and discard the stars. There were two reasons for this; first, they didn’t seem to be quite of the right size and second, they lacked the thin red outline that I had noticed on the pictures, I’d studied. I had, fortunately, some assorted sheets of Soviet stars from CAM Decals where I found some appropriate replacements. As these are printed in two pieces to avoid register issues, I applied all the bottom pieces first, then the “05” on the nose and after some drying time, I applied the red stars themselves. I then cleaned and attached the missile pylons; they came from another kit I was constructing at the same time, namely a MiG-19 from Bilek. The Hasegawa ones are jokes, as are the missiles, so they were also taken from the Bilek MiG-19 kit. The pylons were painted silver (plus a few touch ups on the airframe!) and the missiles flat white (several coats needed!). When dry the decals were coated with clear gloss as all the touch ups also got! The last action was to glue the gear doors in place and the missiles to the pylons, and my Hasegawa Fresco was finished.
| CONCLUSIONS |
 This is
one of those times where I have to say, that apart from being more than 40 years
old, this kit is a gem from its time, a pleasure to put together and paint. Too
bad that Hasegawa didn’t have patience to get the size to 1/72 because of
incorrect information, but that was in those days where such information was
hard to come by, so it’s kind of understandable. Anyway it’s recommendable to
those who wish to build an all-weather Fresco, whether it is going to be with
cannon or missile armament, it will be an outstanding addition to any Soviet /
Cold War collection. Aftermarket decals be an interesting addition, provided
they exist for this kit!
This is
one of those times where I have to say, that apart from being more than 40 years
old, this kit is a gem from its time, a pleasure to put together and paint. Too
bad that Hasegawa didn’t have patience to get the size to 1/72 because of
incorrect information, but that was in those days where such information was
hard to come by, so it’s kind of understandable. Anyway it’s recommendable to
those who wish to build an all-weather Fresco, whether it is going to be with
cannon or missile armament, it will be an outstanding addition to any Soviet /
Cold War collection. Aftermarket decals be an interesting addition, provided
they exist for this kit!
| REFERENCES |
The Observer’s Soviet Aircraft Directory, William Green and Gordon Swanborough, Frederick Warne & Co Ltd 1975, ISBN 0 7232 1529 4
Wikipedia, the Online Encyclopedia
17 October 2017
Copyright ModelingMadness.com Thanks to
for the review kit. You can find this one at your favorite hobby shop
or on-line retailer. If you would like your product reviewed fairly and fairly quickly, please
contact
the editor or see other details in the
Note to
Contributors. Back to the Main Page
Back to the Review
Index Page
Back to the Previews Index Page