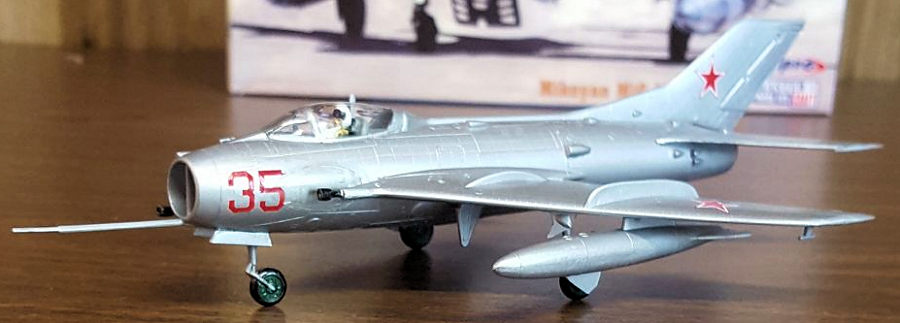
KP 1/72 MiG-19S 'Farmer'
| KIT #: | 3105 |
| PRICE: | ~$10.00 |
| DECALS: | Four options |
| REVIEWER: | Chris Mikesh |
| NOTES: | Out of the Box |
| HISTORY |
 The Mig-19 is an all-metal
single-seat mid-wing monoplane with a slab type tail plane and retractable
tricycle undercarriage. The Mig-19 S, this model, is powered by 2 RD-9B
axial flow turbo Jets with a 9 stage compressor driven by two stage turbine
rated at 2200 KP and 3040 KP with afterburner. The four spars wings with 55°
sweep has a 3 degree anhedral. The fuselage is divided into two main parts.
Pressurized cockpit is provided with an ejection seat. The built-in armament
consists of 3, 30 mm NR-30 cannons and is completed by various combinations
of bombs and rockets carried on under wing racks.
The Mig-19 is an all-metal
single-seat mid-wing monoplane with a slab type tail plane and retractable
tricycle undercarriage. The Mig-19 S, this model, is powered by 2 RD-9B
axial flow turbo Jets with a 9 stage compressor driven by two stage turbine
rated at 2200 KP and 3040 KP with afterburner. The four spars wings with 55°
sweep has a 3 degree anhedral. The fuselage is divided into two main parts.
Pressurized cockpit is provided with an ejection seat. The built-in armament
consists of 3, 30 mm NR-30 cannons and is completed by various combinations
of bombs and rockets carried on under wing racks.
This fighter is a lineal successor of the successful line of Mig-15 and Mig-17 Fighters at the beginning of the 1950s. The first Mig-19 made its maiden flight in 1952. The first serial aircraft were delivered in 1954 to new operational units of the VVS in the Soviet Union.
| THE KIT |
The Mig-19 consisted of standard gray plastic on 4 main sprues and a clear sprue for canopy and stand. The parts were pretty obvious and I could see this was going to be a quick build. The decal sheet seemed straight forward and would be easy to get to the decals you need. I opted for the USSR version as it was going to be straight silver over-all.
| CONSTRUCTION |
 This kit is not for the novice. It is not a bad kit – but
you do have to pay attention and do your research. As with most kits, you
start with the cockpit. There is not much there – just a seat, and an
instrument panel. The pilot is optional, but I recommend it unless you want
to scratch build an interior. Aside from the black instruments, I used
Tamiya J.N. Grey XF-12 for the interior. I know… many of the purists prefer
a more green shade – however, my experience is that Tamiya dries a shade or
tint off from what is anticipated. I tested it on a piece of sprue and it
was pretty close. (Most people won’t see it anyway.)
This kit is not for the novice. It is not a bad kit – but
you do have to pay attention and do your research. As with most kits, you
start with the cockpit. There is not much there – just a seat, and an
instrument panel. The pilot is optional, but I recommend it unless you want
to scratch build an interior. Aside from the black instruments, I used
Tamiya J.N. Grey XF-12 for the interior. I know… many of the purists prefer
a more green shade – however, my experience is that Tamiya dries a shade or
tint off from what is anticipated. I tested it on a piece of sprue and it
was pretty close. (Most people won’t see it anyway.)
A good chunk of nose weight is needed. BUT it is difficult to find a place to put it. The Air intake/nose protrudes deeply into the fuselage, and the seat/instrument panel is deep into the fuselage. Yup… you guessed it… Clip the instrument and the pilot’s legs off. Super glue all of the above mentioned in place and prepare for the next challenge.
Fuselage: It seems simple that you would be putting 2 halves together and gluing on the nose. Come On!!! This is a KP kit! Nothing can be THAT simple!! The port fuselage half was bowed outward a good half inch when the back half was mated to starboard. The starboard half had a twist in it so the cockpit would not close when mated. Nothing a good dose of Superglue couldn’t fix! So after whining for 20 minutes, I glued the back third of the fuselage so that it mated properly. Working my way forward inch by inch and gluing to two halves together, I finally got to the nose. It was off by 2 millimeters, but I could work with it. After grinding it flush, I glued on the nose cap, and tail cone. Neither fit well but that is why sanding stix were made.
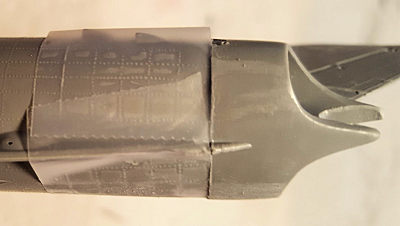 Next Challenge: The kit has so much external detail I
didn’t want to lose too much of it. I taped the fuselage to protect the
detail and started sanding and filling. Research is a key because the
instruction sheet does not have enough information. The kit provides 26
little fuselage air intakes. Where do they go?? The instructions indicate
gluing on about 8 if you look hard enough. What do you do with the other 12
or so? Some pictures will help, but there are still left-overs. I think
these are spares if you clip them from the sprue and it goes flying. Watch
the alignment as you glue them on.
Next Challenge: The kit has so much external detail I
didn’t want to lose too much of it. I taped the fuselage to protect the
detail and started sanding and filling. Research is a key because the
instruction sheet does not have enough information. The kit provides 26
little fuselage air intakes. Where do they go?? The instructions indicate
gluing on about 8 if you look hard enough. What do you do with the other 12
or so? Some pictures will help, but there are still left-overs. I think
these are spares if you clip them from the sprue and it goes flying. Watch
the alignment as you glue them on.
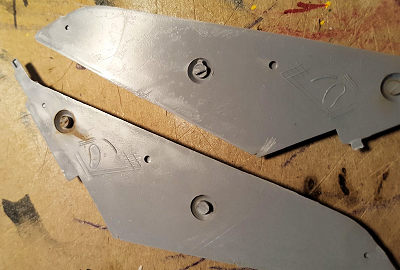 There were large injector pins on the inside of the
wings. These needed to be clipped and sanded down for the wings to glue
together. Also the wings were very warped, but easily resolved when the
wings glued together. I recommend a liquid glue as it softens the plastic
enough to shape easily. Press in a clamp to hold shape for at least an hour.
There were large injector pins on the inside of the
wings. These needed to be clipped and sanded down for the wings to glue
together. Also the wings were very warped, but easily resolved when the
wings glued together. I recommend a liquid glue as it softens the plastic
enough to shape easily. Press in a clamp to hold shape for at least an hour.
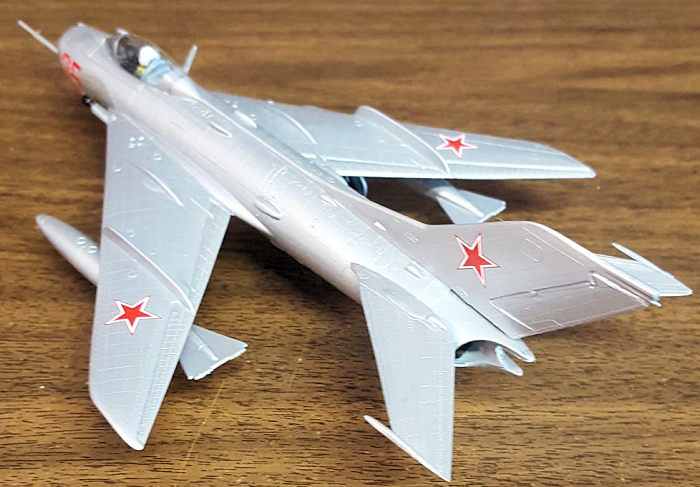
The wings had to be fitted to the fuselage. Lots more grinding and fitting to close gaps. Note that the plane had a 3 degree anhedral (downward slope). That opened the top wing root and will need to be filled. It is not a natural state in the kit – so be ready with the superglue and filler again. The wing tanks were also warped outward. Like the fuselage, I superglued half, then squeezed the two together and glued the other half. Sand the seams. The elevators needed to be fitted to mate to the fuselage. As a reminder, clean the leading and trailing edges up before gluing to the fuselage. My example had a lot of flash and mis-molding.
The astute observer will notice the kit picture only has one main landing gear strut and the nose gear. After some well stifled expletives and searching the bench I decided to scrounge the spares box to find something I could modify to meet the need. At the bottom of the spares box is the exact strut from another Mig-19. It only goes to prove Mom was right… WATCH YOUR LANGUAGE!
| COLORS & MARKINGS |
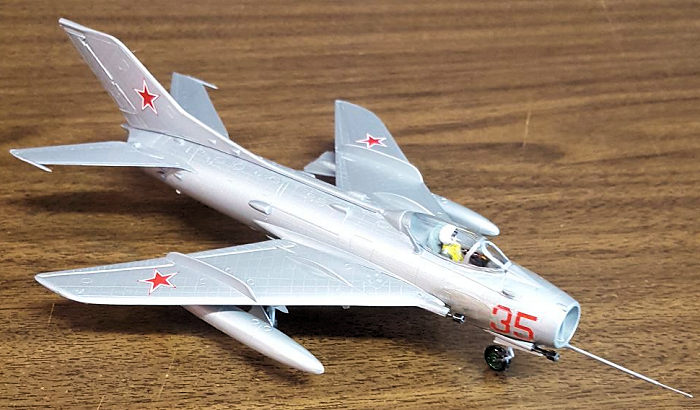
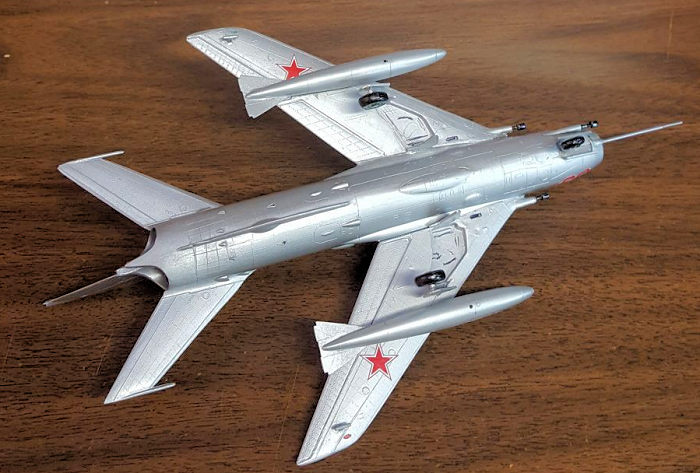 As I had selected the USSR Mig-19, it would be straight
silver. I turned to my favorite model paint – Tamiya TS-17 (Spray) Gloss
Aluminum. It is very forgiving if you put on too much, does not run unless
you really abuse it, and levels off nicely as it dries. Wheels are also
Tamiya, X-5 Green. The blast shields are often a problem on Migs. The
instructions indicated ‘Steel’, but Steel paint dries far too dark. I used
Tamiya X-32 Titanium Silver which is a different tint and sets the blast
shields off nicely. Tamiya Metallic Grey XF-56 was used for the engine
exhausts.
As I had selected the USSR Mig-19, it would be straight
silver. I turned to my favorite model paint – Tamiya TS-17 (Spray) Gloss
Aluminum. It is very forgiving if you put on too much, does not run unless
you really abuse it, and levels off nicely as it dries. Wheels are also
Tamiya, X-5 Green. The blast shields are often a problem on Migs. The
instructions indicated ‘Steel’, but Steel paint dries far too dark. I used
Tamiya X-32 Titanium Silver which is a different tint and sets the blast
shields off nicely. Tamiya Metallic Grey XF-56 was used for the engine
exhausts.
I have received many comments on using Sharpies on my models. Just so you know; a good black Fine Point Sharpie works great on wheels, interiors, and touch-up. Also a fresh Silver Sharpie has the near-same tint as the spray aluminum for canopies and touch-ups. Also if doing wheels – it makes it real easy. Red and Green are very useful for navigation lights. Above all – no brush clean up.
 Considering the kit, I didn’t
trust the decals – and I was right. I put a coating of Decal Saver on top
and cut the decals out. 6 Stars and 2 sets of number made it easy. I also
used the Micro-Sol and Micro-Set combination. As the decals dried, they
became brittle, so I had to be careful with handling. The adhesive is not
the best, but they stayed on the model. Multiple coast of Micro-sol/set did
not help.
Considering the kit, I didn’t
trust the decals – and I was right. I put a coating of Decal Saver on top
and cut the decals out. 6 Stars and 2 sets of number made it easy. I also
used the Micro-Sol and Micro-Set combination. As the decals dried, they
became brittle, so I had to be careful with handling. The adhesive is not
the best, but they stayed on the model. Multiple coast of Micro-sol/set did
not help.
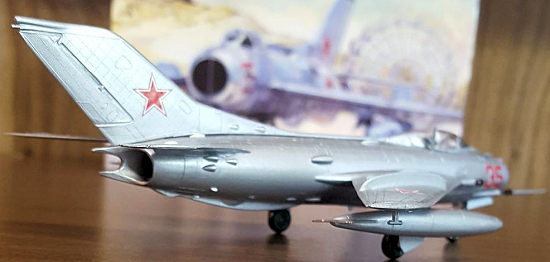
A fast airbrush coating of Future Floor finish sealed everything. Future is excellent for covering over and leveling off minor flaws in surface details as reflected in silver paint. It won’t solve all problems – but helps with the over-all evenness of the surface. Recommended. Then add all the ‘break-off’ details like antennas and pitot tubes, and you’re done.
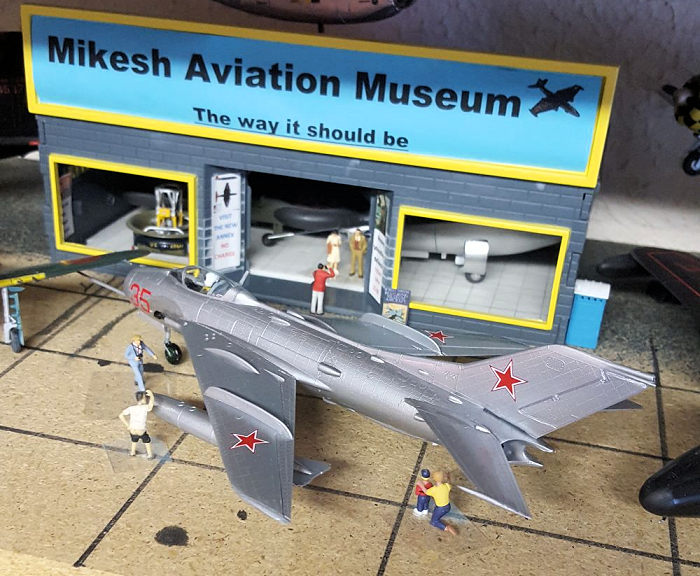
The model now resides in its natural habitat at the Mikesh Aviation Museum with the nearly 600 other planes.
| CONCLUSIONS |
 The biggest issue is the surface detail. Though raised and
fine (consider the age of the kit), there is far too much detail. It makes
the model look “busy”, and is not appealing to the eye. If you are thinking,
“sand it off”, I’d say – good luck! There are too many little lumps and
bumps to be concerned about.
The biggest issue is the surface detail. Though raised and
fine (consider the age of the kit), there is far too much detail. It makes
the model look “busy”, and is not appealing to the eye. If you are thinking,
“sand it off”, I’d say – good luck! There are too many little lumps and
bumps to be concerned about.
On a scale of 1-10 (1 being ‘trash it’) I think this is a solid 6-7. It will take some skill to overcome flaws in the kit, research, and examining the instruction sheet to figure out what to do. But if you have skill and a real desire to do a Mig-19 in 1/72, this is not a bad way to go if you are patient. It was a fun project, and in the end well worth it. Yes, I’d do it again!
If your kit runs out of parts, it becomes a model. (Kit started 6/1/19. Finished 7/27/19 with many interruptions. No X-acto blades were harmed in the production of this model.)
| REFERENCES |
https://en.wikipedia.org/wiki/Mikoyan-Gurevich_MiG-19
March Field California (first hand photography)
http://www.repulomuzeum.hu/Leltar/Leltarfotok/MIG-19lt.htm
2 September 2019
Copyright ModelingMadness.com
If you would like your product reviewed fairly and fairly quickly, please contact the editor or see other details in the Note to Contributors.
Back to the Main Page Back to the Review Index Page Back to the Previews Index Page