| KIT #: | H-213 |
| PRICE: | $10.00 'used' |
| DECALS: | One option |
| REVIEWER: | Christopher Campbell |
| NOTES: | A simple vintage kit that builds up nicely with few issues and a nice visit to the dawn of the Space Age. |
| HISTORY |
The U.S. Air Force was not alone in pushing the envelope and shattering altitude and speed records as the jet age went into high gear in the early 1950’s. While the Air Force had numerous “X-planes” in addition to cutting edge jets of “Century Series” being developed, tested, and pushed to their limits, the U.S. Navy had theirs as well.
There were new fighter jets to be certain, including some of very radical, sometimes dubious design, such as the notoriously underpowered and ill-handing Vought F7U Cutlass. Far more impressive was the F8U Crusader with which future astronaut John Glenn set a transcontinental speed record in 1957. However, the Navy had two principal “X-planes” which were just as influential as many of the Air Force designs. These were the Douglas D.558-1 Skystreak and D.558-II Skyrocket.
These aircraft were part of what was to be a three phase program to parallel the Air Force X-program in some respects. The D.558-1 was purely jet powered and a contender to be the first aircraft to exceed Mach-1. It first flew in 1947 and set a number of speed records. However, it was only able to achieve .99% of the speed of sound in level flight, only exceeding Mach-1 in a dive.
The initial idea was to include both jet and rocket power on phase II. The design of the original D.558 airframe made this impossible, though. An entirely new airframe was produced which could accommodate both jet and rocket engines.
Looking rather like a bullet with swept wings attached to it, the first of three airframes produced would take to the air under jet power just a year later in 1948, putting the Navy program ahead of the game in many respects. Yet it was not flown under rocket power during this phase of the program and was eventually turned over to the N.A.C.A. for continued development.
This saw a methodical series of tests that investigated multiple instability factors that were being encountered in virtually all of the high speed research aircraft of the day, including the Skyrocket. Among these problems were the notorious pitch-up and inertial coupling. This was meticulous and painstaking approach to these problems likely saved lives. The loss in the Bell X-2 with Capt. Mel Apt is, as well as Chuck Yeager’s nearly fatal multiple axis spin in the X-1A are well known examples of these potentially deadly phenomena, though there were certainly others. The D.558-2 never suffered any of these misfortunes to any serious extent and all three aircraft survive to this day.
This is in no way an admonishment of the Air Force program, its directors, or its pilots. Different approaches were being taken by different services and bureaus in an era of rapid development an innovation. Test flying always has and likely always will be a dangerous business. Pilots and aircraft are pushed to their limits and beyond with unfortunate events inevitably happening. Still, while the three D.558-2’s might have flirted with disaster, they managed to avoid it in over three hundred flights.
Initially taken off from the ground under jet power in a very conventional fashion using a well proven Westinghouse J-34 turbojet engine, the program transitioned to rocket power. The second airframe was fitted with an LR-8-RM-6 rocket engine similar to that used in the Bell X-1 program. The third airframe retained the jet engine and carried the LR-8-RM-5 engine of the same family, taking the power potential of the aircraft to the limit.
 Carried aloft by a modified Boeing P2B (Naval B-29
variant) the D.558-2 soon made several flights reaching speeds in excess of Mach
1.5. It became a true history maker in 1953 with legendary test pilot Scott
Crossfield at the controls taking the aircraft past Mach 2 in a shallow dive. It
was the first manned aircraft ever to exceed this speed, and while it would be
the only flight during the program to reach Mach 2, the D.558-2 program was far
from over.
Carried aloft by a modified Boeing P2B (Naval B-29
variant) the D.558-2 soon made several flights reaching speeds in excess of Mach
1.5. It became a true history maker in 1953 with legendary test pilot Scott
Crossfield at the controls taking the aircraft past Mach 2 in a shallow dive. It
was the first manned aircraft ever to exceed this speed, and while it would be
the only flight during the program to reach Mach 2, the D.558-2 program was far
from over.
It continued to be used for numerous tests, some of which were most unconventional for an “X-plane.” Among these were the tests of modern, streamlined bomb and fuel tank shapes to see if such external stores could be carried on supersonic aircraft without detrimental effects. While this might have seemed mundane, these were as yet unproven aerodynamics, and the Skyrocket was doing valuable research. Issues of high Mach instability continued to be investigated as well, with the D.558-2 making invaluable contributions to aircraft from the Century Series and it Naval contemporaries as investigating aerodynamics still being applied to today’s most modern aircraft.
The final flight would be in 1956 after which all of the D.588 airframes would be retired and become displays, two in museums and the third as a gate guard on a post Antelope Valley College. A third stage of the D.558 was planned that would have rivaled the legendary X-15 and flown comparable missions to the edge of space. Sadly, this did not materialize and the journey D.558 ended with the second phase of the program. It could be said that it went out on top, having logged numerous flight hours without serious incident carving out a legendary niche as the first manned aircraft to exceed Mach-2.
| THE KIT |
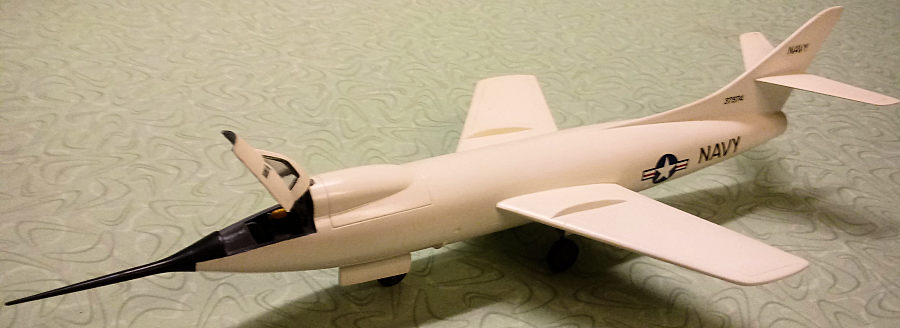
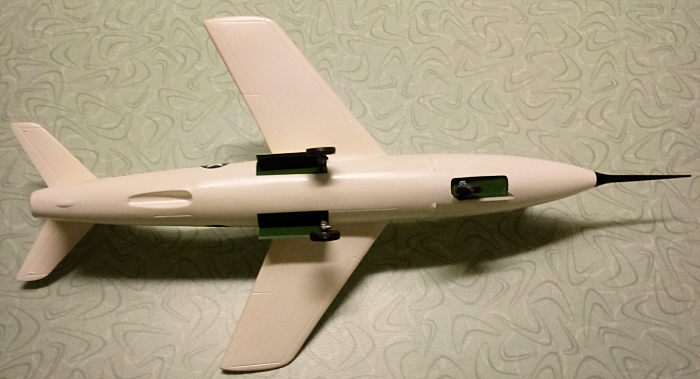
The Revell D.558 is essentially an ancient kit, first appearing in 1955 when the Skyrocket was still a hot item and front page news. It is a “Box Scale” kit in 1/54 scale and typical of kits in this era. It has a canopy design to be positioned open, but a very rudimentary “office” to be shown. Surface detail is sparse, but not overdone. The panel lines are actually engraved, making it much more modern than most Revell kits of the day.
It includes a boarding ladder and pilot figure posed in the process of climbing aboard. Various versions had included different versions of a Revell stand for displaying the aircraft in flight. One of the most well known and attractive boxings is their History Makers series in the 1980’s, when they brought the mold out of retirement for the first time in a decade. It was most recently released in 1994 as part of Revell SSP series of vintage kits with vintage box art, which was the version built here.
| CONSTRUCTION |
I built this kit when I was getting back into modeling after something of a hiatus in the early 1991. I jumped back in with both feet in the last few years of the decade and have never looked back. I have always been a junkie for Cold War era aircraft, X-planes, and anything that screams Space Age. The D.558-2 was a subject that I had always wanted to build. Unfortunately, the opportunity had never presented itself. When I came across an SSP release of the Skyrocket at a local hobby shop, I grabbed it.
 At the time that I built this, I did not have a lot of
good photos of the cockpit of the Skyrocket. The Ginter volume on the Skyrocket
was still around a year from publication. Thus, my improvements to the sparse
kit cockpit were something of a guess, though they proved somewhat accurate.
At the time that I built this, I did not have a lot of
good photos of the cockpit of the Skyrocket. The Ginter volume on the Skyrocket
was still around a year from publication. Thus, my improvements to the sparse
kit cockpit were something of a guess, though they proved somewhat accurate.
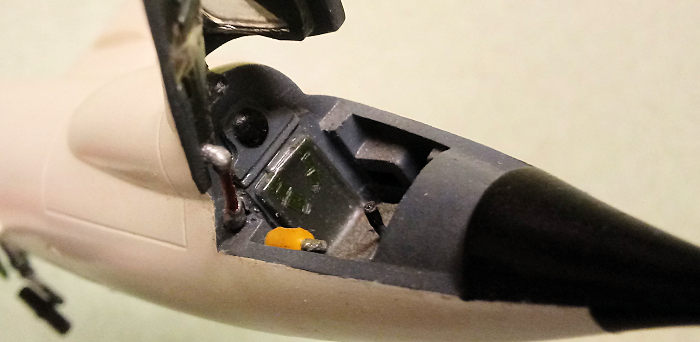
I made a cockpit floor from plastic card and scrounged a control panel, stick, headrest, oxygen bottle and a small support arm from the spares bin to flesh out the rather sparse cockpit offered in the kit, as I wanted to display it with the cockpit open, since that was an option. Everything was initially sprayed with Testors Flat Grey and while this dried the panel was painted Flat Black and drybrushed with silver to pick out some detail.
The parts of the seat, the underside of the canopy and a few other parts of the cockpit were then brush painted with Model Master Olive Drab with a little Flat Black swirled in to try and get that unique, not quite O.D. tone seen in the nylon padding used various cockpit parts during this area as well as period flight and pressure suits. This tuned out to be exactly the shade that I had hoped for when dry. Lastly the oxygen bottle was painted Testors Flat Yellow and the support strut in Flat Red with the valve and connection points respectively painted in Testors Aluminum.
These last two smaller bits and the control stick were set aside while the rest of the cockpit was assembled and fitted to the fuselage. I was uncertain if this kit was going to want to tail-sit. I chose to err on the side of caution and glued a 5/16 oz. bullet fishing sinker into the nose for good measure. The fuselage halves were then glued together using CA glue and, despite being from a forty-plus year-old mold, I found that only a little sanding and virtually no filling was required at any of the seams, with one exception.
The ventral recess in the fuselage for the jet engine exhaust port proved something of a challenge. The fit was not bad, but there was a visible seam to deal with and it was trapped within a small, tricky contour. My solution was a small bit of 320 grit sandpaper, carefully folded and cautiously worked, so as not accidentally misshape or enlarge the opening in the process. This was followed with a small bit of 0000 steel wool worked in the area with a Q-tip until I was satisfied that it was sufficiently smooth.
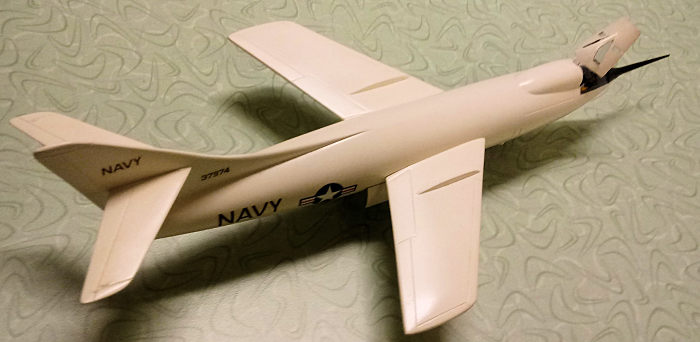
With this done, I assembled the wings and glued them to the fuselage. Some filling was required here. This was done with Squadron Green Putty and the excess was removed with nail polish remover on a paper towel. Once dry, it was smoothed out with 400 grit sandpaper followed by a few passes of 0000 steel wool. The horizontal tail planes were then glued in place with CA glue and required only some minor sanding. After this the nose cone with its long pitot and instrumentation boom were glued in place and only small amount of CA glue to fill the seam and some minor sanding was needed to smooth it out.
With this done I was ready to paint it. The cockpit was stuffed with damp papertowels and the nose sprayed with Testors Flat Black. This was set aside to dry while I gave some thought to how I would paint the rest of it. It would be simplest to stick something into the open annulus at the rear of the fuselage to use as handle. The rocket motor plate would not be glued into place until the final assembly, so I wrapped a larger paintbrush handle with masking tape and slipped it into place.
Once the black paint was dried, the boom and glare panel were masked off with low tack tape and I gave the model several coats of Testors Gloss White, standing the model upright at around a 45 degree angle by clamping the brush handle lightly in a bench vise while I waited for it to dry. During this time I took the landing gear bay doors and canopy and placed them on some doubled up masking tape laid out on my workbench to hold them in place as I sprayed them with the same white. After these and the model had dried for a couple of hours, I came back and gave them all a few more coats.
| COLORS & MARKINGS |
While the paint was drying, the landing gear components and wheels were cleaned up and painted. Model Master Dark Anodonic Grey was used for this with oleos accented with Testors silver. The tires themselves were painted with Testors Rubber. The rocket motor plate was painted in Flat Black and accented with some light drybrushing of Anodonic Grey.
Once the paint on the gear doors and the aircraft was dry, the masking was removed and I was pleasantly surprised that I had managed no overspray anywhere. The demarcation between the black and white was pleasantly sharp and looked right on the money compared to the photos that I had seen.
 The landing gear wells and the interior of surfaces of
the landing gear doors were painted in Model Master Zinc Chromate. While these
dried, the wheels were glued to the landing gear with a small amount of CA glue
and glued into place on the aircraft. The location and fit of these was quite
positive and I had no problems with aligning them.
The landing gear wells and the interior of surfaces of
the landing gear doors were painted in Model Master Zinc Chromate. While these
dried, the wheels were glued to the landing gear with a small amount of CA glue
and glued into place on the aircraft. The location and fit of these was quite
positive and I had no problems with aligning them.
The nose gear door went on without a problem. The same cannot be said of the main gear doors. There is no positive attachment or alignment point for them. I put some gap filling CA glue on the mating edge of each with a toothpick and aligned them as best as I could before giving them each a zap with accelerator before they could move out of place.
The rocket exhaust plate was test fitted and a little trimming was needed. This was done with and X-acto blade and after a touchup with some Flat Black it too was glued into place.
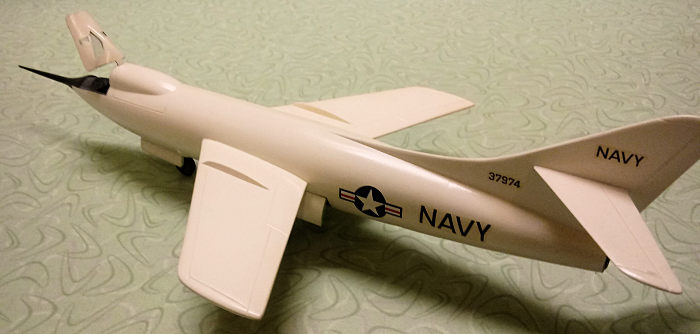
With assembly of the model essentially completed, I gave it an airbrushed coat of Future to serve as a gloss base. The same was done with the canopy. The kit was then decaled using the sheet from the kit.
Being a newer production run item, my sheet was in excellent shape and the decals went on quite well. They set easily with a little Micro Sol. Once they had dried, the entire aircraft was shot again with Future for a glossy top coat.
When this was dry the control stick was glued into place and the small oxygen bottle affixed to the right sight of the cockpit with a drop of CA glue. The small clear windows were glued into the solid canopy and this was glued in an open position then the small support strut was glued in place. Voila, I had a completed D.558-2 Skyrocket for my collection!
| CONCLUSIONS |
This is a great old vintage kit and can still be built up to nice representation of this record setting aircraft. It is an odd scale at 1/54, but that was not an issue for me personally. It has since been overshadowed by superior, more detailed kits from Mach2 and most notably, Special Hobby. The latter has been released in multiple versions, some of which include the external bomb shapes being tested as noted in the history.
To date, there has been no mainstream kit of the D.558-2 in 1/48. Allyn produced one in the 1950’s that was essentially a desk model and is now almost worth its weight in gold, if you find one. There was also a resin from Collect Aire that was always pricey and remains so. A 1/32 kit has been announced from Jetmads for later this year. This might make an interesting shelf-mate from my 1/32 Revell X-1’s, if it really intrigues me.
However, for now, if you want a Skyrocket in a scale between 1/72 and 1/32, this is still pretty much the only game in town. At the time that I built this, I had not honed my model skills to their current level, and I now probably would have done a few things differently.
 The landing gear bays are shallow and devoid of
detail, so I probably would have improved these. I likely would have done more
or less the same with the cockpit, though, with the exception of the control
stick, which I now know was actually of a yoke style. As for the jet exhaust
recess in the ventral fuselage, I might have opened this up and fitted some sort
of tubing for a jet exhaust, though the aircraft that Crossfield flew was purely
rocket powered. So, maybe? Also, while the kit decals were suitable, based on a
study of photos when writing this article, I would have raided the decal file
for some addition markings in various areas.
The landing gear bays are shallow and devoid of
detail, so I probably would have improved these. I likely would have done more
or less the same with the cockpit, though, with the exception of the control
stick, which I now know was actually of a yoke style. As for the jet exhaust
recess in the ventral fuselage, I might have opened this up and fitted some sort
of tubing for a jet exhaust, though the aircraft that Crossfield flew was purely
rocket powered. So, maybe? Also, while the kit decals were suitable, based on a
study of photos when writing this article, I would have raided the decal file
for some addition markings in various areas.
This is an antiquated kit to be certain. That does not mean that it is any less fun and it can easily be built into a nice looking model for your collection. It would make a great introductory model for a novice modeler wanting to get into jets, which was, of course, its original market. An experienced modeler could take it and run with it, possibly turning out something quite impressive.
I found this one of the easiest and most enjoyable projects that I have taken on since I began modeling again in earnest. The build time was probably only around ten-twelve hours and I completed it over a weekend. I would recommend it for anyone wanting to build a Douglas Skyrocket who is not fixated on detail and just wants a decent looking model. For those who want something more, a modern kit is probably your best option, though I would say that this could be detailed out nicely with some determined scratchbuilding.
| REFERENCES |
https://www.scalemates.com/search.php?fkSECTION%5B%5D=All&q=Revell+d.558
https://en.wikipedia.org/wiki/Douglas_D-558-1_Skystreak
https://en.wikipedia.org/wiki/Douglas_D-558-2_Skyrocket
http://www.astronautix.com/d/d-558-2.html
https://www.militaryfactory.com/aircraft/detail.php?aircraft_id=761
19 September 2022 Copyright ModelingMadness.com. All rights reserved. No
reproduction in part or in whole without express permission. If you would like your product reviewed fairly and fairly quickly, please
contact
the editor or see other details in the
Note to
Contributors.