Italeri 1/72 UH-34J Sea Horse
| KIT #: | 1066 |
| PRICE: | $15.00 when new |
| DECALS: | Four options |
| REVIEWER: | Christopher Campbell |
| NOTES: |
| HISTORY |
Building on their massive success with the S.55/H-19 design, Sikorsky created a larger, even more capable helicopter in the form of the S.58. This was originally built for a U.S. Navy specification for an antisubmarine helicopter. However, it would find a place with every U.S. military branch as well as those of many foreign countries.
Powered by a Wright R-1820-84 nine-cylinder radial producing more than 1,500 horsepower and driving a four blade rotor, the S.58 could lift more than two tons. This was quite respectable when it first flew in 1954. It was a rugged aircraft and would prove itself a workhorse in every corner of the globe. It would be licensed to Westland in England where it would be uprated with a turboshaft engine. However, in its original form it would serve with more than twenty nations. It would also see action in numerous conflicts around the globe.
In U.S. Service it would be operated by the Navy, Marine Corps, Air Force, Army, and Coast Guard. It would be known by multiple designations in these services. These would include HSS-1 Sea Bat and HUS-1 Sea Horse in the Navy and Coast Guard. The Air Force and Army designated it very simply as the H-34. Navy designations were later changed to SH-34 and UH-34, while the army would redesignate it as CH-34. For myself, I have always simply thought of it as the H-34, as my father referred to them from his days in the Air Force.
Whatever the designation, it was an excellent aircraft and had a long service career in many roles. These would include anti-submarine warfare, search and rescue, air assault, medivac, VIP transport, to include Presidential, and general utility work of almost any kind. Like the Huey, it was very much the jack of all trades, though master of many.
It could carry between twelve and sixteen troops, depending on configuration. Medivac versions could fit up to eight stretchers. This, along with its versatility made it invaluable upon battlefields in multiple conflicts.
It would see action first in Algeria, with French forces pioneering its use in an air assault role. There it would be used extensively doing yeoman’s work to include evacuating more than 20,000 wounded.
 It would be
utilized extensively by the Marine Corps and to a lesser degree by the Army in
Vietnam, especially in the earlier stages of the conflict. South Vietnamese
forces would also employ it up to the end of the war. In the same theater, Laos
would operate the type as well.
It would be
utilized extensively by the Marine Corps and to a lesser degree by the Army in
Vietnam, especially in the earlier stages of the conflict. South Vietnamese
forces would also employ it up to the end of the war. In the same theater, Laos
would operate the type as well.
It served with Isreal and would see action in the Six Day War in 1968. Other French aircraft would see action in Chad, while British built Wessexes would see combat in Borneo, Oman, Aden, and the Falklands.
Notably, the type was used to recover all of the space capsules of the Mercury space program. However, its power and lift capacity were just sufficient to lift the capsule and pull it from the water. One was infamously lost when Liberty Bell Seven piloted by Astronaut Virgil I. “Gus” Grissom filled with water and had to be cut loose, save it pull the chopper down with it. It sank to the depths of the Atlantic and remained there until recovered in 1999.
In U.S. military service, the H-34 was gradually retired as it began to be replaced by the UH-1 Huey and the CH-46 Sea Knight. Starting in the late 1960’s, they were rapidly transferred to reserve units and phased out altogether. The last one in U.S. Service, a Marine Corps bird made its last flight in 1973.
Still, with more than two-thousand airframes produced, it was not truly done. Many found use in civilian roles, to include police service. There was even the Orlando Helicopter Airways joint venture with Winnebago to produce aerial motor homes in the form of the Winnebago Heli-Home from H-34 and H-19 airframes. Only around five or six were produced. However, it is a most interesting repurposing of these aircraft. (Around two years ago, one of my best friends, Alex Calahan and I marveled at one of these built up beautifully in a “camping and fishing” diorama at the Atlanta IPMS show. I never talked to the modeler, though I hope he is reading this, as my hat is off to him for a beautiful depiction of this unique footnote in aviation history.)
As for when the final military models were retired in foreign service, I have not been able to determine. There is no doubt that they soldiered on long after they had been retired by the U.S. The last variant definitively known to have been in military service was the Westland Wessex HC2, retired by the R.A.F. in 2003.
One apparently appeared on television in 1980’s television series Riptide. As I understand this, it was a detective series geared to compete with Magnum P.I. While I watched Magnum, I was unaware this until a model show vendor mentioned it when I was purchasing my 1/48 Revell H-34 kit some years back. I shall have to have a look for it on streaming, out of curiosity, if nothing else.
I personally have always loved the Sikorsky S-55 and S-58 series, as I saw them in so many library books as a child. I built the Revell H-19 a number of times, though was frustrated for years that there was no H-34 kit. It was the quintessential helicopter of its day. The S.55 was good, though the S.58 was unquestionably better, proving it in its longevity and versatility on every continent.
Some of these whirlybirds are still flying in private hands, mostly for industrial contractors and a scant few with helicopter enthusiasts. There was both an H-19 and a couple of H-34’s in use in my area through the 1990’s and early 2000’s.
I thought that they might have been retired by now. However, around five or six years back I saw a red H-34 lowering a large air conditioner unit onto the roof of Parkway Place Mall as I was driving to work. It was the closest that I had ever seen one in operation, being only around two-hundred meters from where I was driving. It was my thrill for the day and perhaps the month, even.
| THE KIT |
 In 1996,
Italeri issued their UH-34 kit, which was subsequently released by Revell one
year later and offered with new parts as a Wessex at the same time. To my
knowledge, this was the first 1/72 H-34 kit offered.
In 1996,
Italeri issued their UH-34 kit, which was subsequently released by Revell one
year later and offered with new parts as a Wessex at the same time. To my
knowledge, this was the first 1/72 H-34 kit offered.
Revell had previously released a 1/48 H-34. However, unless I am mistaken, your only option for building a 1/72 H-34 prior to this would be undertaking a major conversion of the Frog or Matchbox Westland Wessex kit.
The kit has been released several times over the years. The most recent release was in 2018, featuring insignia for an Italian Navy HSS-1 Sea Bat. I need to track one of these down, as I love the markings.
It is clear from the breakdown of the parts that it had been designed from the onset so that certain sprues could be molded either for Sikorsky or Westland versions. All parts are nicely molded with no flash. The principal difference between the two kits is the nose section and associated components. There are a few other bits that are specific to the Sikorsky H-34 variants.
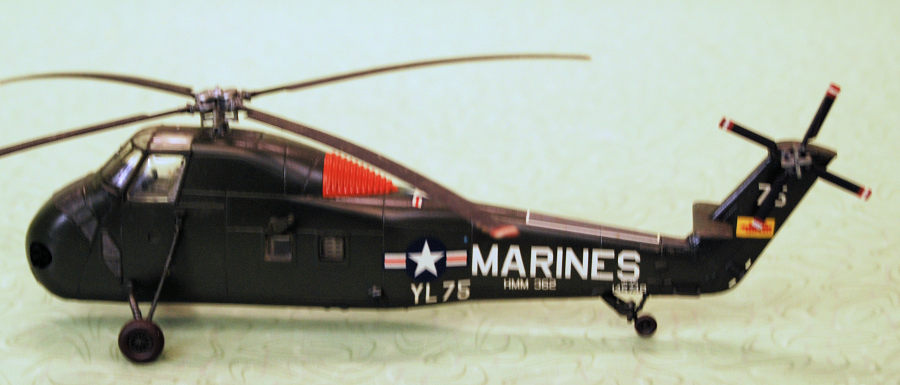
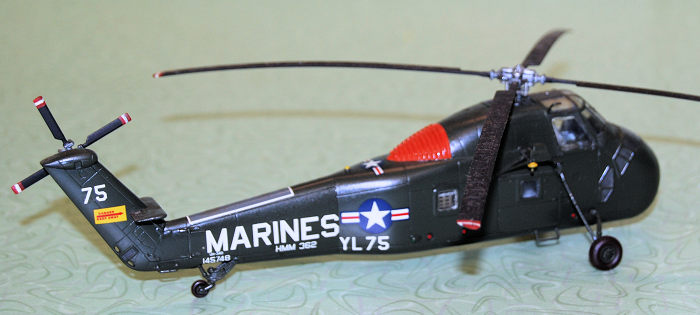
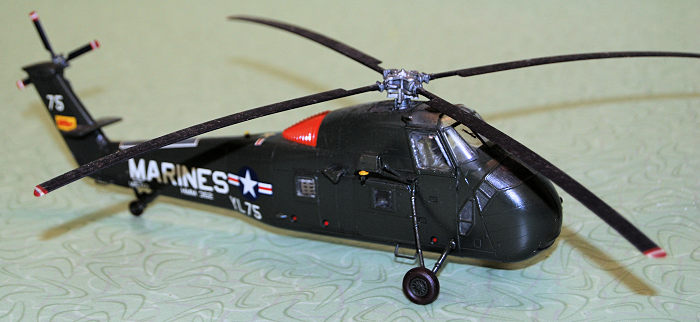
Decals are provided for four aircraft. One is the U.S.M.C. aircraft that I chose to model. Two are French Navy aircraft, both overall blue. The fourth is a West German aircraft in overall olive drab.
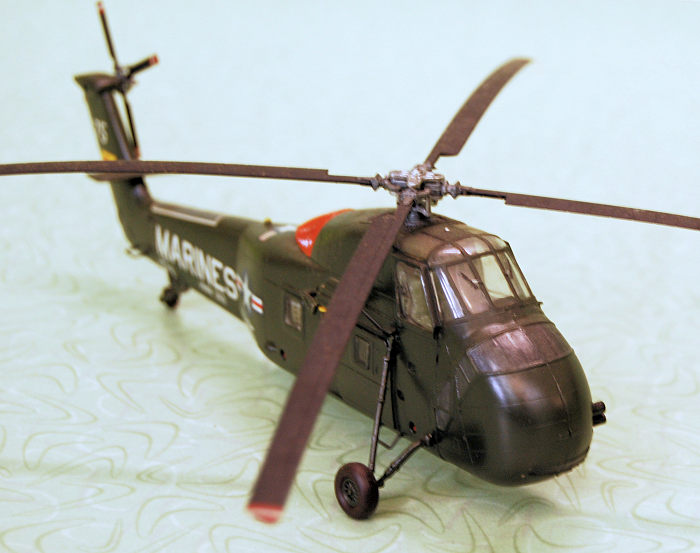
One thing of note is that the rotors have some droop nicely molded into them. This has become fairly commonplace now on helicopters where it is appropriate. However, when this kit was first offered, it was somewhat novel, though very appreciated.
Interior detailing in both the cockpit and passenger compartment is good for this scale and there is the option of positioning the side door open if one wishes. Included along with this are two optional door guns and mounts, depending on the version one chooses to build.
Overall, this is a very nice kit. It fits together very well and builds up into a very nice model of this legendary helicopter.
HobbyBoss has released a 1/72 H-34 of their own in 2007. I have one in the stash, though I have not yet built it. It appears somewhat similar, though I cannot speak for the quality of it yet, having not worked on it. However, I have to say that it will be hard to upstage the Italeri kit in this scale.
| CONSTRUCTION |
I had bought this model from the now closed Magic & Funworld Hobbies in Fountain City, Tennessee near Knoxville around a year earlier when I had been trout fishing in the Smokies. I finally got around to it about a year later in 2004 after an obsession with 1/32 Spitfires and Hurricanes. The build went quite smoothly and mostly by the instructions. I began by spraying all of the interior as well as the cockpit components, except for the instrument panel in Testor’s Flat Grey.
While this was drying the instrument panel was painted in Model Master Flat Black. Instruments were picked out by drybrushing with Testor’s Silver. Unfortunately, little can be seen of it once the kit is complete.
The sling seats as well as the centers of the crew seats were painted with Model Master Olive Drab. Seat belts were then painted in Testor’s Model Master Medium Green, and the buckles picked out with Model Master Dark Anodonic Grey. The center console and rotor shaft cover were painted in Flat Black per the instructions, as were the grips of the control sticks.
All of the interior components were glued up with CA glue without trouble. The attachment points are quite positive, and the fit is excellent. That, in general, is the theme throughout this kit.
 These
subassemblies were set aside while I went to work on installing all of the side
windows on the fuselage. I elected to leave those of the cockpit out for now,
seeing that they could be installed later, after painting. The others were
carefully glued in place with thick CA glue (chosen for its hold strength)
applied with a toothpick, then set aside to dry for some time.
These
subassemblies were set aside while I went to work on installing all of the side
windows on the fuselage. I elected to leave those of the cockpit out for now,
seeing that they could be installed later, after painting. The others were
carefully glued in place with thick CA glue (chosen for its hold strength)
applied with a toothpick, then set aside to dry for some time.
I now went to work on the rotors. These parts were all very nicely molded, requiring only some cleanup with an X-Acto blade. Model Master Flat Black was then sprayed on all of the blades
After this was dry the tips were painted in Testor’s Flat Red and striped with Model Master Flat White. The rotor heads and actuators were all painted in Model Master Dark Anodonic Grey. Then the main rotor assembly was glued up and set aside.
Attention then went back to the helicopter itself and the fuselage was assembled using CA to glue everywhere. The ventral panel was glued in place, proving mostly a good fit, though a small amount of sanding was needed. This along with some other simple sanding to eliminate the fuselage seam was accomplished with 400 grit sandpaper followed by some polishing with 0000 steel wool.
After fitting the exhaust pipes and gluing them in place from the inside with CA glue, the nose was now assembled and sanded in the same manner after mating it to the fuselage. I elected to build this one with the side door closed, as I had just built a Revell 1/48 kit with it open. This was then glued in place with a small amount of CA.
The horizontal stabilizer and some smaller bits were added to the fuselage with CA glue with very little cleanup or sanding required. Since the aircraft is essentially one color, I glued the landing gear in place at this time as well. With this done, everything was blown off thoroughly and all openings stuffed with paper towel bits in preparation for painting.
| COLORS & MARKINGS |
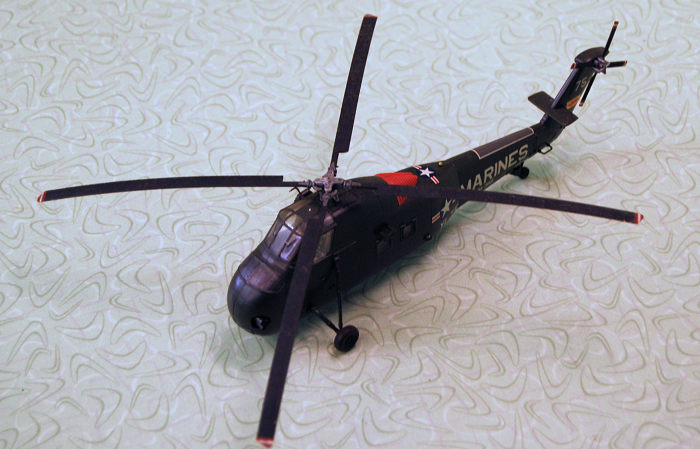 The
color noted in the instructions is Field Green. Marine Green might also be
correct. However, I think that I used the wrong color on this one, as it
seems a bit dark. Yet it does not look quite like Olive Drab, so I may have
gotten it right. It has been a few years, and my recollection is not perfect
at this point. In any case, paint was sprayed on and set aside to dry.
The
color noted in the instructions is Field Green. Marine Green might also be
correct. However, I think that I used the wrong color on this one, as it
seems a bit dark. Yet it does not look quite like Olive Drab, so I may have
gotten it right. It has been a few years, and my recollection is not perfect
at this point. In any case, paint was sprayed on and set aside to dry.
While this was drying, I worked on other bits. I had not yet attached the upper aft cowl so that I could paint it separately. This was sprayed in Testor’s Orange and set aside as well. Once it was dry, the screens on the engine cowl were hand painted in Model Master Dark Anodonic Grey, as well as those around the rotor shaft opening. Canopy framing was hand painted in the same green used for the helicopter.
The wheels were also painted, the tires in Testor’s rubber and the hubs in more Dark Anodonic Grey. The exhaust stubs were painted in Testor’s Rust and accented with Model Master Burnt Iron.
The model was then sprayed with Model Master Gloss, then decaled once dry. Decals went on quite well. Micro Set was used on this one, though I used Solvaset on the decals of the Wessex that I built soon after with good results as well. Once these had dried for several hours the model was shot with Model Master Semi-Gloss and everything looked good. Now for the final assembly
| FINAL CONSTRUCTION |
 The
cockpit side windows and canopy section went on with no trouble at all using
a little carefully applied CA glue. The wheels were glued in place as well
as the steps and hoist using small amounts of CA glue. The hoist hook weight
was painted in Flat Yellow, with the hook in silver.
The
cockpit side windows and canopy section went on with no trouble at all using
a little carefully applied CA glue. The wheels were glued in place as well
as the steps and hoist using small amounts of CA glue. The hoist hook weight
was painted in Flat Yellow, with the hook in silver.
Running lights were picked out and the fuel filler caps were painted in Testors Flat Red. The orange cowl was glued in place as well and went on without issue. There were virtually no fit issues encountered anywhere in this kit, which was something of a relief compared to many of the interesting though troublesome shorter run kits that were appearing on the scene at the time.
The last thing to do was attach the rotors. The main rotor assembly went on cleanly. I had test fitted this previously and knew that, like the canopy and cowl that it would. A little CA glue secured it. The tail rotor was glued in place, and I was done. Now, I had a lovely little U.S.M.C. UH-34 in my collection at last.
| CONCLUSIONS |
As with the Italeri Wessex, I cannot recommend this kit highly enough. It builds very easily and cleanly. Anyone with some helicopter experience will have no trouble producing a beautiful H-34. It would also be an excellent choice for a modeler who wants to try their hand at rotary wing aircraft.
I am not certain if there are aftermarket detail sets available, though it would lend itself nicely to some super detailing if a modeler chose to do so. If not, it is quite nice out of the box. I started this one on a Friday night and finished it on a Sunday afternoon. I think the build time was around ten hours and it was pleasure throughout all of them. I will definitely build another. I simply must have that Sea Bat kit.
| CONCLUSIONS |
https://en.wikipedia.org/wiki/Sikorsky_H-34
https://www.scalemates.com/kits/italeri-1066-uh-34j-sea-horse--110033/timeline
https://www.scalemates.com/kits/italeri-1066-uh-34j-sea-horse--110033
H-34 Choctaw in Action by Lennart Lundh, Squadron Signal Aircraft # 146, 1994
Sikorsky H-34: An Illustrated History by Lennart Lundh, Schiffer Militray Books, 1998
3 March 2025
Copyright ModelingMadness.com. All rights reserved. No reproduction in part or in whole without express permission.
If you would like your product reviewed fairly and fairly quickly, please contact the editor or see other details in the Note to Contributors.