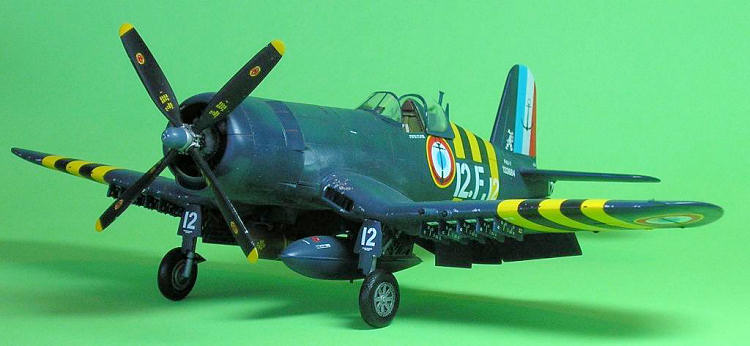
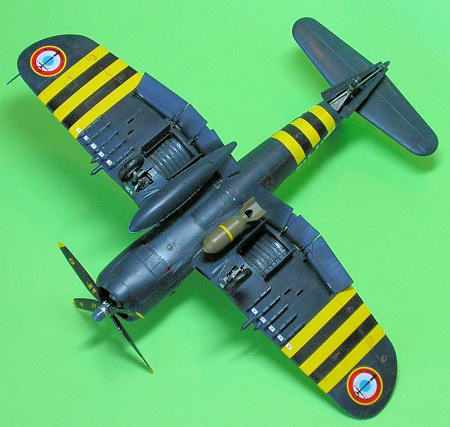
Revell 1/48 F4U-7 Corsair
| KIT #: | 4590 |
| PRICE: | $5.00 (used) |
| DECALS: | Three options |
| REVIEWER: | Brad Gaff |
| NOTES: | Added seat belts |
| HISTORY |
The origins of the Corsair date back to the 1st
February 1938 when a U.S. Navy design contest called for a single seat, ship
board fighter offering a good service ceiling and top speed. Chance Vought’s
design team, led by Rex B. Beisel entered the V-166B into the competition,
eventually received approval on June 11 of the same year to design the XF4U-1.
The aircraft had a rather extended development phase and wasn’t delivered to the
U.S. Navy until July 31, 1942. Early problems were encountered during aircraft
carrier landing trials. Forward visibility was poor due to the long nose; it
would swing on touch-down and had a bad habit of bouncing if thumped into the
deck. Consequently the U.S. Navy confined most operations of the Corsair to land
where the aircraft excelled against the Japanese. The British, who were supplied
initially with 95 machines under lend lease, cut off the
 wingtips
added a bludged front hood for the pilot to raise his seat and used a curved
approach to the carrier deck when landing. As a result, Royal Navy Corsairs
engaged in carrier operations a full 9 months before their U.S allies.
wingtips
added a bludged front hood for the pilot to raise his seat and used a curved
approach to the carrier deck when landing. As a result, Royal Navy Corsairs
engaged in carrier operations a full 9 months before their U.S allies.
By the end of 1943, contracts for 4.699 machines had been signed for by
the U.S. Navy, but the machine was still not certified for carrier operations,
mainly due to the bouncing problem which had not been entirely eliminated. A
total redesign of the oleo struts was undertaken by Programme Dog, curing the
problem. The aircraft was finally accepted for carrier operations after flight
tests in April 1944. The reputation the Corsair already had led to tests against
the F6F Hellcat, leading the a Navy evaluation board to conclude “it is the
opinion of the board that generally the F4U is a better fighter, bomber and an
equally suitable carrier aircraft as the F6F. It is strongly recommended that
carrier fighter and/or bomber compliment be shifted to the F4U”. As a result, by
the end of the Okinawa campaign, almost every carrier was equipped with the
Corsair. By V.J. Day, 2,140 enemy aircraft had fallen to the guns of Corsairs,
for only 189 losses.
Production of the F4U continued in the post war years, with the
development of the F4U-5, AU-1 and F4U-7 versions. The Corsair would render
invaluable support to ground troops during the Korean War with cannons,
HVAR/ATAR rockets, iron bombs and napalm. At least 12 victories were claimed by
Navy and Marine Corsair pilots, one of which being a MiG-15. In 1952, under the
U.S. Military Assistance Program, 94 F4U-7’s were passed on to the French
Aeronavale. They would equip 12.F, 14.F, 15.F and 17.F Flotillas, seeing action
in the first Indochina War, Algerian War and Suez Crisis. They were retired in
1964. From rather shaky beginnings, the Corsair not only became a war winner,
but would outlive all of its contemporaries. It would also be the last prop
driven fighter to be designed and built in the USA.
| THE KIT |
| CONSTRUCTION |
 I
started with all the minor pieces, bomb, drop tank, flaps, prop, engine and
undercarriage, mainly because I dislike doing all these small jobs at the end of
a project and my impatience to see the model finished can make me rush. I
painted the bomb Gunze Olive Drab, the engine black and grey and gear legs and
wheel hubs Humbrol silver. No problems were encountered here, so construction
and painting moved to the cockpit and inner cowl, where I splashed around some
Gunze 58 interior green, painted the instrument panel and consoles black and the
headrest brown. Seatbelts were added once everything was dry from a set of
Luftwaffe belts from Lions Roar (yeh I know but I didn’t have any US belts).
I
started with all the minor pieces, bomb, drop tank, flaps, prop, engine and
undercarriage, mainly because I dislike doing all these small jobs at the end of
a project and my impatience to see the model finished can make me rush. I
painted the bomb Gunze Olive Drab, the engine black and grey and gear legs and
wheel hubs Humbrol silver. No problems were encountered here, so construction
and painting moved to the cockpit and inner cowl, where I splashed around some
Gunze 58 interior green, painted the instrument panel and consoles black and the
headrest brown. Seatbelts were added once everything was dry from a set of
Luftwaffe belts from Lions Roar (yeh I know but I didn’t have any US belts).
This is where problems started. I noticed the forward fuselage panel
lines were off by a fair way. I decided to test fit the engine cowling at this
time as well and I didn’t fit into the tab at the top of the fuselage. I cut out
the protruding plastic and the fit was better. I also test fitted the bottom
wing to the fuselage and oh no, the fuselage was too skinny to fit the cowling.
I decided to glue the rear fuselage together as all that seemed to fit well.
Once dry, I installed a spreader bar from scrap sprue to the forward fuselage
and glued it together. This gives you a good fit, except for a gap at the top of
the cowling/fuselage joint. This however can be easily filled and re-scribed.
Doing this created another small problem; the
engine doesn’t fit onto the section it should. No worries I just cut that piece
off the fuselage and installed the engine into the cowling. I left off the part
that goes between the radiator flaps and fuselage that the exhaust stacks attach
too.
At this time I glued the upper
wings to the lower. Attach the wings to the fuselage and let it dry, be sure
 to line it
up properly or your engine cowl won’t fit. Once this was done my cowlings fitted
nicely although I had to deal with a small gap at the top previously mentioned.
I also filled all the poorly aligned panels with super glue and scribed them
back freehand with a blunt scalpel.
to line it
up properly or your engine cowl won’t fit. Once this was done my cowlings fitted
nicely although I had to deal with a small gap at the top previously mentioned.
I also filled all the poorly aligned panels with super glue and scribed them
back freehand with a blunt scalpel.
Fuselage joints cleaned up, the horizontal stabilizers were attached.
Careful gluing will ensure no clean up is needed. Wing joints were dealt with
here too, no problems really, just some minor filling and sanding. The radiator
inserts in the wings roots are undersized though. I glued them in as best I
could and used superglue to fill the step. Re-scribing was done freehand again.
Cannons, centreline racks and rocket rails all fitted well but if you are
building a Suez stripped aircraft, leave off the outer rocket rail as they run
very close to the stripe and it makes putting the decal on easier.
Flaps need some jiggling to fit. I cut a little off the middle flaps
tabs, as the middle and inner flap should be attached to each other with a small
gap between the middle and outer flap. If you just slot them in without
modification you will end up with a large gap where you shouldn’t have one
(between middle and inner). Main gear and tail wheels doors were also installed
now and it was off to the paint shop.
| COLORS & MARKINGS |
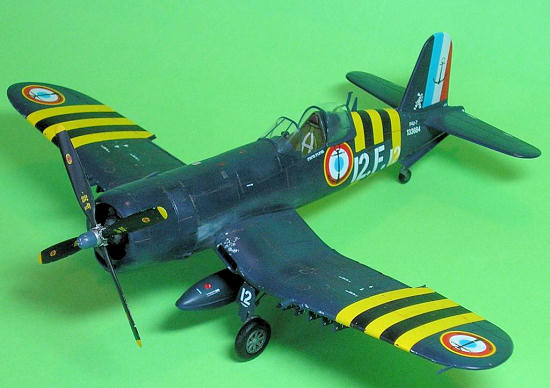 Looking
at the aircraft I figured Humbrol 15 Midnight blue would suit. The tin was
actually older than me by at least 10 years as it came from Dad’s stock of
paint. For a 37 year old tin of paint, it sprayed nicely. Unfortunately the
midnight blue looked like midnight purple. It sat for a couple of days as I
thought about what to do, keep going or repaint? I decided to repaint and got
out some Humbrol 104 Oxford blue. Naturally I screwed up my mixture as it was
too thin in my airbrush, but I pressed on. However, I found the thinner paint
actually got rid of the purplish tinge to midnight blue and I think I just
busted the saying that two wrongs don’t make a right! Once all this was dry, I
used some Humbrol gloss in preparation for decals and weathering.
Looking
at the aircraft I figured Humbrol 15 Midnight blue would suit. The tin was
actually older than me by at least 10 years as it came from Dad’s stock of
paint. For a 37 year old tin of paint, it sprayed nicely. Unfortunately the
midnight blue looked like midnight purple. It sat for a couple of days as I
thought about what to do, keep going or repaint? I decided to repaint and got
out some Humbrol 104 Oxford blue. Naturally I screwed up my mixture as it was
too thin in my airbrush, but I pressed on. However, I found the thinner paint
actually got rid of the purplish tinge to midnight blue and I think I just
busted the saying that two wrongs don’t make a right! Once all this was dry, I
used some Humbrol gloss in preparation for decals and weathering.
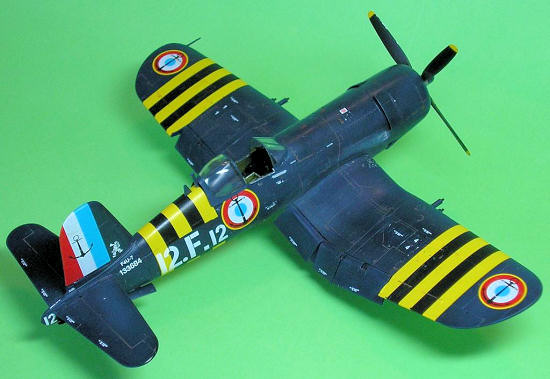
At this point I glued on the landing gear for ease of handling. Ahhh
those huge stripe decals, usually I paint all stripes and fin flashes but I
decided to have a crack at these. Laying them down on Mr. Mark decal softener I
found they settled down very well indeed. They are a little big, but I would
rather this than be a little too small. The rest of the decals are equally as
good. Also, it looks like the model built on the front of the instructions and
sides of the box has the stripes on the wings far too inboard. However the decal
placement guide is correct, to the best of my research.
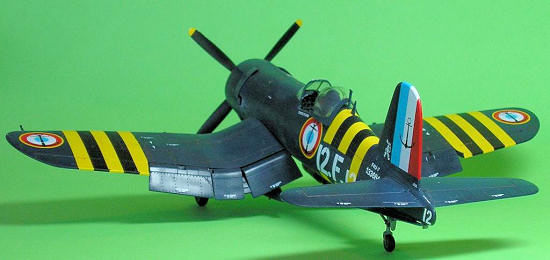
I decided, that as these aircraft were fairly new when the Suez Crisis
broke out they wouldn’t be too bashed around. I added some restrained paint
chipping to the airframe and panel lines were lightly washed with some MIG
pigments ‘dry earth’. I mix the
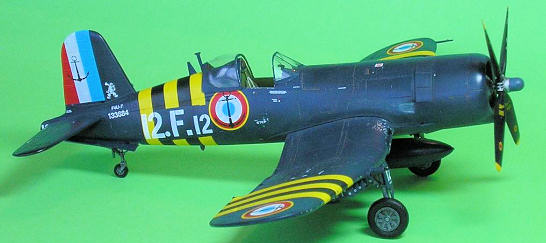 pigment
with water, liberally dosed with some dishwashing liquid and let the mixture dry
(about 20 minutes). Then you wash it off with a damp lint free cloth in the
direction of the airflow to leave it stuck in the detail of the kit. Exhaust
stains were accomplished with some white hard chalk pastel ground up and dusted
on with a good brush.
pigment
with water, liberally dosed with some dishwashing liquid and let the mixture dry
(about 20 minutes). Then you wash it off with a damp lint free cloth in the
direction of the airflow to leave it stuck in the detail of the kit. Exhaust
stains were accomplished with some white hard chalk pastel ground up and dusted
on with a good brush.
Finally I attached the drop tank, bomb, antennas, gun sight, prop and
last two rocket rails. At this late stage I found out the upper exhaust stacks
don’t fit due to my earlier installation of a spreader bar in the fuselage. Upon
looking at pictures more closely I couldn’t find one that showed the stacks
poking out, so I glued on the lower ones and chucked out the upper ones. With
the application of the Humbrol flat and the attaching of the canopy, I called it
done.
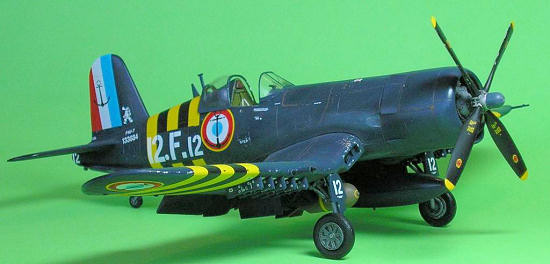
| CONCLUSIONS |
 I
thought upon starting this kit that it wouldn’t have the problems that I
encountered. I’m still not sure that it wasn’t my own screw ups with the forward
fuselage, but no matter what way I fitted it, I couldn’t make it work without
doing the mods mentioned. I also noticed that some aircraft had a step ladder
installed on the starboard side, rear of the trailing edge on the wing. This
part isn’t included in the kit. All that said, this kit shouldn’t pose a problem
to a modeller with some experience and is undoubtedly the best F4U-7 in 1/48 on
the market.
I
thought upon starting this kit that it wouldn’t have the problems that I
encountered. I’m still not sure that it wasn’t my own screw ups with the forward
fuselage, but no matter what way I fitted it, I couldn’t make it work without
doing the mods mentioned. I also noticed that some aircraft had a step ladder
installed on the starboard side, rear of the trailing edge on the wing. This
part isn’t included in the kit. All that said, this kit shouldn’t pose a problem
to a modeller with some experience and is undoubtedly the best F4U-7 in 1/48 on
the market.
| REFERENCES |
Famous Fighters of the Second World War, William Green, Macdonald,
London, 1962.
July 2011
If you would like your product reviewed fairly and quickly, please contact me or see other details in the Note to Contributors.