Kosmosur 3D 1/48 A-4P Skyhawk
| KIT #: | |
| PRICE: | 17$ |
| DECALS: | None provided |
| REVIEWER: | Francisco Santoro |
| NOTES: | Aerocalcas 48011 decals. |
| HISTORY |
Argentina got a total of 130 A-4 Skyhawks since 1965. The Argentinian Air Force received 25 A-4Bs (labelled as Ps, but locally known as Bs) in 1965, and another 25 in 1970, all of them refurbished by Lockheed in the United States. The Bs had three weapon pylons, and were destined to the 5th Air Brigade.
In 1976, 25 A-4Cs were bought to replace the ageing F-86F-40 Sabres in service with the 4th Air Brigade. They were received as is, had five weapon pylons, and could carry the AAM AIM 9B Sidewinder missile.
 The
Navy (Armada), also got their hands on Skyhawks version B, labelled A-4Q, plus
spare parts. They were received in 1971, and immediately replaced the F9F
Panther and Cougar in use onboard the ARA 25 de Mayo aircraftcarrier.
The
Navy (Armada), also got their hands on Skyhawks version B, labelled A-4Q, plus
spare parts. They were received in 1971, and immediately replaced the F9F
Panther and Cougar in use onboard the ARA 25 de Mayo aircraftcarrier.
During the Malvinas War, Skyhawks, armed with unguided bombs, had some successes against the Royal Navy, sinking the destroyer Type 42 HMS "Coventry", the frigate Type 21 HMS "Antelope", and causing heavy damage to the logistic landing ship RFA "Sir Galahad" (ended up as a war grave), Type 42 HMS "Glasgow," and frigates HMS "Argonaut" and "Sir Tristram." A-4Qs departing from Río Grande, Tierra del Fuego, played a role in the bombing runs against British ships, sinking the Type 21 HMS "Ardent." The Skyhawks also played a role in damaging the light aircraftcarrier HMS "Invincible," damage not recognised by the Royal Navy.
A total of 22 A-4s were lost to all causes during the six weeks of the war.
| THE KIT |
 but
if you’re a competent scratch builder, you can improve these kits and make them
look similar to regular injected kits.
but
if you’re a competent scratch builder, you can improve these kits and make them
look similar to regular injected kits.
This A-4B, promoted really as a Q, is from Kosmosur 3D, from Argentina. The model comes separated in two fuselage halves, front and rear, two fuel tanks also separated in front and back, a vacuformed canopy, a pilot attached to his seat, arrestor hook, slats, refuelling probe, wheels, landing gear struts, two speedbrakes, and a set of bombs. The model is molded in hard, White PLA plastic. Printing lines are very visible and the parts are smooth to the touch. There aren´t any instructions provided, though the kit doesn’t need them.
No decals are provided, so I bought from Aerocalcas set 48011, which comes with options for two Mirage IIIEAs, two A-4Ps, and two A-4Cs.
| CONSTRUCTION |
Not much to say here. I glued with epoxy glue the fuselage halves and the fuel tanks, making sure to tape them to avoid the parts from drifting and leaving steps. After that, I glued the two slats to the wings, and added the speed brakes. Once the glue had cured, I grabbed Vallejo’s Perfect Plastic Putty to fill the gaps that resulted in the union of the main parts. This is basically the entire assembly process.
| COLORS & MARKINGS |
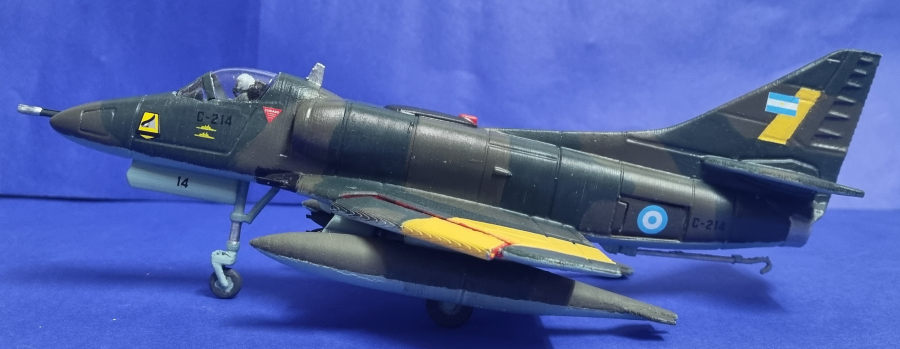
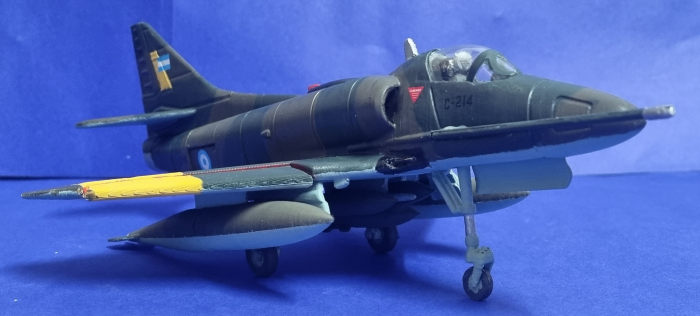
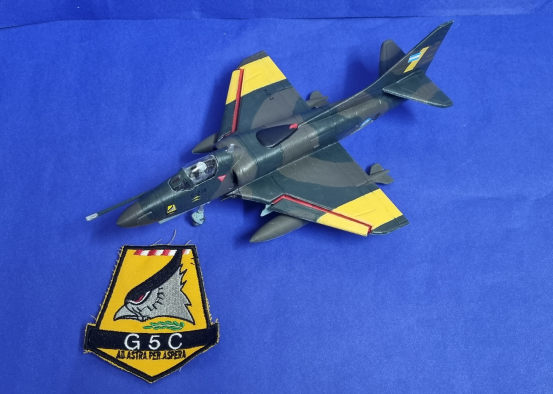
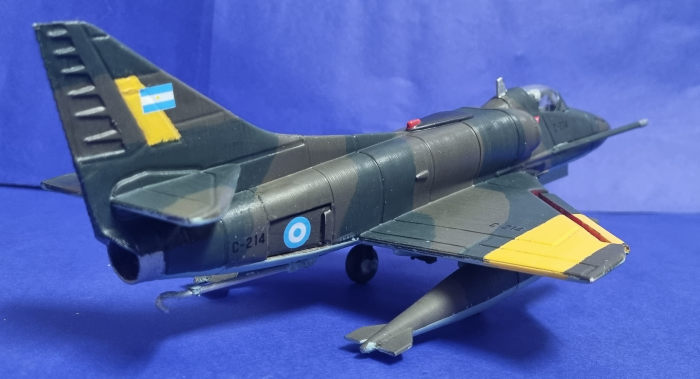
Argentinian A-4Bs were painted in a scheme of brown and dark green upper surfaces, with light blue lower surfaces. The yellow Malvinas bands were added between April and May as a way for the troops to quickly ID friendly aircraft. Turns out, these yellow bands also helped the British to spot the enemy, so they were covered after a month of use.
 I
first painted the yellow bands and masked them. I then painted the
camouflage.Colours used were all from the Revell Aqua range, 46 NATO Brown, 40
Black Green, 15 Matt Yellow, and 49 Light Blue. Once the paint had cured, I
painted the slat bays Revell Aqua 36 Carmin Red. Before going for the decals, I
painted the smaller parts such as the fuel tanks, refuelling probe and arrestor
hook in the camouflage colour, landing gear in the underside colour, bombs in
Revell 40 Black Green, and the wheels in a combination of light blue hubs and
Revell 78 Tank Green tyres. The pilot was painted with an Olive Drab suit, white
helmet and black boots and gloves. I then glossed the model twice with Revell
Aqua 01 Gloss Varnish for the decals.
I
first painted the yellow bands and masked them. I then painted the
camouflage.Colours used were all from the Revell Aqua range, 46 NATO Brown, 40
Black Green, 15 Matt Yellow, and 49 Light Blue. Once the paint had cured, I
painted the slat bays Revell Aqua 36 Carmin Red. Before going for the decals, I
painted the smaller parts such as the fuel tanks, refuelling probe and arrestor
hook in the camouflage colour, landing gear in the underside colour, bombs in
Revell 40 Black Green, and the wheels in a combination of light blue hubs and
Revell 78 Tank Green tyres. The pilot was painted with an Olive Drab suit, white
helmet and black boots and gloves. I then glossed the model twice with Revell
Aqua 01 Gloss Varnish for the decals.
The decals from Aerocalcas didn’t present any issues. They’re thin, in register (something Condor Decals tends to have issues with), and easy to work with. After allowing the decals to settle, I brushed some Microsol over them. The plane was then matt varnished with Revell Aqua 02 Matt Varnish.
The final bits were then added. I glued the landing gear struts, wheels, bombs, refuelling probe, arrestor hook and fuel tanks with epoxy glue and left it to harden. The pilot was added once the other pieces had cured, with the vacuformed canopy being put in place with white glue after painting it in the camouflage colours.
| CONCLUSIONS |
In spite of not being really detailed, I liked this kit. I know we have the Hobbycraft and Hasegawa Skyhawks, but those are hard to come by. Not the A-4M from Hasegawa, which is reissued rather frequently.
Francisco Santoro
10 July 2023 Copyright ModelingMadness.com. All rights reserved. No
reproduction in part or in whole without express permission. If you would like your product reviewed fairly and
fairly quickly, please
contact
the editor
or see other details in the
Note to
Contributors.