TTModelworks 1/48 AD-5N/A-1G Skyraider
| KIT #: | TTM48012 |
| PRICE: | $169.95 |
| DECALS: | One option |
| REVIEWER: | David C Jones |
| NOTES: | 3D printed with resin canopy. Several aftermarket items used. |
| HISTORY |
The Douglas AD-5 Skyraider was a multiseat attack aircraft designed for the U.S. Navy after the Korean War to cover all the earlier multirole versions the that had emerged over the years in one airframe. The -5 was used by the U.S. Navy, U.S. Marines, U.S. Air Force and South Vietnamese Air Force.
The original designation AD (Attack Douglas) was changed in 1962 to A-1 which is what most people know the type as. The plane in this article is the AD-5N which was later known as the A-1G.
The AD-5 Skyraider has been represented in 1/48 by the Matchbox kit in 1980 which was both primitive and under scale. Later it was reissued in 2013 under the Revell label. An AD-5 conversion kit was issued by C & H Aero Miniatures to work in conjunction with the Tamiya kit. It had a fundamental drawback. Like the Matchbox, the fuselage was too narrow.
 I
have built both and with TLC they certainly look the part, but when sitting
beside the single seat Tamiya A-1H they are sadly lacking.
I
have built both and with TLC they certainly look the part, but when sitting
beside the single seat Tamiya A-1H they are sadly lacking.
The TTModelworks Douglas AD-5N is an ambitious 3D printed kit that came out in 2025. It is part of a complete family of AD-5s including the AD-5, -5N, -5Q, and 5W. I purchased two: A straight AD-5 and an AD-5N which is the subject of this article.
The reason I chose to do this particular aircraft was an article online describing the Skyraider’s role as a nuclear bomber. The aircraft in question was part of the all-weather VA(AW)-33 “Nighthawks” Detachment 42 stationed aboard the U.S.S. Forrestal during the ship’s Mediterranean Cruise in 1958.
They were assigned nighttime and other missions. In this case, “other” meant a Mk.7 “Thor” nuclear shape which was delivered using the loft bombing technique. It was considered a one-way mission by the crews.
| THE KIT |
The TTModelworks AD-5N Skyraider is light years ahead of the old Matchbox kit and the C & H Aero Miniatures conversion kit for the Tamiya that preceded it. It can be made into a beautiful model straight out of the box.
I added a few things to “accurize” my Skyraider. Most of it is a matter of taste as the kit parts look fine:
 Eduard USN
Seatbelts -The kit comes with separate 3D printed seatbelts, but I prefer the
look of photo-etched belts in this case.
Eduard USN
Seatbelts -The kit comes with separate 3D printed seatbelts, but I prefer the
look of photo-etched belts in this case.
Master gun barrels with flash hiders -The kit comes with cannons, but the turned brass ones added extra detail.
Tamiya 1/48 A-1H engine cowling and cowl flaps -Again, this is a matter of taste. To my OCD Mk.1 eyeball, the TTModelworks cowl looks too rounded in the front compared to Tamiya’s parts. I purchased a Tamiya Skyraider “D” parts sprue online to get the parts for my model.
Matchbox 1/48 AD-5N 300 Gallon fuel tank -The kit comes with an accurate 150 Gallon tank. I would have been fine using it but the photos I had of the real thing had the larger fuel tank at the time. Figuring it would add some interest; I went with the bigger tank.
There were various other scratch-built additions such as exterior lights, the windshield wiper and antennas to represent the aircraft I was depicting. Over the long life of these airframes the antennas and lighting changed quite a bit so having the photos on hand at the timeframe in question is a huge plus. Always check your references!
| CONSTRUCTION |
The TTModelworks kit is engineered very differently from traditional plastic kits. For instance, the major first step is putting together the fuselage halves (front and rear) with the rear cockpit bulkhead sandwiched in between.
The unconventional parts breakdown meant I was studying the instructions and test fitting everything multiple times before gluing them together. I found that the main components fit extremely tight so hitting them with light sandpaper assures that everything mates up properly and without friction.
The cockpit of the AD-5N went together in a straightforward manner and has a lot of electronics. I had to study my references to get everything right as the painting instructions are very basic.
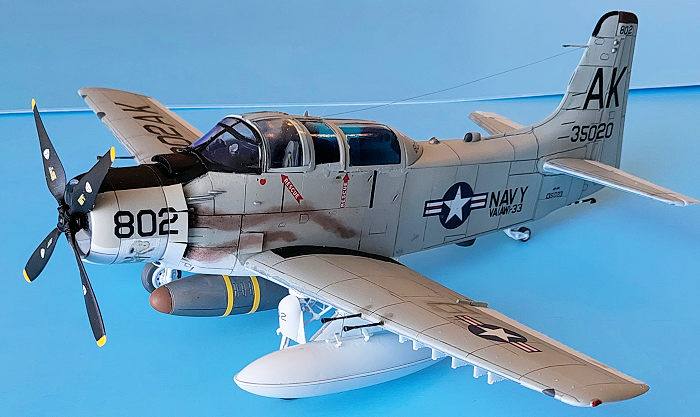
Moving on to the engine, I found it is a work of art by itself. It is kind of a shame to hide all that detail under the cowl. It would really lend itself to a maintenance diorama. I did a minor modification here. I clipped the printed prop shaft off and replaced it with aluminum tubing so I could rotate the prop.
 I had
problems with the cowl flaps. I tried to remove the front and rear cowl flaps
from their cages and, in both cases, they broke up. I don’t know if this was
operator error or bad luck, but I decided to see if some spare Tamiya kit flaps
would fit.
I had
problems with the cowl flaps. I tried to remove the front and rear cowl flaps
from their cages and, in both cases, they broke up. I don’t know if this was
operator error or bad luck, but I decided to see if some spare Tamiya kit flaps
would fit.
The Tamiya flaps were slightly larger in dimensions, so I checked the Tamiya cowl against the TT cowl as a reference. Their inner and outer diameters were identical, but the Tamiya was a scale six inches (1/8th inch) longer. After deliberating a bit, I decided to see if the beautiful TT engine was compatible with the Tamya cowl and I found it was workable with a bit of sanding.
I studied a lot of pictures in my various Skyraider references and found that I preferred the look of the Tamiya cowling shape. Decision made, I ordered a new tree “D” from Tamiya to replace the one from the kit I pulled it out of. In the end, I only used a few Tamiya parts, the cowl, the forward flaps and rear cowl flaps, and the exhaust stacks.
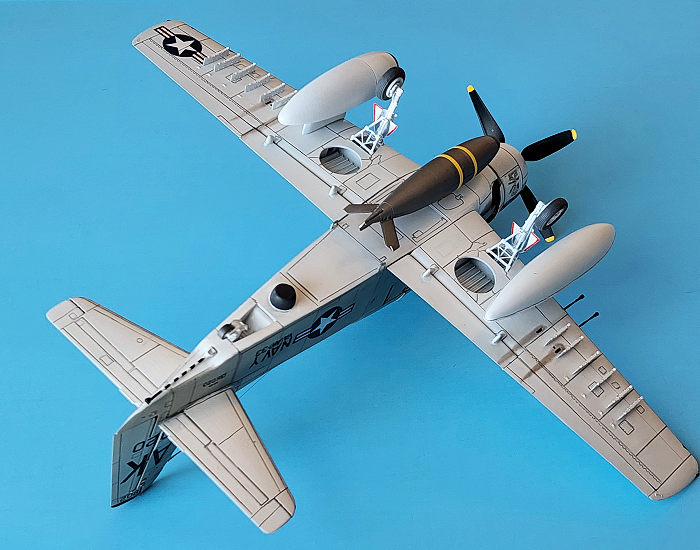
Assembly of the wings and control surfaces was straightforward. The only rough areas I hit were at the wing fold joints. They can be assembled folded or unfolded. I wanted them in the extended positions, and it took a bit of putty to get things completely flush.
The kit’s landing gear is unique. It includes two complete sets of gear, one loaded and the other unloaded. It’s a really nice touch. With the Skyraider, unless it is completely empty, I figure loaded would be the option to use.
The canopy is a clear resin and replaces the original vacuformed one in earlier issues of this kit. While it is far better than the older vac canopy, it has a flexible, rubbery quality about it that I had to fight with the whole way. After cleanup, I painted the rear sections Tamiya clear blue. The final touch was to paint the framework to match the airframe.
Next was the weapons, tailhook and various fiddly bits mixed with the painting and decaling stages.
As a major point of this kit was the nuclear payload, I ended up going with a Mk.7 “Thor” nuclear shape from Cat4 centerline, an AN/APS-31B radar that is included with the kit to starboard, and a 300 Gallon fuel tank stolen from a Matchbox AD-5 kit on the port main pylon. The twelve wing pylons were left empty.
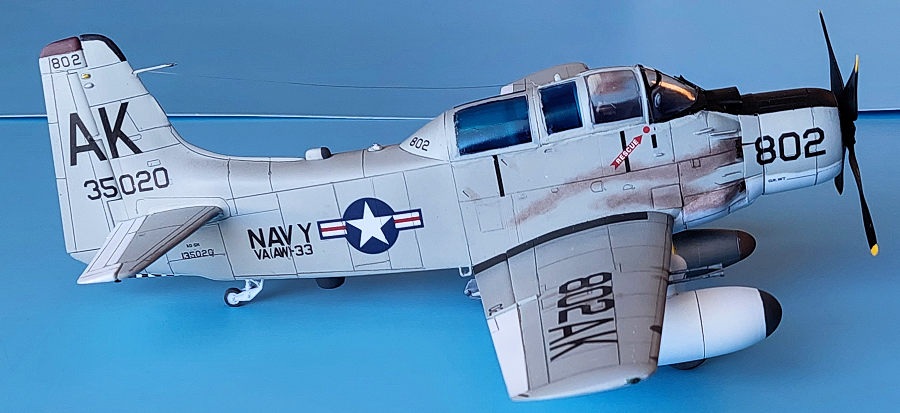
| COLORS & MARKINGS |
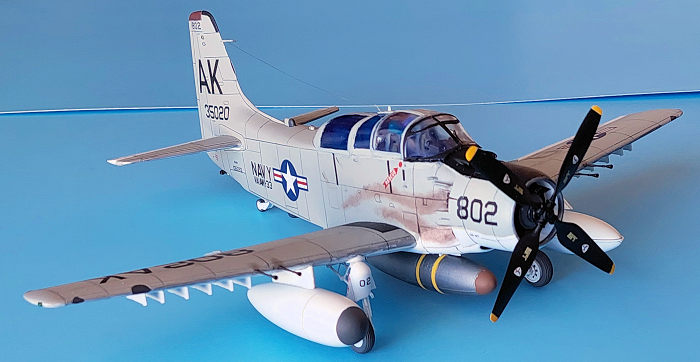 The model
was painted with a combination of Tamiya Acrylic paints and the Vallejo Acrylic
paints. The overall base coat was Mr. Surfacer 1000 straight from the rattle
can. Afterwards I applied black walkways and antiglare panels, white undersides,
elevators and ailerons. Then the top of the airframe was painted light gull
gray. The maroon tailfin tip and silver corroguard leading edges were masked and
brush painted last. Afterwards, the entire kit was prepped for decals with
Tamiya acrylic gloss.
The model
was painted with a combination of Tamiya Acrylic paints and the Vallejo Acrylic
paints. The overall base coat was Mr. Surfacer 1000 straight from the rattle
can. Afterwards I applied black walkways and antiglare panels, white undersides,
elevators and ailerons. Then the top of the airframe was painted light gull
gray. The maroon tailfin tip and silver corroguard leading edges were masked and
brush painted last. Afterwards, the entire kit was prepped for decals with
Tamiya acrylic gloss.
I cannot comment on the quality of the kit decals as I did not use them. They are on a single piece of backing and look like they are in register and have good color saturation.
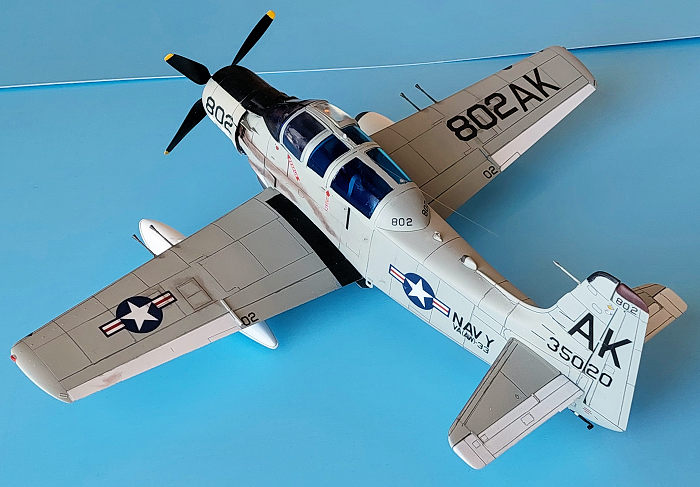
To depict my plane, I used spare decals from various Techmod letters and number sheets. Stencils and insignia were from a Tamiya Skyraider sheet. Lastly, the Snoopy character on the cowl was a homemade decal made by scanning the image from the Ginter Book Electronic Aggressors Part One 1949-1977 by Angelo Romano.
Once the decals settled, the model was painted with Tamiya flat and weathered with pastels and pencils. Since the photos of the actual aircraft showed it to be only mildly dirty by Skyraider standards, I kept weathering light. Afterwards it was sealed with another coat of Tamiya Flat.
| CONCLUSIONS |
I would recommend this kit to more experienced builders who can think outside the box. It was a real challenge, but I truly enjoyed doing something new and different. I have since ordered an AD-5Q and an AD-5W and I hope to see TTModelworks come up with more subjects in the future. The finished product looks excellent.
| REFERENCES |
There are a lot of Skyraider books out there but the primary ones I used for this model are:
AD Skyraider in Detail & Scale by Bert Kinzey
Douglas AD/A-1 Skyraider: Part One (Naval Fighters 98) by Steve Ginter
Douglas AD/A-1 Skyraider: Part Two (Naval Fighters 99) by Steve Ginter
Electronic Aggressors Part One 1949-1977 by Angelo Romano.
Happy Modeling!
27 March 2026
Copyright ModelingMadness.com. All rights reserved. No reproduction in part or in whole without express permission from the editor.
If you would like your product reviewed fairly and fairly quickly, please contact the editor or see other details in the Note to Contributors.