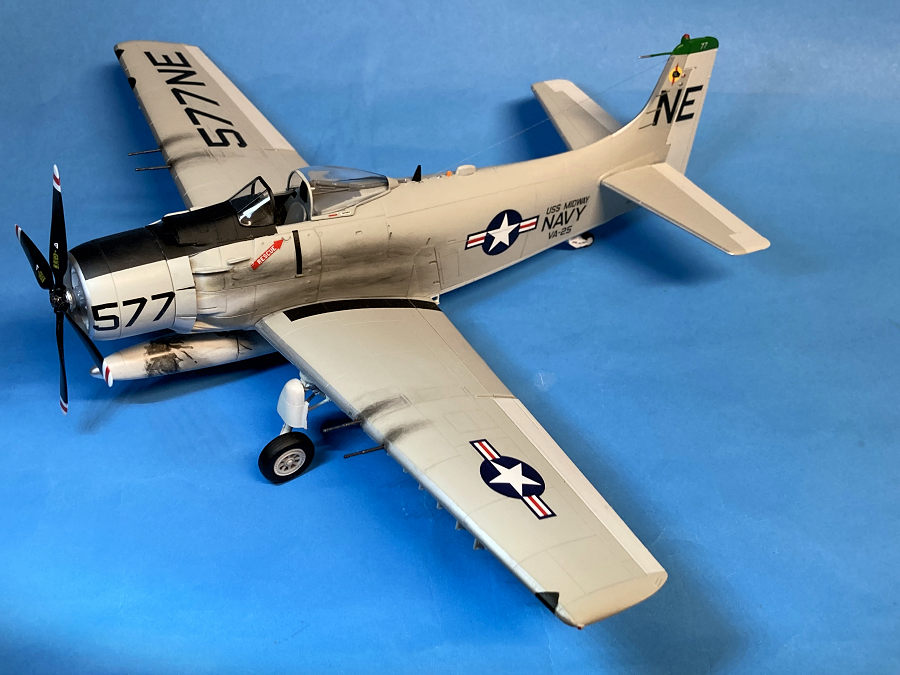
Tamiya 1/48 A-1H Skyraider
| KIT #: | 61058 |
| PRICE: | $35.00 |
| DECALS: | Three options |
| REVIEWER: | H Davis Gandees |
| NOTES: | 2024 tooling |
| HISTORY |
 On 20
June 1965, Lt. Clint Johnson and wingman Lt. Charlie Hartman of VA-25 from
the USS Midway were on their way to a RESCAP mission in North Vietnam to
pick up a downed Air Force pilot when they were attacked by 2 Mig 17s. One
of the Migs attacked from head on attempting to fly between the 2 Skyraiders.
The Mig was shot down and crashed from the fire of 8- 20mm cannons. Now
flying on adrenaline, the two pilots wanted to go after the other Mig, but
clear thinking on the part of their CAG refocused them on the RESCAP
mission. Johnson and Hartman were awarded ½ kill each and received Silver
Stars for the first gun shoot down of a Mig in the Vietnam war.
On 20
June 1965, Lt. Clint Johnson and wingman Lt. Charlie Hartman of VA-25 from
the USS Midway were on their way to a RESCAP mission in North Vietnam to
pick up a downed Air Force pilot when they were attacked by 2 Mig 17s. One
of the Migs attacked from head on attempting to fly between the 2 Skyraiders.
The Mig was shot down and crashed from the fire of 8- 20mm cannons. Now
flying on adrenaline, the two pilots wanted to go after the other Mig, but
clear thinking on the part of their CAG refocused them on the RESCAP
mission. Johnson and Hartman were awarded ½ kill each and received Silver
Stars for the first gun shoot down of a Mig in the Vietnam war.
Lt. Clint Johnson continued flying a total of 126 missions in A-1Hs, A4s and A7s. After leaving the Navy, he became a pilot for Delta Airlines from 1968-1997 flying DC-9, 727, and L1011 aircraft.
The WWII designed A-1H and the A-1E model were quite useful for supporting RESCAP (Rescue Combat Air Patrol) missions. Often, they would escort helicopters to the rescue scene and could loiter for long periods strafing enemy troops while the helicopter rescued the shot down airmen.
U.S. Air Force Skyraiders also flew the same type missions. The Skyraiders that first flew in 1945, flew in Korea with the Navy and Marines. Skyraiders continued to fly combat in Vietnam until they were turned over to the South Vietnam Air Force in late 1972.
| THE KIT |
 In my
opinion this is one of Tamiya’s best kits. It is well engineered and parts fit
was excellent. I was tempted to build the ubiquitous “Bumble Bee” scheme, but
after reading the story of Clint Johnson and Charlie Hartman’s Mig shoot down
the decision was made to build Johnson’s Canasta 577 of VA-25 “The Fist of the
Fleet”.
In my
opinion this is one of Tamiya’s best kits. It is well engineered and parts fit
was excellent. I was tempted to build the ubiquitous “Bumble Bee” scheme, but
after reading the story of Clint Johnson and Charlie Hartman’s Mig shoot down
the decision was made to build Johnson’s Canasta 577 of VA-25 “The Fist of the
Fleet”.
The kit is built O-O-B. There are 11 pages of well-illustrated clear instructions and 3-views of the three kit options. The shape and panel lines are well done. This is a much better model than the earlier 1988 Monogram kit.
| CONSTRUCTION |
 Even as this
model is almost 30 years old, it is one of the best models I’ve ever built.
Parts just click into place, and I experienced no problems building it.
Even as this
model is almost 30 years old, it is one of the best models I’ve ever built.
Parts just click into place, and I experienced no problems building it.
As many detailed reviews have covered assembly of it in detail, I will just discuss the sequence of how I built and painted mine.
The cockpit detail is excellent although there was no provision for a seatbelt/harness. The cockpit area was painted with Tamiya Light Gull Gray with a flat black panel and consoles. Using cockpit photos, various colors were picked out.
The engine cylinders were painted aluminum and given a black wash. The crankcase was painted engine gray. As I wanted to display the engine, I selected the open cowl vents option.
Following the excellent instructions, the fuselage and wings went together with no fit issues. I focused on alignment of wings, stabilizers and landing gear that are the basic requirement for any contest model, and it has won 2 recent awards.
| COLORS & MARKINGS |
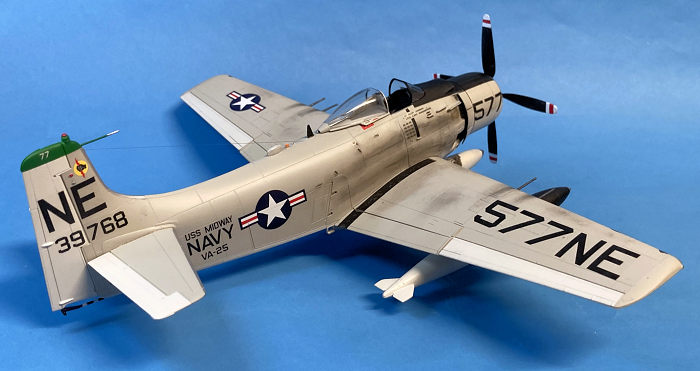
Navy Skyraiders had aluminum leading edges on the wings and stabilizers. I masked and painted these with Floquil Old Silver first as I don’t like masking a painted model if I can help it. The other colors were painted and masked before the main colors as well. The control surfaces were painted Insignia White and when dry were masked. The same process was done for the anti-glare panel and wing walks that were painted Tamiya Semi-Gloss Black. The vertical stabilizer tip was painted with Testors 1124 Green. Finally, the upper surfaces were painted with Tamiya AS-16 Gull Gray and the lower surfaces with AS-20 Insignia White.
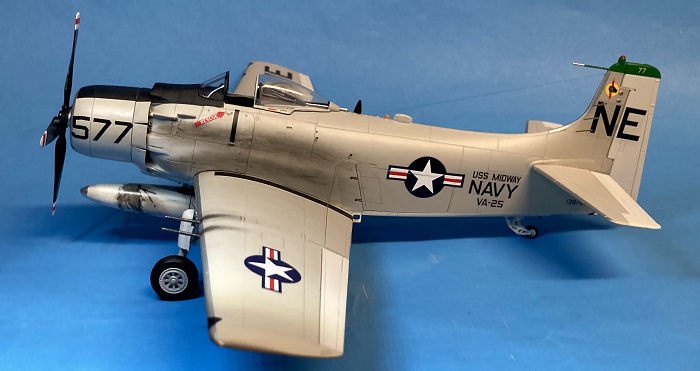
The wheels were painted white, and a black wash applied between the spokes to give them depth. The gear legs were painted white with chrome oleos then installed and properly aligned. The gear door inner edges were painted red with my finest 5/0 brush and installed and aligned.
The cannon barrels were drilled and painted gunmetal and installed and carefully aligned from the side and above.
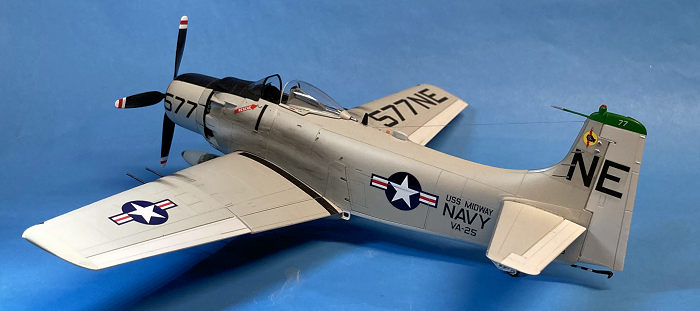 The kit
decals for Canasta 577 were used and required patience and Solvaset to conform.
When they were dry the model was washed to remove any remaining carrier film.
When dry the model was given a light coat of semi-glass clear and put in a
Tupperware to dry and protect it from dust.
The kit
decals for Canasta 577 were used and required patience and Solvaset to conform.
When they were dry the model was washed to remove any remaining carrier film.
When dry the model was given a light coat of semi-glass clear and put in a
Tupperware to dry and protect it from dust.
The prop was sprayed gloss black and the tips masked and painted white and red. Decals were applied with the Aeromaster triangle logo pointed up when a blade is in the 3 o’clock position when viewed from the front. When dry the prop was given a final semi-gloss coat and left to be installed at the end of the build. I incorrectly painted the rear blade tips red and white instead of yellow.
Now came the part I think gives a Skyraider its iconic appearance. The exhaust and cannon stains were applied with various pastels using a soft brush.
The exhaust stains begin at the exit of the exhaust stacks using orange and then black and brown that are all carefully blended in with the soft brush. Some photos show the Skyraiders clean, but I like the dirty look of a well-used Skyraider. The cannon stains were done the same way using black pastel. I made them heavy as Lt. Johnson surely had the cannon trigger pressed for a long time as the Mig closed in head on. Some light staining was applied under the wings behind the rocket pods and on the upper wings.
The canopy was masked with Eduard masks and painted. The gun sight, and canopy retract mechanism were installed and the windscreen and sliding canopy installed with white glue.
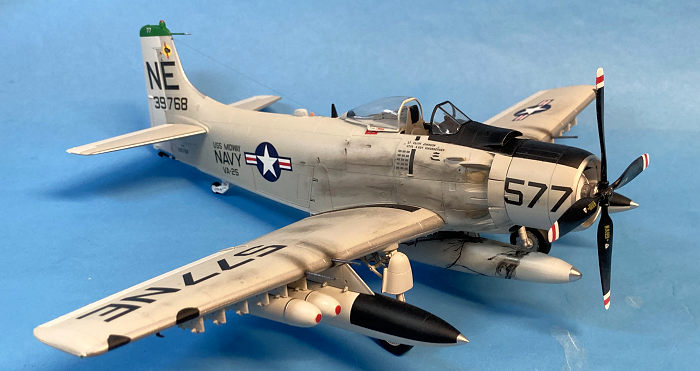
577 was loaded for the RESCAP mission with four, LAU-3 rocket cannisters, 800 rounds of 20mm and two 150-gallon tanks on the inner pylons. The rocket pods were painted white with aluminum rears and red covers on the front. The drop tanks were painted white and anti-glare panels flat black with silver tips.
Another iconic Skyraider trait is oil staining on the centerline tank from the leaky Wright R-3350 engine. I couldn’t confirm if 577 carried a centerline tank on that mission, but the mission was a long one and plenty of fuel would be needed. This was done with a mixture of Pledge and Tamiya panel line enhancer applied to the tank held at an angle to allow the proper stain flow. The rest of the ordinance was hung and carefully aligned.
The nav, position and rotating beacon lights were painted with a 5/0 brush. A nylon antenna wire was installed and the Skyraider was done.
| CONCLUSIONS |
The engineering and fit are excellent, and it was a pleasure to build in 40 hours. I recommend it for even a first-time modeler as the directions are so good. Perhaps I’ll repaint the rear prop tips and seat Lt. Johnson in the cockpit.
| REFERENCES |
References: Squadron Publications A-1 Skyraider No. 27
28 July 2026
Copyright ModelingMadness.com. All rights reserved. No reproduction in part or in whole without express permission.
If you would like your product reviewed fairly and fairly quickly, please contact the editor or see other details in the Note to Contributors.