Trumpeter 1/48 F9F-2 Panther
| KIT #: | 2832 |
| PRICE: | $75.00 |
| DECALS: | Two options |
| REVIEWER: | Francisco Santoro |
| NOTES: | Aerocals 48005 decals |
| HISTORY |
 From
Wikipedia: The Grumman F9F Panther is one of the United States Navy's first
successful carrier-based jet fighters, as well as Grumman’s first jet fighter. A
single-engined, straight-winged day fighter, it was armed with four 20 mm
cannons and could carry a wide assortment of air-to-ground munitions.
From
Wikipedia: The Grumman F9F Panther is one of the United States Navy's first
successful carrier-based jet fighters, as well as Grumman’s first jet fighter. A
single-engined, straight-winged day fighter, it was armed with four 20 mm
cannons and could carry a wide assortment of air-to-ground munitions.
The Panther was used extensively by the U.S. Navy and Marine Corps in the Korean War. It was also the first jet aircraft used by the Blue Angels aerobatics demonstration team, from 1949 through late 1954. The aircraft was exported to Argentina and was the first jet used by the Argentine Naval Aviation."
| THE KIT |
The kit comes in a sturdy top opening box, typical from Trumpeter. Inside, there're three light grey sprues and one clear sprue. The model comes with two decal options for aircraft of the US Navy. Apart from the plastic parts, included are a film part for the instrument panel and a photoetch instrument panel dial faces.
| CONSTRUCTION |
I began by painting the interior of the fuselage and the cockpit parts in Interior Grenn (Revell 48). When that was dry, I painted the side consoles in black. The pilot's seat was painted in black too, with silver rudder pedals and black instrument panel. After all that was dried, I moved on to the fuselage.
 I didn't
want to build the aircraft with the air brakes in the down position, as the kit
would have you glue them, so I trimmed the actuator of it and glued the brakes
in the up position. With that done, I glued the cockpit to the fuselage side,
and glued 60g of lead weight to the back of it to have a nose sitter aircraft.
Before closing the fuselage, you must glue the nose landing gear to the roof of
the cockpit, otherwise you won't be able to place it after the aircraft is
complete. I then glued both fuselage halves and let them to dry. To complete the
fuselage, I built up the cannon bay and glued it to the nose of the model.
I didn't
want to build the aircraft with the air brakes in the down position, as the kit
would have you glue them, so I trimmed the actuator of it and glued the brakes
in the up position. With that done, I glued the cockpit to the fuselage side,
and glued 60g of lead weight to the back of it to have a nose sitter aircraft.
Before closing the fuselage, you must glue the nose landing gear to the roof of
the cockpit, otherwise you won't be able to place it after the aircraft is
complete. I then glued both fuselage halves and let them to dry. To complete the
fuselage, I built up the cannon bay and glued it to the nose of the model.
While the fuselage was drying, I built up the wingroots and wings. The wing roots were easy to build, and the wings per se need to have the holes for the bombs and missiles opened before gluing them together.
After gluing the wings together, I glued them to the fuselage halves, and left them to dry. The horizontal stabilizers were glued too at this time.
| COLORS & MARKINGS |
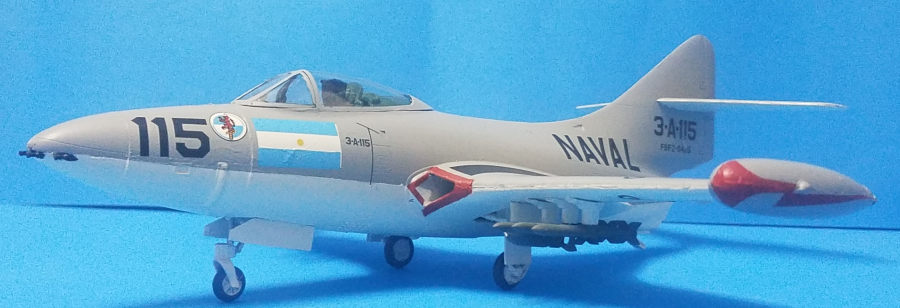
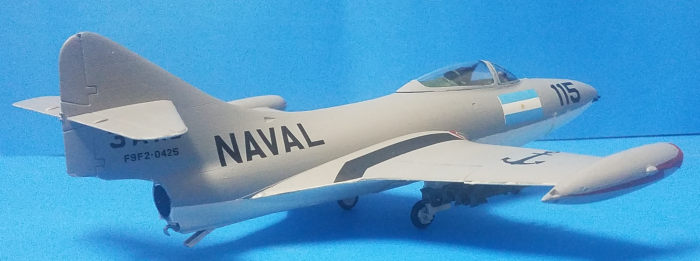
The F9F-2s of the Armada Argentina were
painted in a simple scheme of Light Gull Grey upper surfaces with white
undersurfaces. I first painted the upper areas of the aircraft with Revell 76
Light Grey, and primed the lower surfaces with the same colour. After letting
the paint cure for 24hs, the lower areas were painted with Revell 05 White.
After the paint had dried, I glossed the aircraft with
 Revell's 01
Gloss Varnish to prepare the surface for the decals.
Revell's 01
Gloss Varnish to prepare the surface for the decals.
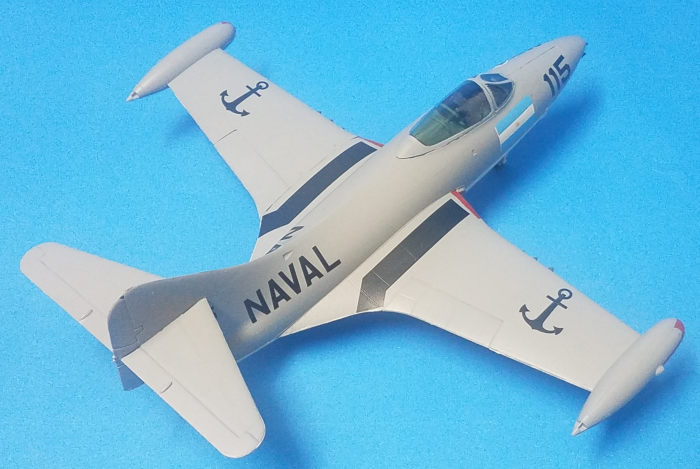
I used Aerocalcas 48005 decal sheet for this aircraft. The sheet has two options for the Panther and one for a Helicopter. They were of excellent quality and easy to work with, and they needed only one pass with Microsol over them to make them conform to the surface. After letting the decals dry for 24hs, I varnished the model with Revell's 02 Matt Varnish.
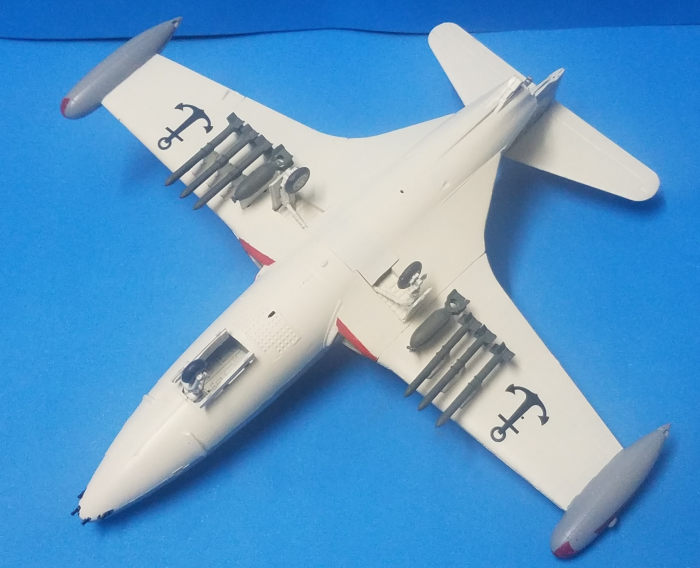
I painted the main landing gear in white, and the bombs and missles with Olive Drab (Revell 66). Before gluing the armament to the wing pylons, I glued the landing gear, which proved to be a fairly loose fit. With the armament glued (six missiles and two 100lbs bombs), the model was complete.
| CONCLUSIONS |
It was fun to build this kit, no fit issues and nicely detailed. Recommended.
| REFERENCES |
https://en.wikipedia.org/wiki/Grumman_F9F_Panther
17 May 2021
Copyright ModelingMadness.com. All rights reserved. No reproduction without express permission.
If you would like your product reviewed fairly and fairly quickly, please contact the editor or see other details in the Note to Contributors.