Czech Model 1/48 FJ-1 Fury
| KIT #: | 4805 |
| PRICE: | $30.00 when new |
| DECALS: | Two options |
| REVIEWER: | Chuck Horner |
| NOTES: | Also used ID models kit |
| HISTORY |
North American began designing its first jet fighter in 1944. The NA-135, with its straight wings, tail and canopy, was definitely related to the P-51. N.A. actually created two designs, one for the Navy and a slightly slimmer, straight-wing design for the Air Force. Both were accepted.
After the war, German swept-wing research became available. N.A. offered to redesign bother projects with swept wings, but this would cause a delay. The Air Force accepted this and the F-86 was born. The Navy, not even sure jets could operate off carriers, much less swept wings, declined and the FJ-1 Fury proceeded as planned.
An order of thirty aircraft was placed with deliveries starting in 1947. A few went to NATC for testing while most went to VF-5A, based at NAS North Island, San Diego and skippered by CDR. Evan Aurand. They were tasked with not only bringing the FJ-1 up to fleet service but to create new procedures for operating jet aircraft off carriers.
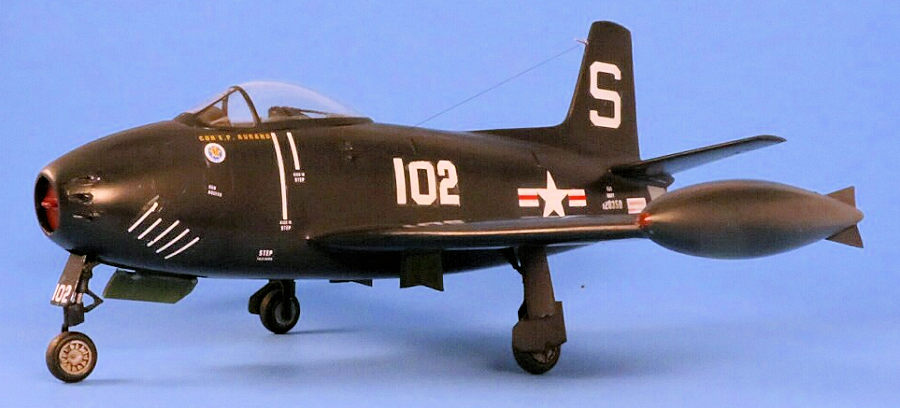
The squadron took this job seriously and was very proud that they were on the cutting-edge of Naval aviation. On 29 February 1948 VF-5A broke three west coast speed records from Seattle to San Francisco, Seattle to Los Angeles and Seattle to San Diego. CDR. Aurand set the Seattle to L.A. record in 1 hr., 58 min while flying FJ-1 120349, side number 102.
 But things did not go well for the Fury. The
plane’s first carrier quals aboard the USS Princeton were a disaster. Nearly
every plane was pranged, many becoming non-flyable. The ship’s captain
publicly told CDR. Aurand to get his planes off the ship before he killed
someone.
But things did not go well for the Fury. The
plane’s first carrier quals aboard the USS Princeton were a disaster. Nearly
every plane was pranged, many becoming non-flyable. The ship’s captain
publicly told CDR. Aurand to get his planes off the ship before he killed
someone.
Not all was bad news. In September, 1948, the squadron, now VF-51, entered seven FJ-1’s in the Bendix Race for jets, a cross-county race between Long Beach, Calif. and Cleveland, Ohio. The best time of the Furys was 4:10:34 with an average speed of 489.5.
Ultimately, the FJ-1 never fully entered fleet service and no more were produced. VF-51 converted to the F9F Panther in May 1949 and turned their FJ-1s over to the Naval Reserves.
My interest in the FJ-1 goes back to my time as Operations Manager of the New England Air Museum in Connecticut (formerly Bradley Air Museum). In the mid-1960’s we found one of the two remaining FJ-1’s abandoned in Philadelphia after the State Department stopped its sale to Cuba. This turned out to be Bu.No. 120349, side number 102, the speed record holder of the Seattle to L.A. run in 1948.
We gave it a quick paint job, applied the markings and put it in our (then new) outdoor display. ADM. Aurand visited the plane while it was on display. After a few years it began to deteriorate and was put into outdoor storage for future restoration. The plane was later traded and now has been restored and is on display at the Yanks Museum in Chino, CA. A fitting place for it since its entire history was along the West Coast.
| THE KIT |
This Czech Model kit has been on my "shelf of Doom" for years after I screwed up one wing trying to correct a bad warp. I would periodically take it out and look at it but couldn’t see how to correct it. I recently found an old, 1/48 scale, vac-u-form, ID Model of the FJ-1 from 1980. I decided to mate the ID Model wings to the Czech Model.
| CONSTRUCTION |
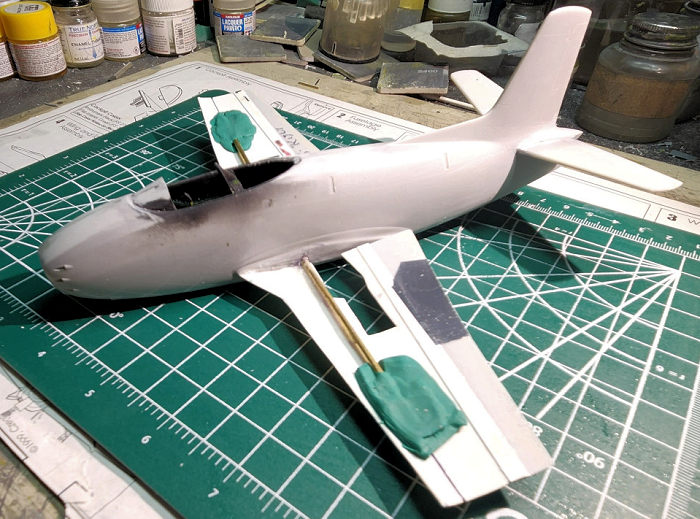
I had completed the resin cockpit during the first build attempt, but I now found I had lost some pieces. The armored head rest had broken off along with the control stick. I made a new head rest from sheet plastic and found a reasonable facsimile control stick in the spares box. I then inserted a brass rod through the fuselage for a wing spar and bent it up 3 degrees for the correct dihedral.
At this point, I realized I was missing the wheels and one main gear strut. The CM box is a flimsy end-opening type and parts can easily fall out. I’m sure I put these pieces in a safe place – someday I’m sure I’m find that place.
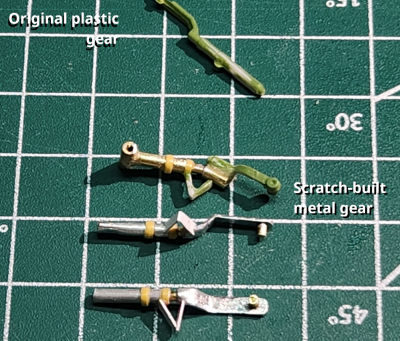 In the meantime, I needed
to build new gear or abandon the build all together. I took an aluminum tube
that was about the same diameter as the remaining kit gear. I flattened the end
with a pair of pliers and then bent it to match the kit part. I cut the upper
strut apart and inserted a smaller brass rod for the oleo strut. The collars are
Tamiya thin tape, wrapped around the shaft several time and coated with super
glue to seal them.
In the meantime, I needed
to build new gear or abandon the build all together. I took an aluminum tube
that was about the same diameter as the remaining kit gear. I flattened the end
with a pair of pliers and then bent it to match the kit part. I cut the upper
strut apart and inserted a smaller brass rod for the oleo strut. The collars are
Tamiya thin tape, wrapped around the shaft several time and coated with super
glue to seal them.
I decided that a matched pair would look better so I built a second one. Things were going so well, I moved on to the nose gear and modified it as well.
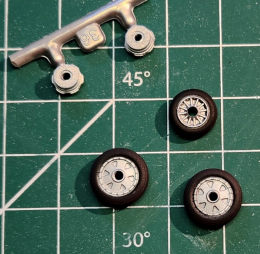 Next, I needed to find wheels. After searching though
my spares box, I decided to take the F-86 wheels from an old Monogram Canadian
Sabre kit. They looked ok and fit the gear so I painted then and put them aside.
Next, I needed to find wheels. After searching though
my spares box, I decided to take the F-86 wheels from an old Monogram Canadian
Sabre kit. They looked ok and fit the gear so I painted then and put them aside.
Finally, I was ready to tackle the wings. I had already cut out the vac-u-form wings and sanded them down. I discovered that the vac-wing root cord was shorter than the CM wings and the wing tips did not look right either.
I decided I would have to combine both sets to get the right dimensions. I cut the trailing edges of the CM wings (it was the center and leading edge that I had destroyed previously). I cut the vac wings at the rear spar line and mated the two pieces. The wings now matched the CM fuselage attach outline.
First thing in attaching the wings was to line up my brass rod support with the forward spar line of the lower-wing half. I tacked these down with clay, then super glued the rod and the forward edge of the lower wing to the fuselage. Once this was secure, I attached the top half of the wings. The tips came next. I saw that the wing span was coming up a little short so I added small sheet plastic spacers to the wing tips. Finally, I added plastic shims and super-glue filler to the wing roots to fill them in.
 I next tackled the canopies. I had purchased a
replacement to the original, which had yellowed badly. When I went to cut them
out, I saw that the details on the replacements were very soft and hard to see.
I found that when I overlayed them on the original, which had sharper details, I
could see where to cut and later where to mask. I cut out both replacements to
see which was the best fit. As it turned out both were good and worked equally
well. I selected one, masked and painted it.
I next tackled the canopies. I had purchased a
replacement to the original, which had yellowed badly. When I went to cut them
out, I saw that the details on the replacements were very soft and hard to see.
I found that when I overlayed them on the original, which had sharper details, I
could see where to cut and later where to mask. I cut out both replacements to
see which was the best fit. As it turned out both were good and worked equally
well. I selected one, masked and painted it.
I planned on using the tip tanks and assembled them. My Ginter book reference showed clear position lights in the front tip of each tank. I sanded the tips back flat and glued a piece of clear sprue with super glue filler. I then sanded them into the correct profile and painted one with clear red and the other clear green. The tanks have two fins, top and bottom, which did not come with the kit. The directions have a template and the fins were just flat so I cut them from sheet plastic and glued the on.
I attached the tip tanks and glued on the canopy. I sealed and filled the edges of the canopy with several application of white glue. Likewise, with all the modifications to the wings, I had to enlarge the mounting opening of the tanks so that they would slip over the wing tips. I sealed these up with super glue filler.
| COLORS & MARKINGS |
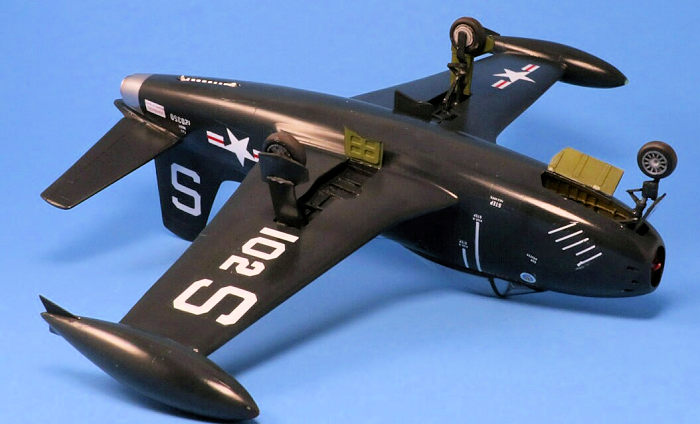
I gave the model a over-all coat of Tamiya Sea Blue, but when I looked at it the next day, it just looked like a black blob. Scale color really needed to come into play.
Many years ago, I was building a F4U-4 Corsair at the same time as the museum was restoring their XF4U-4. Restoration had purchased a custom mixed Gloss Sea Blue enamel for the plane. I went back to the workshop and took a cup of the paint for my model. Although it looked perfect of the 1:1 scale plane, the small model looked black.
I decided I needed to lighten my FJ-1 paint, so I went back to the
Tamiya Sea Blue and added some white. I did this by eye until I felt I had a
slightly lighter shade. I ap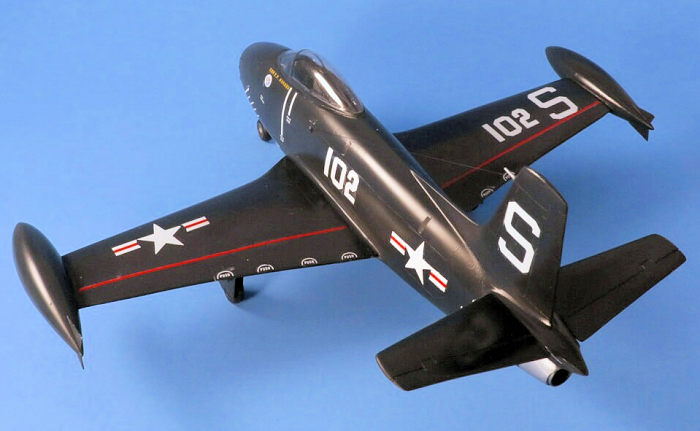 plied a thin coat of the new paint to the FJ and was
satisfied that the model now looked more Sea Blue then Black.
plied a thin coat of the new paint to the FJ and was
satisfied that the model now looked more Sea Blue then Black.
The decals were twenty years old. I wasn’t sure if they were still good so I tried one that I wasn’t going to use. It worked perfectly. Apparently, that was the ONLY one that was going to do that!
As I was putting on the wing Navy Star & Bar (no blue, just white and red), it came apart. I managed to salvage it, then coated the remaining decal sheet with Microscale decal film. This helped.
I wanted to do the aircraft that New England Air Museum had (and Yanks Museum now has), side number 102 that set the speed record from Seattle to Los Angeles in 1948. Unfortunately, the kit comes with only markings for aircraft 101 and 115 of VF-5A. I decided that if I flipped the “5” upside down and applying it backwards, I’d have a reasonable “2”. Most of the white markings went on with only minor difficulties except for the fuselage Stars & Bars, which became unsalvageable.
I had to remove the remnants and repaint that part of the fuselage. I then went to my decal spares box and found a correct size, standard red, white & blue insignia. I cut out the white star and bars and applied each piece separately. With the decaling done and dry, I sprayed another coat of future then a final coat of Tamiya simi-gloss clear.
My scratch-built, metal landing gear came next. I’m happy to say, these attached without a hitch. I add the pitot tube to the upper vertical fin and the wire antenna from the top of the vertical to the fuselage side. I use clear nylon thread painted black. Finally the North American FJ-1 Fury was done!
| CONCLUSIONS |
I happy with the final results. But now that I’m in the “Fury mode” I couldn’t resist pulling out my old ESCI 1/48 FJ-2. But that’s another story…
| REFERENCES |
Naval Fighters Number Seven: North American FJ-1 Fury by Steve Ginter and Ron Picciani, Copyright 1983.
My first-hand knowledge of the FJ-1 through the New England Air Museum.
7 April 2015 Copyright ModelingMadness.com. All rights reserved. No
reproduction in part or in whole without express permission from the editor. If you would like your product reviewed fairly and fairly quickly, please contact the editor or see other details in the
Note to
Contributors.