Special Hobby 1/32 F-80C Shooting Star
| KIT #: | SH 32048 |
| PRICE: | $69.99 |
| DECALS: | Four options |
| REVIEWER: | Donald Zhou |
| NOTES: | Same exact kit as the defunct Czech Model Kit with all the same warts and problems |
| HISTORY |
 The short of it for those that may not know: The F-80 was USAF’s first
operational jet fighter, designed by the legendary Kelly Johnson in only 141
days or so based heavily on the lessons learned from the failed Bell P-59
Airacomet. With the first of anything, there were some teething problems,
problems that killed several test pilots, including America Ace of Aces Richard
Ira “Bing” Bong on August 6th 1945, the day the atomic bomb Little
Boy was dropped on Hiroshima. Eventually, all the bugs were worked out and the
P, then later F-80 Shooting Star gave excellent service in the Korean War.
The short of it for those that may not know: The F-80 was USAF’s first
operational jet fighter, designed by the legendary Kelly Johnson in only 141
days or so based heavily on the lessons learned from the failed Bell P-59
Airacomet. With the first of anything, there were some teething problems,
problems that killed several test pilots, including America Ace of Aces Richard
Ira “Bing” Bong on August 6th 1945, the day the atomic bomb Little
Boy was dropped on Hiroshima. Eventually, all the bugs were worked out and the
P, then later F-80 Shooting Star gave excellent service in the Korean War.
| THE KIT |
I got this kit last year during Freetimehobby “Black Friday” online sale. They
were already ready to move to a new place in 2015 and was trying to get rid of
excess stock and this kit was thrown on the sales bin
 for only $35 dollars! Hell
of deal and since I was ready to complete my “Korean War Quadfecta” of F-86,
F-84 and MIG-15, just needing an F-80 in 1/32 scale, I snatch it up. With
shipping and sigh, the “rikaculas” Georgia’s online tax, it came out to $40 or
so, still around $25 dollars cheaper than the regular sales price…..AHHH!!! If I
only realized then what I was getting myself into!
for only $35 dollars! Hell
of deal and since I was ready to complete my “Korean War Quadfecta” of F-86,
F-84 and MIG-15, just needing an F-80 in 1/32 scale, I snatch it up. With
shipping and sigh, the “rikaculas” Georgia’s online tax, it came out to $40 or
so, still around $25 dollars cheaper than the regular sales price…..AHHH!!! If I
only realized then what I was getting myself into!
Upon opening the kit, I instantly realized there is something familiar about it.
An online search quickly turned up my suspicions. Yep, this is a carbon copy of
the now defunct limited run Czech Model kit. Realizing that, I’ll refer you to
Scott’s preview:
So, realizing the kit is actually the Czech Model one in disguise, before
construction began, I took the time to read both Scott’s and Tom’s construction
notes at least twice before I begin. Saved me a lot of headaches but didn’t
necessarily end any of it either.
| CONSTRUCTION |
 Once again, both Scott’s and Tom’s reviews caught most of the kit’s problems. To
make a long story short, here is something Tom said that really captures this
kit’s and limited run nature of this kit problems:
Once again, both Scott’s and Tom’s reviews caught most of the kit’s problems. To
make a long story short, here is something Tom said that really captures this
kit’s and limited run nature of this kit problems:
“Past that, just remember it’s really an MPM molding, which means it’s still a
limited run kit that will require you to test fit, perform minor surgery, test
fit again, glue, fill the seams, sand down, fill the seams again, etc., etc.
I think of MPM kits as being the plastic embodiment of the Mexican bandit
in “The Treasure of the Sierra Madre.”
“Fit? Fit??
We don’t need no steenking fit!!!
Damn gringo!” Several “WTF”
moments during the construction process - all of which are answered by “It’s
MPM!” - come to mind: the poor attachment of the nose gear doors (did they ever
hear of including the hinges?), the overall poor attachment of the main gear
doors (same question), and the completely idiotic way of doing the tip tanks
(they’d be poor even if you don’t use those resin boulders out there).”
On top of that, due to the fact the mold is now much older, it compounded all
those problems. Here are all of them that I ran into where building this kit:
1.
The intake trunkings. Yep. They are brutal. Save yourself the headaches and the
pink froth that are about to foam around your mouth due to frustration by
cutting off the central connection plank and insert the individual parts into
their corresponding intake lips. Trust me, this will save…well….only 30% of the
frustration.
2.
The intake lips, the fit is ultra-bad! Be sure the extra bleed air in-lets,
which are small resin pieces, are attached properly and don’t jut the whole
entire thing out. Even if you put them correctly, the whole entire thing still
will have seams all over the place and will require plenty of surgery and
filling to look nice…I gave up in the end and you can tell in the pictures there
are still places that may need further filling and sanding.
3.
The gun muzzles. Just tell yourself, as Tom so eloquently put it, “This is an
MPM kit…This is an MPM kit” when you see them….As you can imagine, put these on
the instant the fuselage halves are joined….I’m still thanking the Lord for not
losing any of them in the first place!
4.
Cockpit and nose gear well. The big problem is that there are no guidance points
at all, and whatever are there, they are so tiny as being useless! The ejector
seat is great bit of resin but not so great when you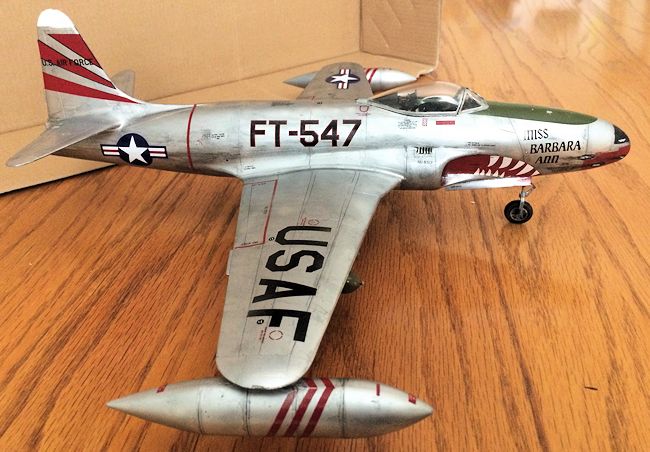 are trying to attach the
plastic base and insert it into the tub. But the greatest is still trying to get
it in place on top of the nose gear well and then have everything settled
down….Eventually they did and I closed up the fuselage halves….It was only after
it was dry that I realized that I knocked the whole entire thing askew!!!!!!
Sigh, up it went on the shelf of doom for 4 months while I worked on my 1/350th
scale NCC-1701-A USS Enterprise!
are trying to attach the
plastic base and insert it into the tub. But the greatest is still trying to get
it in place on top of the nose gear well and then have everything settled
down….Eventually they did and I closed up the fuselage halves….It was only after
it was dry that I realized that I knocked the whole entire thing askew!!!!!!
Sigh, up it went on the shelf of doom for 4 months while I worked on my 1/350th
scale NCC-1701-A USS Enterprise!
5.
After the thing came down for a bit…I decided to glue on the Misawa tip
tanks….Bad idea. After those fell for the third time, up it went on the shelf of
doom again for a month…So leave them off till the end. This is also why my tank
joint got glue splotches all over the place because by the end, I was so beet
red I just splotched on super glue and damn the consequences!
6.
The nose gear, main gears and gear doors. I know it was bad, but the gears just
made me want to blow S___storm all over the place. Namely, there are no tabs
anywhere. Thus it was a hell to put them on. The nose gears especially since
again, I goofed and knocked it askew (The solution was to glue the well in, then
carefully dig out the lower side hole where the gear fits, insert it carefully
into the well and then slobber the joints with superglue). Even without knocking
it askew, the contact points are small and so narrow, you won’t be able to get
them to stay. Get the superglue ready and be sure to swallow the fact that one
of the gear might go in a little bit skewed to the side. The gear doors are
another matter. There is no guidance tabs whatsoever so once again, test fit
test fit and more test fit later, superglue them on and hope they would come out
nice!
Overall, this is what you can expect from the kit. And being the fact the mold
is much older now, the seams and cracks and ill-fitting problems are made worse!
Even if you did do the good ol’ adage, “Test fit three times (more like a dozen
time in this case) and glue once, every single joint will have seams and cracks
and other problems so remember this, and don’t say I didn’t warn you, be prepare
to spend at least two weeks of nothing but filling, sanding, spray on Mr.
Surfacer 1000 to check out the seams and smoothness, rinse, repeat ad nuseum
until your face are beet red, your hair had lost at least 100 dozens and you are
about ready to chuck the thing against the wall!
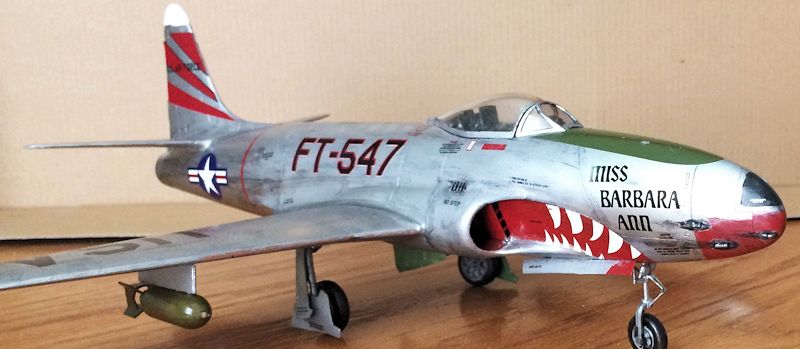
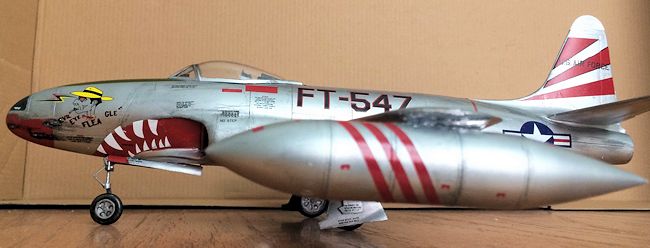
| COLORS & MARKINGS |
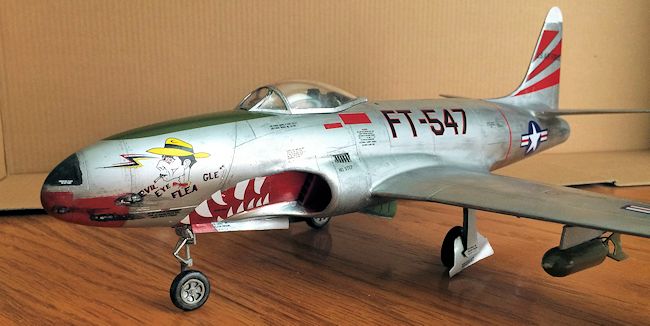 Colors are NMF. For base, I used Testors Chrome Silver. This was a little too
bright since I was planning to do “Evil Eye Fleagle”, a well-used Korean War
bird. In fact, all four markings served in Korea, hence the name “Shooting Star
Over Korea”. I tone it down with good washes with Tamiya Flat Black and then
regular Testor small bottle Silver. This worked quite well in depicting a
well-used, dirty bird in war time.
Colors are NMF. For base, I used Testors Chrome Silver. This was a little too
bright since I was planning to do “Evil Eye Fleagle”, a well-used Korean War
bird. In fact, all four markings served in Korea, hence the name “Shooting Star
Over Korea”. I tone it down with good washes with Tamiya Flat Black and then
regular Testor small bottle Silver. This worked quite well in depicting a
well-used, dirty bird in war time.
The four marking options are: Evil Eyed Fleagle in two options, one with the red
nose and shark mouth and one without. Ramblin=Reck=Tew. A blue nosed bird of 35th
FBS, 8th FBG. 6 Guns for Hire. 80th FBS, 8th
FBG. And the famous Panther Queen of 8th FGB. Guess what? I had to
torture myself further by selecting Evil Eye Fleagle with the sharkmouth!
AHH YES!!! That famous phrase: It’s an MPM kit….It’s an MPM kit……………That aspect
even carried over to the decals….Fine, give us the shark tooths……Which is great,
but darn it, could you also give us the read back grounds?!?!?!? Nope, you go
and you paint them! Same with the white tail tip. Say what you will about
Trumpeter, at least they give you everything on this and save you the trouble of
having to mask, paint, mask and paint again! But still, the red mouth and white
tail tip went on without a problem. Time to decal!
 It’s when I started working on the decals did I realize the biggest problem with
these things. They are thin, a little too thin. In fact, thinner than even the
thin Trumpyboss ones! Well, the good news is it will never ever silver or don’t
go on like Tamiya’s. But these are so thin that I lost one of the shark tooth on
the left side due to the fact I can’t get it to move to the correct place too
well. This means I have to cut off the offending tooth on the other side and why
the left, the teeth partially went above the “gum”. After realizing that, I
adapted the same methods as putting on Trumpyboss’s decal. Wait until they are
almost off the backing paper, then quickly slid them on and just as quick get
them into place and then let Mr. Mark Softer do the main work. This worked out
well but still, lost two stencils to rolling.
It’s when I started working on the decals did I realize the biggest problem with
these things. They are thin, a little too thin. In fact, thinner than even the
thin Trumpyboss ones! Well, the good news is it will never ever silver or don’t
go on like Tamiya’s. But these are so thin that I lost one of the shark tooth on
the left side due to the fact I can’t get it to move to the correct place too
well. This means I have to cut off the offending tooth on the other side and why
the left, the teeth partially went above the “gum”. After realizing that, I
adapted the same methods as putting on Trumpyboss’s decal. Wait until they are
almost off the backing paper, then quickly slid them on and just as quick get
them into place and then let Mr. Mark Softer do the main work. This worked out
well but still, lost two stencils to rolling.
Finally, the gear…As I’ve noted above, there were a lot of problems here so be
forewarned. Finally, the pylons, which are a joke and so are the bombs. However,
I do not have a replacement and while the resin bombs are good with metal fins,
I was just too tired at this point and decided to scrounge up replacement from
my A-1D kit, which had PLENTY of 500 pounders left. I superglued them on and
left it at that….
| CONCLUSIONS |
Despite everything, knocked askew gears, cockpit leaning to one side, razzled
intake joints, a mess of glue splotches Misawa tanks, and glowing so red at one
point when the shark tooth broke that I was
 ready to turn this thing into a lawn
dart and chuck it against a wall, I like it. It not only complete my Korean Quadfecta, but also have a cool scheme. Half of the problems was this was my
first experience at a limited run kit and I didn’t know what to expect despite
reading Scott’s and Tom’s construction notes twice. Now, the hope is that
Trumpeter can grab this kit, and turn it into a main stream plastic one. The
shape overall is accurate except the Misawa Tanks and the number of parts are
limited and is a great subject. If that happens I will buy it again, especially
if “Evil Eye Fleagle” is included in the decals. Overall though, this kit is not
recommended for the beginner or the faint of heart. Only recommended to those
who have a few limited run kits under their belts and are a glutton for
punishment!
ready to turn this thing into a lawn
dart and chuck it against a wall, I like it. It not only complete my Korean Quadfecta, but also have a cool scheme. Half of the problems was this was my
first experience at a limited run kit and I didn’t know what to expect despite
reading Scott’s and Tom’s construction notes twice. Now, the hope is that
Trumpeter can grab this kit, and turn it into a main stream plastic one. The
shape overall is accurate except the Misawa Tanks and the number of parts are
limited and is a great subject. If that happens I will buy it again, especially
if “Evil Eye Fleagle” is included in the decals. Overall though, this kit is not
recommended for the beginner or the faint of heart. Only recommended to those
who have a few limited run kits under their belts and are a glutton for
punishment!
P.S. Yes, I know, the navigation lights are not on….And they won’t be on until much much later……Right now, my head and my brain need some recovery time from the headaches induced by this kit!
Donald Zhou
July 2015
If you would like your product reviewed fairly and fairly
quickly, please
contact
the editor or see other details in the
Note to
Contributors.